


This is a continuation of the "how I e-scout using GOHUNT Maps series." If you missed part one, you can check that out by clicking on the button below.
Now that I have a few prospective areas to look at from Part 1, my next steps will be to now start deep diving into these areas. There are many facets of interest that create a good elk area so I like to break these down to individual classes for consideration. Generally, this will include the surrounding area, access options, and finally, the actual physical make-up of the area.
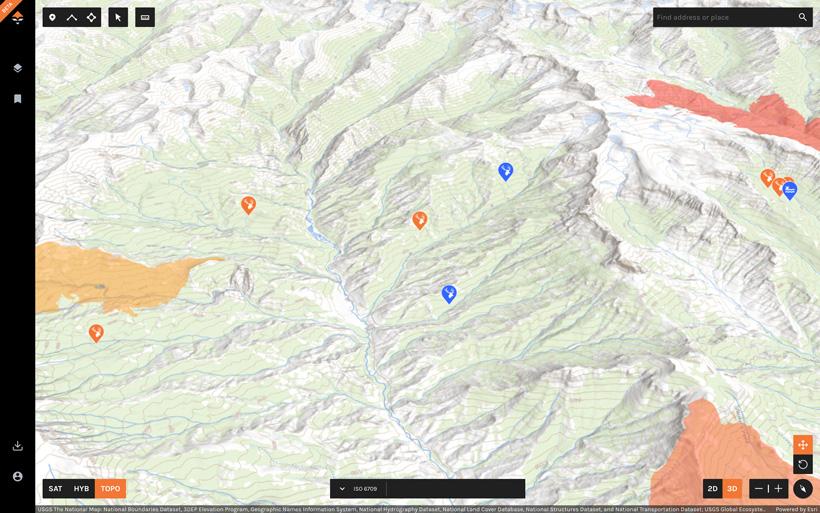
The first thing I will look at is the general breakdown of the selected location as well as its immediate surroundings. Primarily, with this I am looking at the availability of good elk habitat and hunt possibilities in the immediate area as well as surrounding basins, canyons or ridgelines. At the end of the day, I don't want to hike five miles through open prairie land to hunt a 10-acre piece of timber. I want to make sure I have several options within the primary hunting area for movement as needed.
If the area still seems good, I will pop over to the topo map layer quickly to check that no major roads or trails are also found in the area. If, after these checks, the area is still piquing my interest, I will change the color of the waypoint icon, change or delete the rest and move on.
With a few great options on my list, I will now move on to searching for access options in and out of the areas I’m interested in. Primarily, I want to know where I will be parking my truck, how far I will need to hike to access the area and how other hunters may be accessing this and other surrounding areas.
For me, my preferred method at this point is going to be switching my base map over to topo and intently looking for trails and roads. In Wyoming, as well as many other western states, outfitting for big game is a large business and the many maintained trails throughout a state will receive a workout from horse traffic during the season. Because of this, I tend to heavily avoid any areas with trails and, instead, look for locations that will require some cross country travel.
At this point, I will also begin using the line tool to start gauging approximately how far of a hike I am looking at for each area. To do this, I simply select the line tool from the top left corner of the screen and start drawing my path. Once completed, I will be prompted to the line edit screen where you can edit your crucial details as well as see the total distance of the path.
In the above example, our marked line is sitting right around three miles. This includes about two miles of trail hiking and another mile or so of cross country. The elevation is gaining during the hike. I’ve found that this type of distance and elevation gain will generally weed out most of the day hunters, but will also not land me deep enough to be dealing with hunters using livestock. Additionally, these difficult to reach areas adjacent to commonly used areas can be excellent for locating elk sanctuaries.
After I find an area that meets all of my preliminary requirements, I will jump into really breaking down a unit and establishing a hunt plan. Because I chose to not make a pre-season scouting trip into this area, I am going to be primarily focused on marking my travel routes throughout the area, points of interest and water sources.
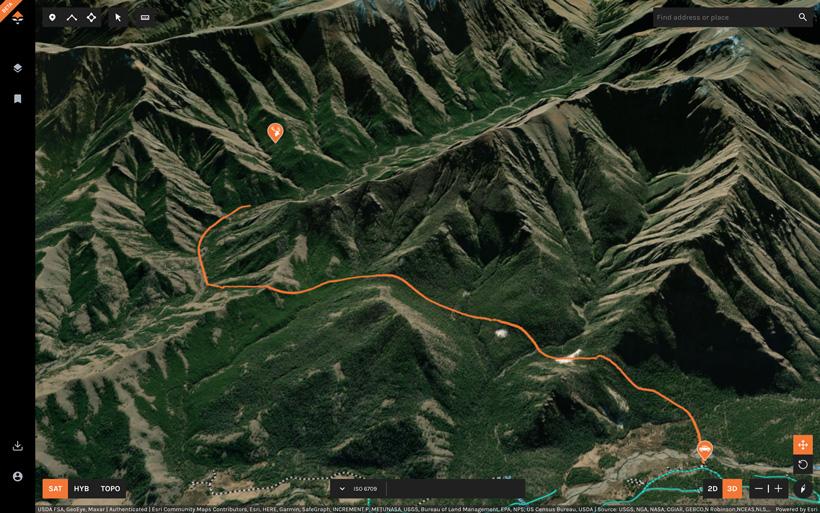
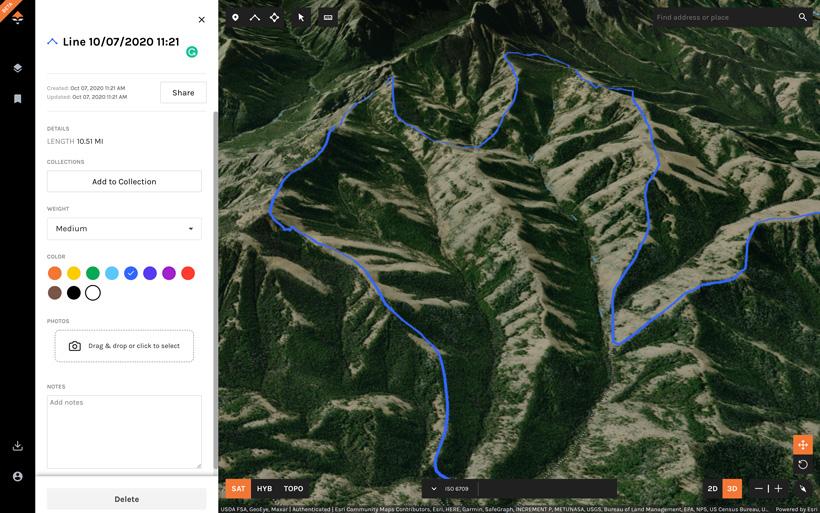
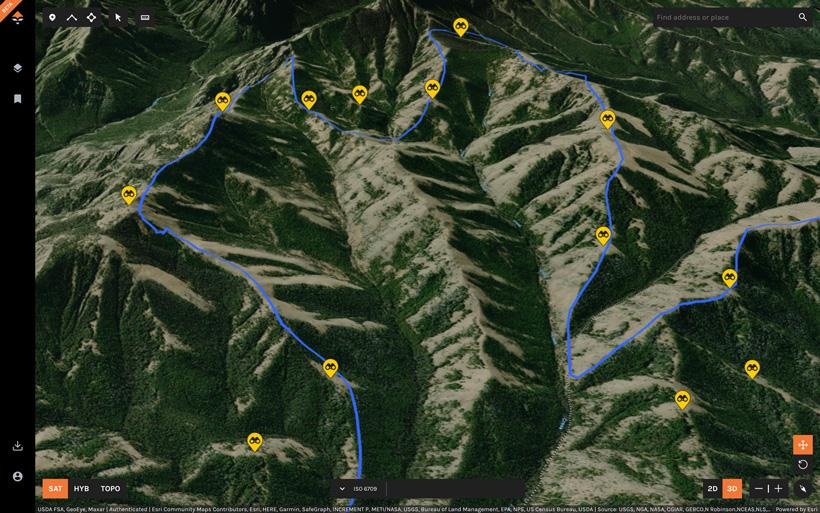
My first order of business is to find likely travel routes that I can use throughout this area. For my hunting style, which is largely based around calling for elk, I really like to utilize prominent ridgelines as these offer the best opportunities to hear bugles as well as the quickest travel routes from one drainage to the next. For this, I will simply begin to mark lines from the original entrance route into the various locations.
Generally, I am going to try to put together a large loop I can travel with the intention of splitting off onto the various finger ridges throughout the course of the hunt. This drawn travel route is merely providing a reference mark for the trip and does not necessarily define an exact course.
It’s obvious from a quick glance at the satellite imagery that there are at least some glassing opportunities here, particularly on the west and south-facing slopes. I would likely spend some time glassing, but my main premise for locating good prominent points will be to listen for any vocal activity.
While these glassing and listening points are generally fairly obvious — think highest elevation points along a ridge — but they are also easy to overlook while in the field. I will mark these throughout my hunting area, but also in spots adjacent to the primary area as well. The biggest thing to remember with elk is that they are where you find them. Sometimes you might get into an area and find it void of animals. Staying flexible and mobile during these times will be crucial and hunters may find that simply moving to the next basin can make all of the difference in the world.
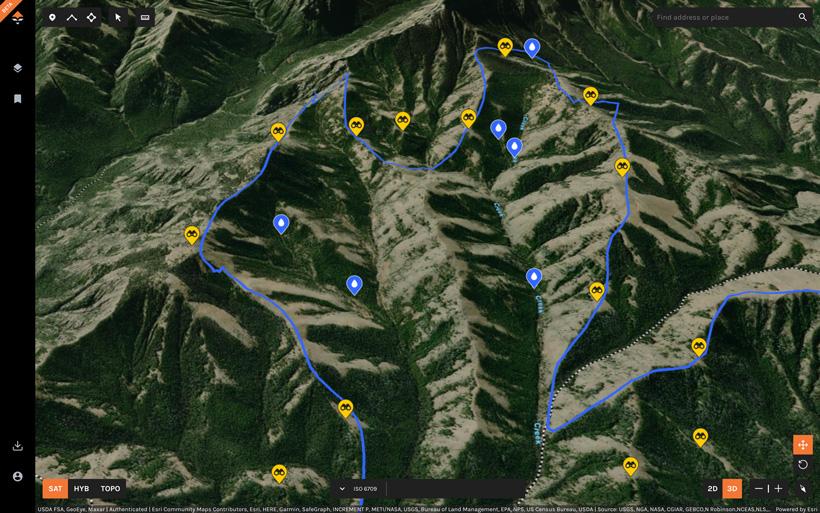
When searching high elevation areas for elk, hunters will commonly find that water is a tough commodity to come by at times. Most deep cut drainages will generally hold water to some degree, but this can mean dropping a thousand feet or more in elevation to find these locations. Because of this, I like to mark as many probable water sources as possible before entering the field in an effort to reduce the amount of elevation gain/loss that will be required throughout the hunt.
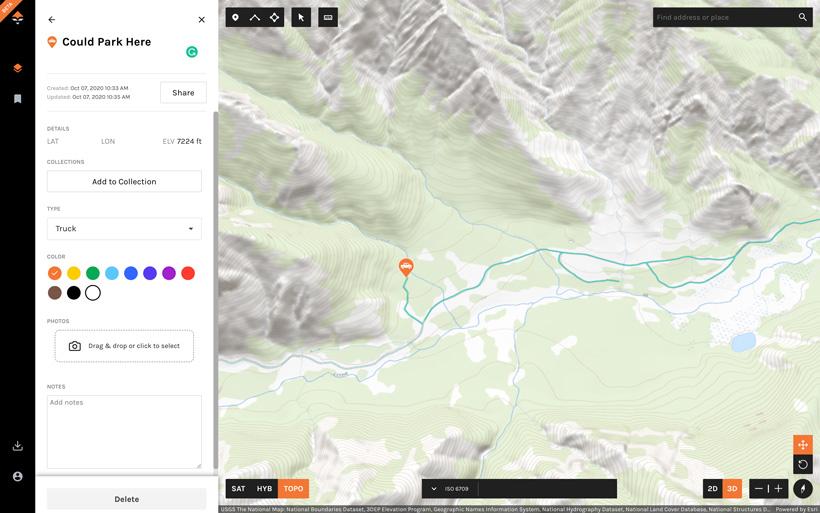
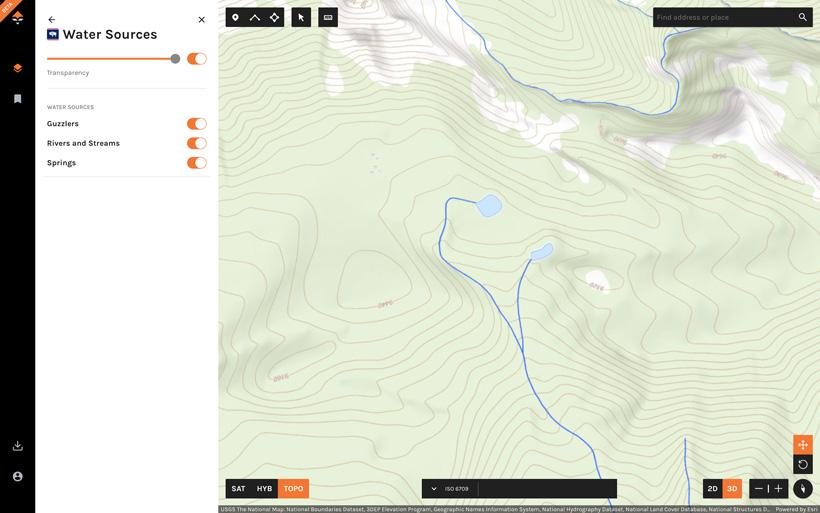
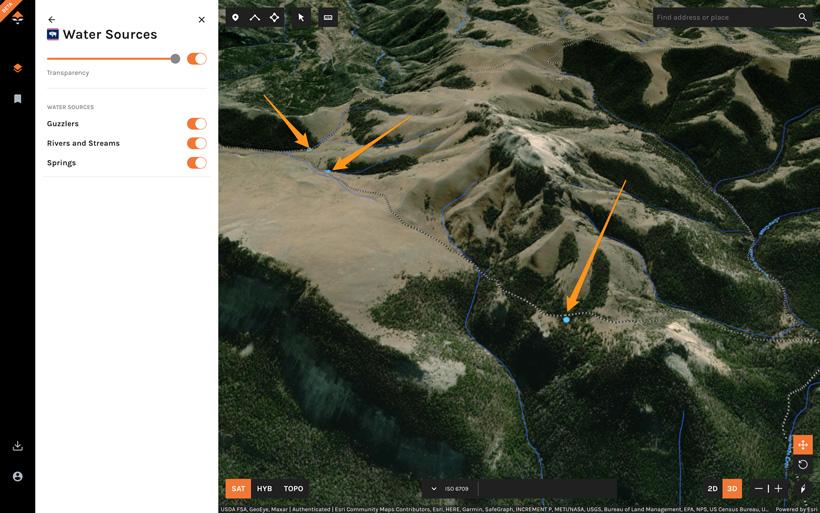
Just a quick glance at satellite imagery and it is generally fairly easy to pick out likely water sources from the get go — areas like deep drainages, dark timber and even lush green meadows are all obvious locations. However, I’ve found that switching to the topo map can also reveal some hidden areas.
In the above example, you can clearly see two water sources — likely small ponds — that marked on the map near our original waypoint initially dropped at the beginning of this article. This is a perfect example of something I would have totally missed when only viewing aerial imagery.
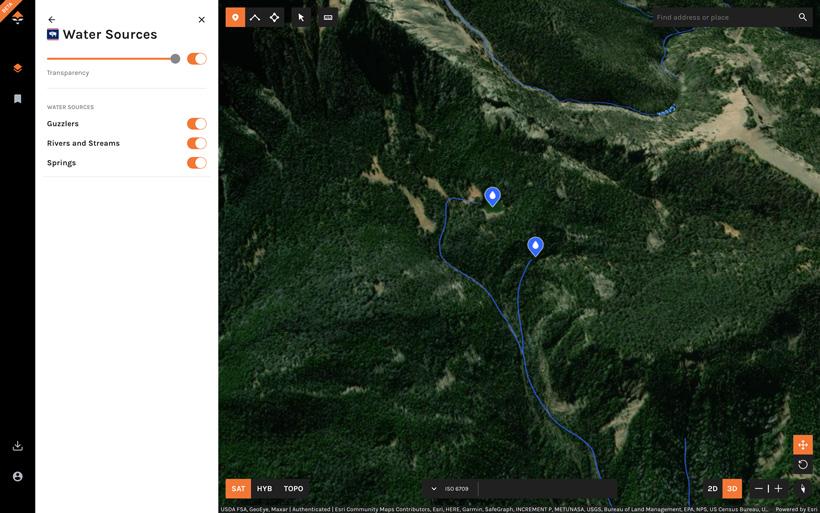
After switching back over to satellite imagery I am now able to make out two definitive bodies of water and I will also mark waypoints on these.
Another feature to consider when searching for water sources is the water source layer, which will show springs as presented by the National Hydrography Dataset. This will include known springs and seeps in areas, but will obviously not show everything. The particular area we are examining in our article did not have any marked or known springs but this is always something I check as any sources marked on this layer are generally safe bets for good reliable water throughout the year.
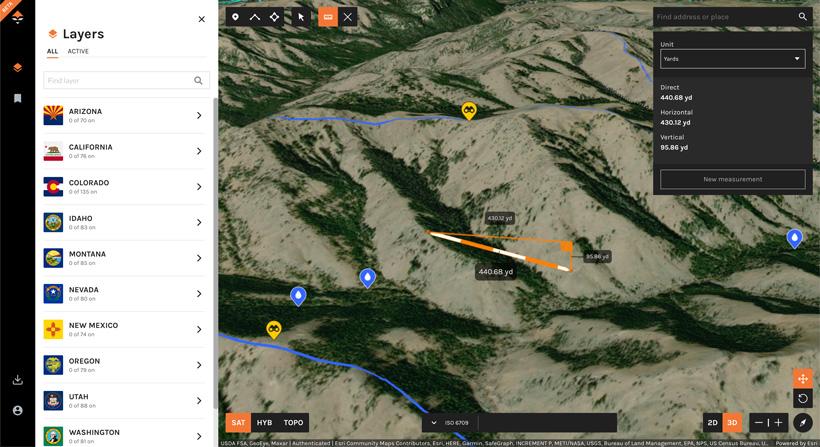
If you’ve spent any time on other mapping platforms you’ve definitely fallen for the age-old mistake of assuming terrain is far milder than it actually is. I can’t tell you how many times I’ve found a great basin to hike into only to arrive at the trailhead and find a slope that seemingly climbs into heaven in a near vertical fashion. One tool currently available on the GOHUNT Maps is the distance measuring tool. This really isn’t much different than most distance measuring tools where it measures distances from A to B, but it also includes features that no other maps do.
Our measuring tool will not only provide the true horizontal distance, but all the ground travel distance and the elevation gain. What's more, this metric can also be formatted to display in a number of different measurement units. This tool is excellent for double checking climbing routes and can also be used by rifle hunters for calculating approximate shooting distances when selecting glassing points.
At this point, I’ve got enough waypoints and data gathered to feel comfortable in locating elk if they are to be found in this area.
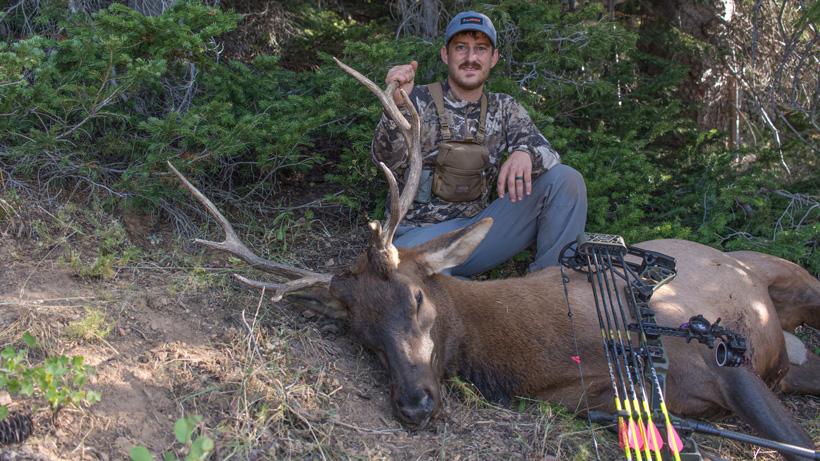
Using the steps outlined above, I am able to quickly break down an area or unit and better prepare myself for the hunt. These preseason steps will greatly reduce downtimes during the hunt and will help me stay focused on a specific course of action. At the end of the day, I don’t want to spend my limited hunting days on scouting. All the steps I outlined in Part 1 and now in Part 2, put me in the right spot back in September in Wyoming on this archery bull elk.
If you’re an Insider, GOHUNT Maps is included in your membership at no additional cost. You can also use GOHUNT Maps with our new Explorer membership, learn more here. If you have any questions, feel free to comment below and I'll l be happy to explain my scouting methods in further detail.