


Hunting season is in full swing, but with that said, it's still the perfect time to be heavily invested in e-scouting and preparing for any upcoming adventures. One exciting new feature we’ve recently released is our GOHUNT Maps, which will truly change the way you scout and hunt.
For 2020, I have some exciting hunts planned, and most recently just returned from a successful Wyoming archery elk hunt. I have hunted Wyoming before; however, for this trip we planned to hunt new country, which means success heavily fell on e-scouting endeavors prior to the hunt.
When initially beginning your e-scouting the biggest hurdle will be simply narrowing down an area(s) to consider. Some states/hunts will be easy as the tags are unit specific, but other opportunities — like Wyoming elk — are good for nearly the entire state. At this point, I will largely depend on our Filtering platform to help me narrow down my choices.
Before really diving into the nitty-gritty of my process, first I like to do some initial setup on my map. This will mainly include turning on various layers to better help me to narrow down specific basins and drainages quicker.
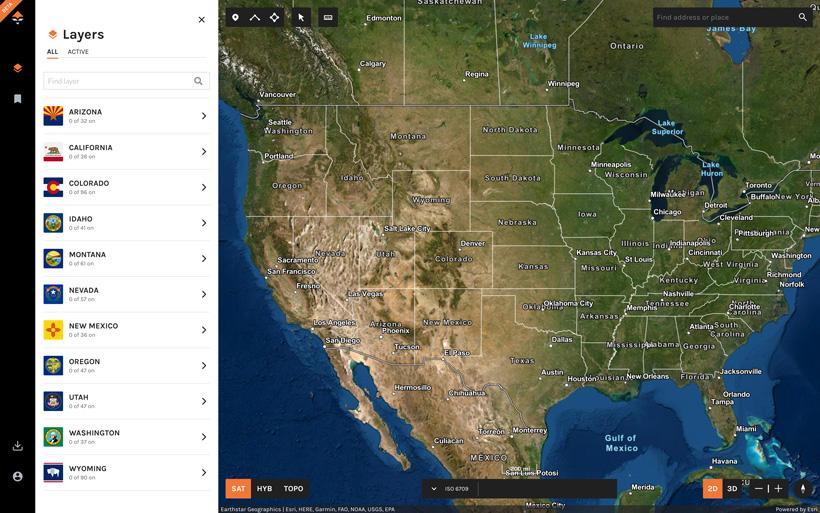
After initially loading the primary map screen, my next step will be to select the layers tab and navigate to the state I will be working with.
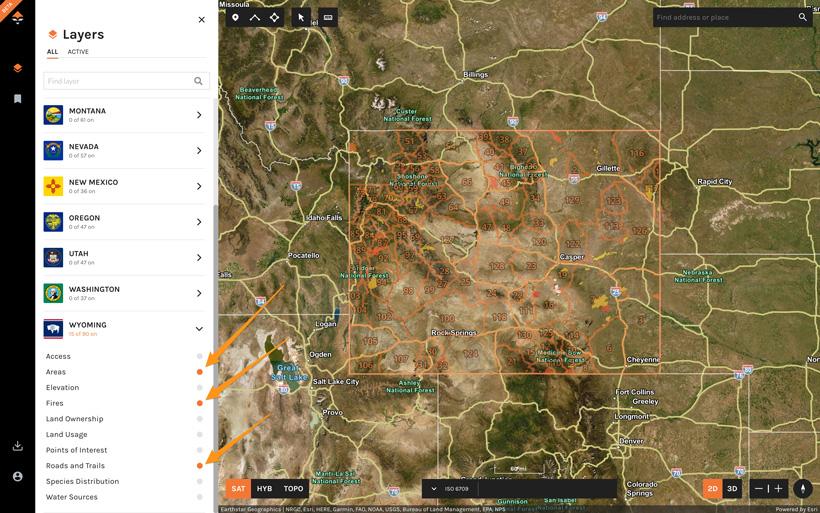
From here, I will select the state I am researching and then begin to select the various layers I will be using. For a September elk hunt, this will generally initially include unit boundaries, fire history and roads and trails.
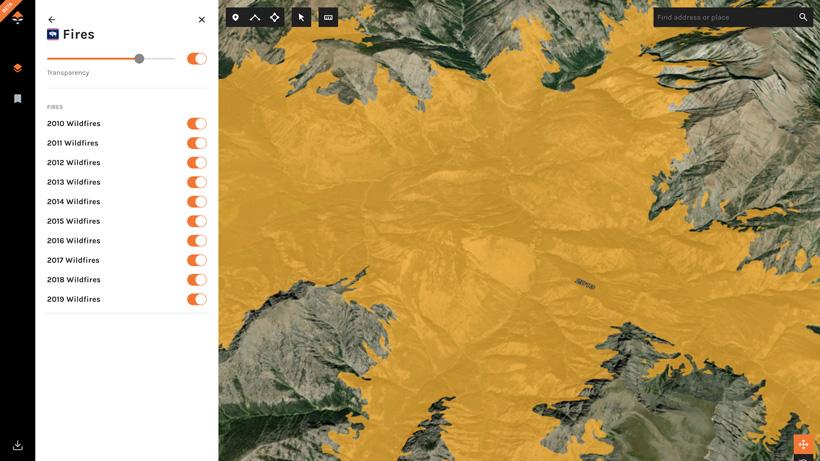
One simple fact of elk that I’ve learned over the years is that they absolutely love old burns. These areas provide great feed, good travel options and better visibility for incoming prey. In most cases, if I can find good timber and water in close proximity to a burn, I will find elk. I typically target these areas a little harder during the rifle seasons, but archery seasons can still be very productive in these areas.
When first accessing the fire layer you will have the option to selectively turn on fires based on the year they occurred. I will generally begin my research by selecting every year, but may selectively filter these out as I dive more deeply into an area.
The areas filter is nothing more than the list of available hunting unit boundaries. Some states use the same unit boundaries for every species while others use individual and unique boundaries for each species. Whenever you are viewing a state it will be important to pay close attention to this.
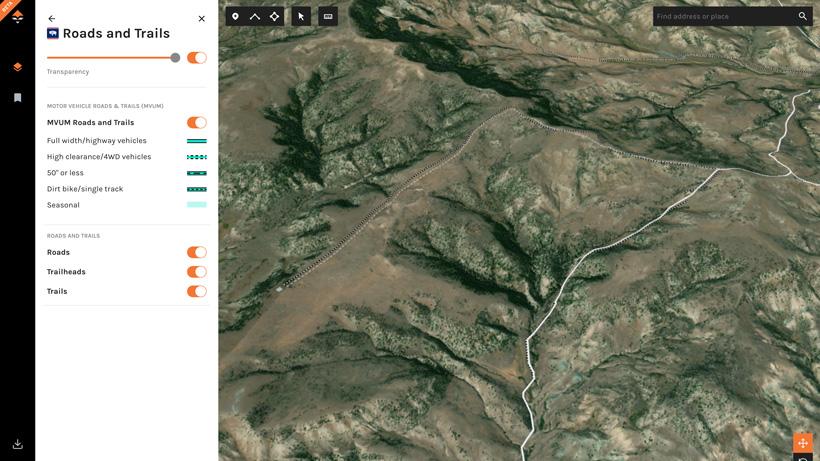
This one is fairly straightforward as it contains the roads, trails and motor vehicle use map (MVUM) layers. When first beginning my research, I will select all three of these in an effort to immediately weed out any no-go areas. Simply put: there is nothing worse than falling in love with a basin only to find that there is a massive trail providing easy access to anyone.
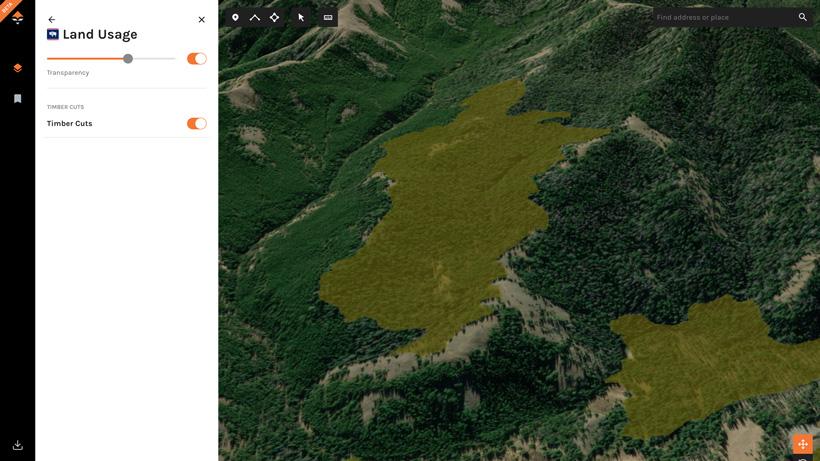
This layer will effectively show past timber cutting projects in an area. I won’t go out of my way to target these areas specifically, but they can and do provide good glassing options for some areas while also providing good feed for the local game.
In my case, timber cutting is fairly minimal in most parts of western Wyoming and this is a layer I will not be needing for this particular hunt. This layer can be extremely valuable in states like Montana, Idaho, Washington or Oregon.
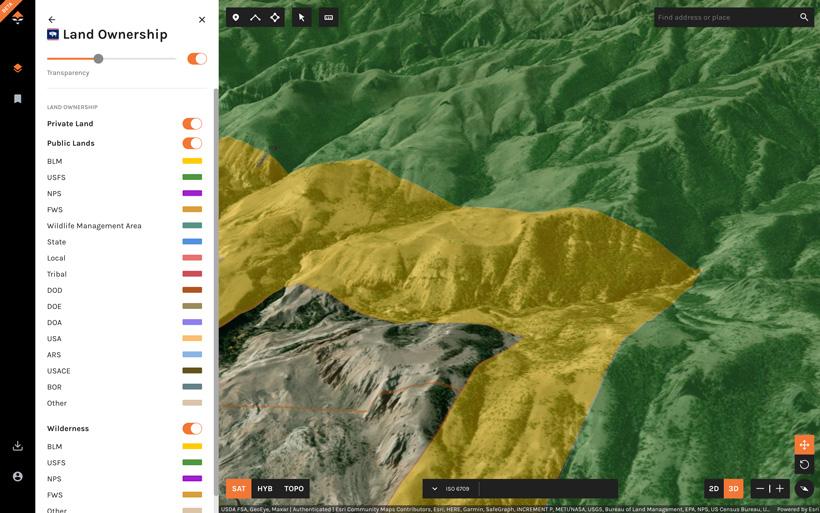
This layer will show public lands, private lands and wilderness areas. When hunting elk — particularly in high elevation areas — hunters will generally not have to worry too much about public and private lands. In an effort to reduce clutter on my screen, I will usually forgo this layer initially with the exception of the wilderness layer.
In Wyoming, hunting by nonresidents in wilderness areas is not permitted unless the hunter is using a licensed guide or with a resident sponsor. Because this will be a DIY-style trip I will want to pay close attention to any wilderness boundaries.
Now that I have my map setup with the layers I want, I will begin searching for some prospective hunting areas. The first things I’ll consider for elk are the three primary needs of all elk: food, water and cover. On top of these, elk will actively search out areas with a minimal amount of pressure as possible.
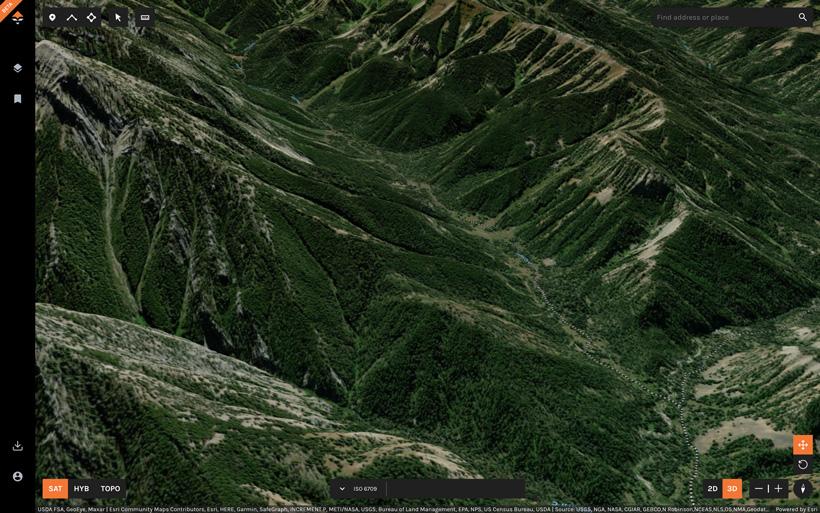
By this point, I’ll have a general idea of the unit(s) or areas I want to hunt and can begin flying over the terrain utilizing the 3D mode. To start, I’ll simply zoom into the rough area I want to scout and enter 3D mode using the toggle at the bottom right portion of the map. At this point, one of my favorite tricks is to spin the camera so I am facing south. In general, elk prefer north facing aspects and by spinning the camera I can now quickly and positively identify large, dark and timbered north slopes with likely elk habitat.
While moving through an area, I will drop waypoints at any location that I feel is worth a double-check. During this initial run, I will spend very little time actually dissecting the area and will spend the majority of the time just marking areas to come back to.
It is also important to note that I will generally scout for an area backwards. That is to say, I will generally find the final location (hunting area) first and then find access options second.
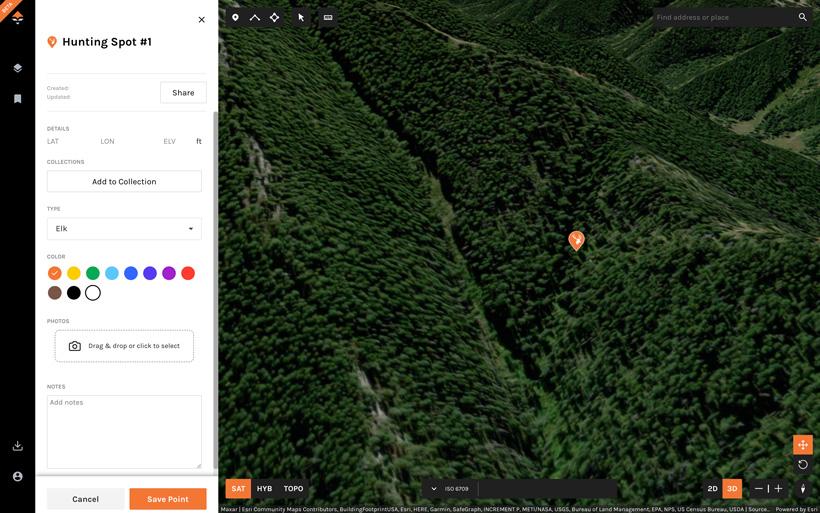
Now it is time to start marking some areas. Once I’ve found a likely look area I will simply drop a waypoint by selecting the waypoint icon in the upper left hand corner of the screen and then clicking where I want the point snapped too.
Additionally, at this point I will also edit features such as the waypoint name, icon, color and add any specific notes. Another point to note is that I like to keep all of my initial location waypoints the same color and as I am checking them off my final list — either for good or bad — I will change the colors. This will help me see the bigger picture and to keep things more organized.
I will usually continue through this process until I have six to 10 spots marked or more, depending on my gut feeling.
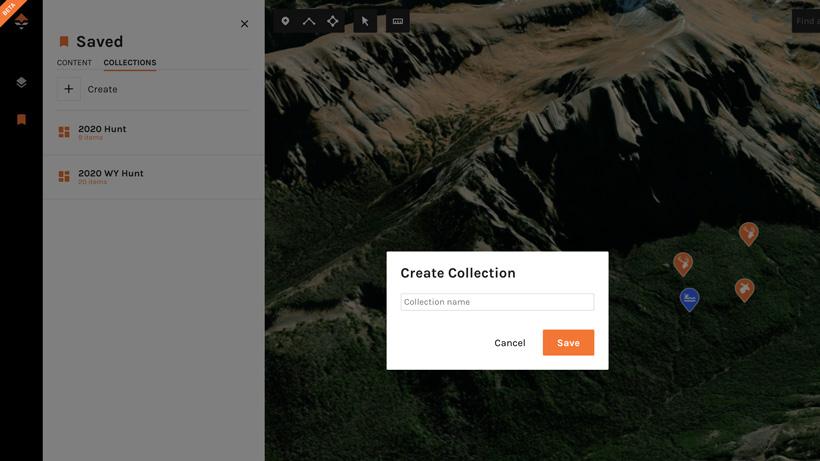
Another great feature of GOHUNT Maps is to create content Hunt Folders where specific waypoints, lines and polygons can be stored. This can be a great way to organize your waypoints and will also make locating specific points much easier.
To create a collection, simply click on your saved content tab, select Collections and then select create.
Once created, you can then navigate back to a specific waypoint and select the "Add to Collection” link to add the item to your collection or you can use the bulk select tool. The waypoint, or mark, will now be visible in both your saved content folder as well as your collection folder. For more information on how to use Hunt Folders, check out this article here.
Part two takes an even deeper dive in how I planned out my Wyoming elk hunt. Check out part two here.
If you’re an Insider, GOHUNT Maps is included in your membership at no additional cost. You can also use GOHUNT Maps with our new Explorer membership, learn more here. If you have any questions, feel free to comment below and I'll l be happy to explain my scouting methods in further detail.