


Mapping out the elevation profile for a long hiking route for an elk hunting area.
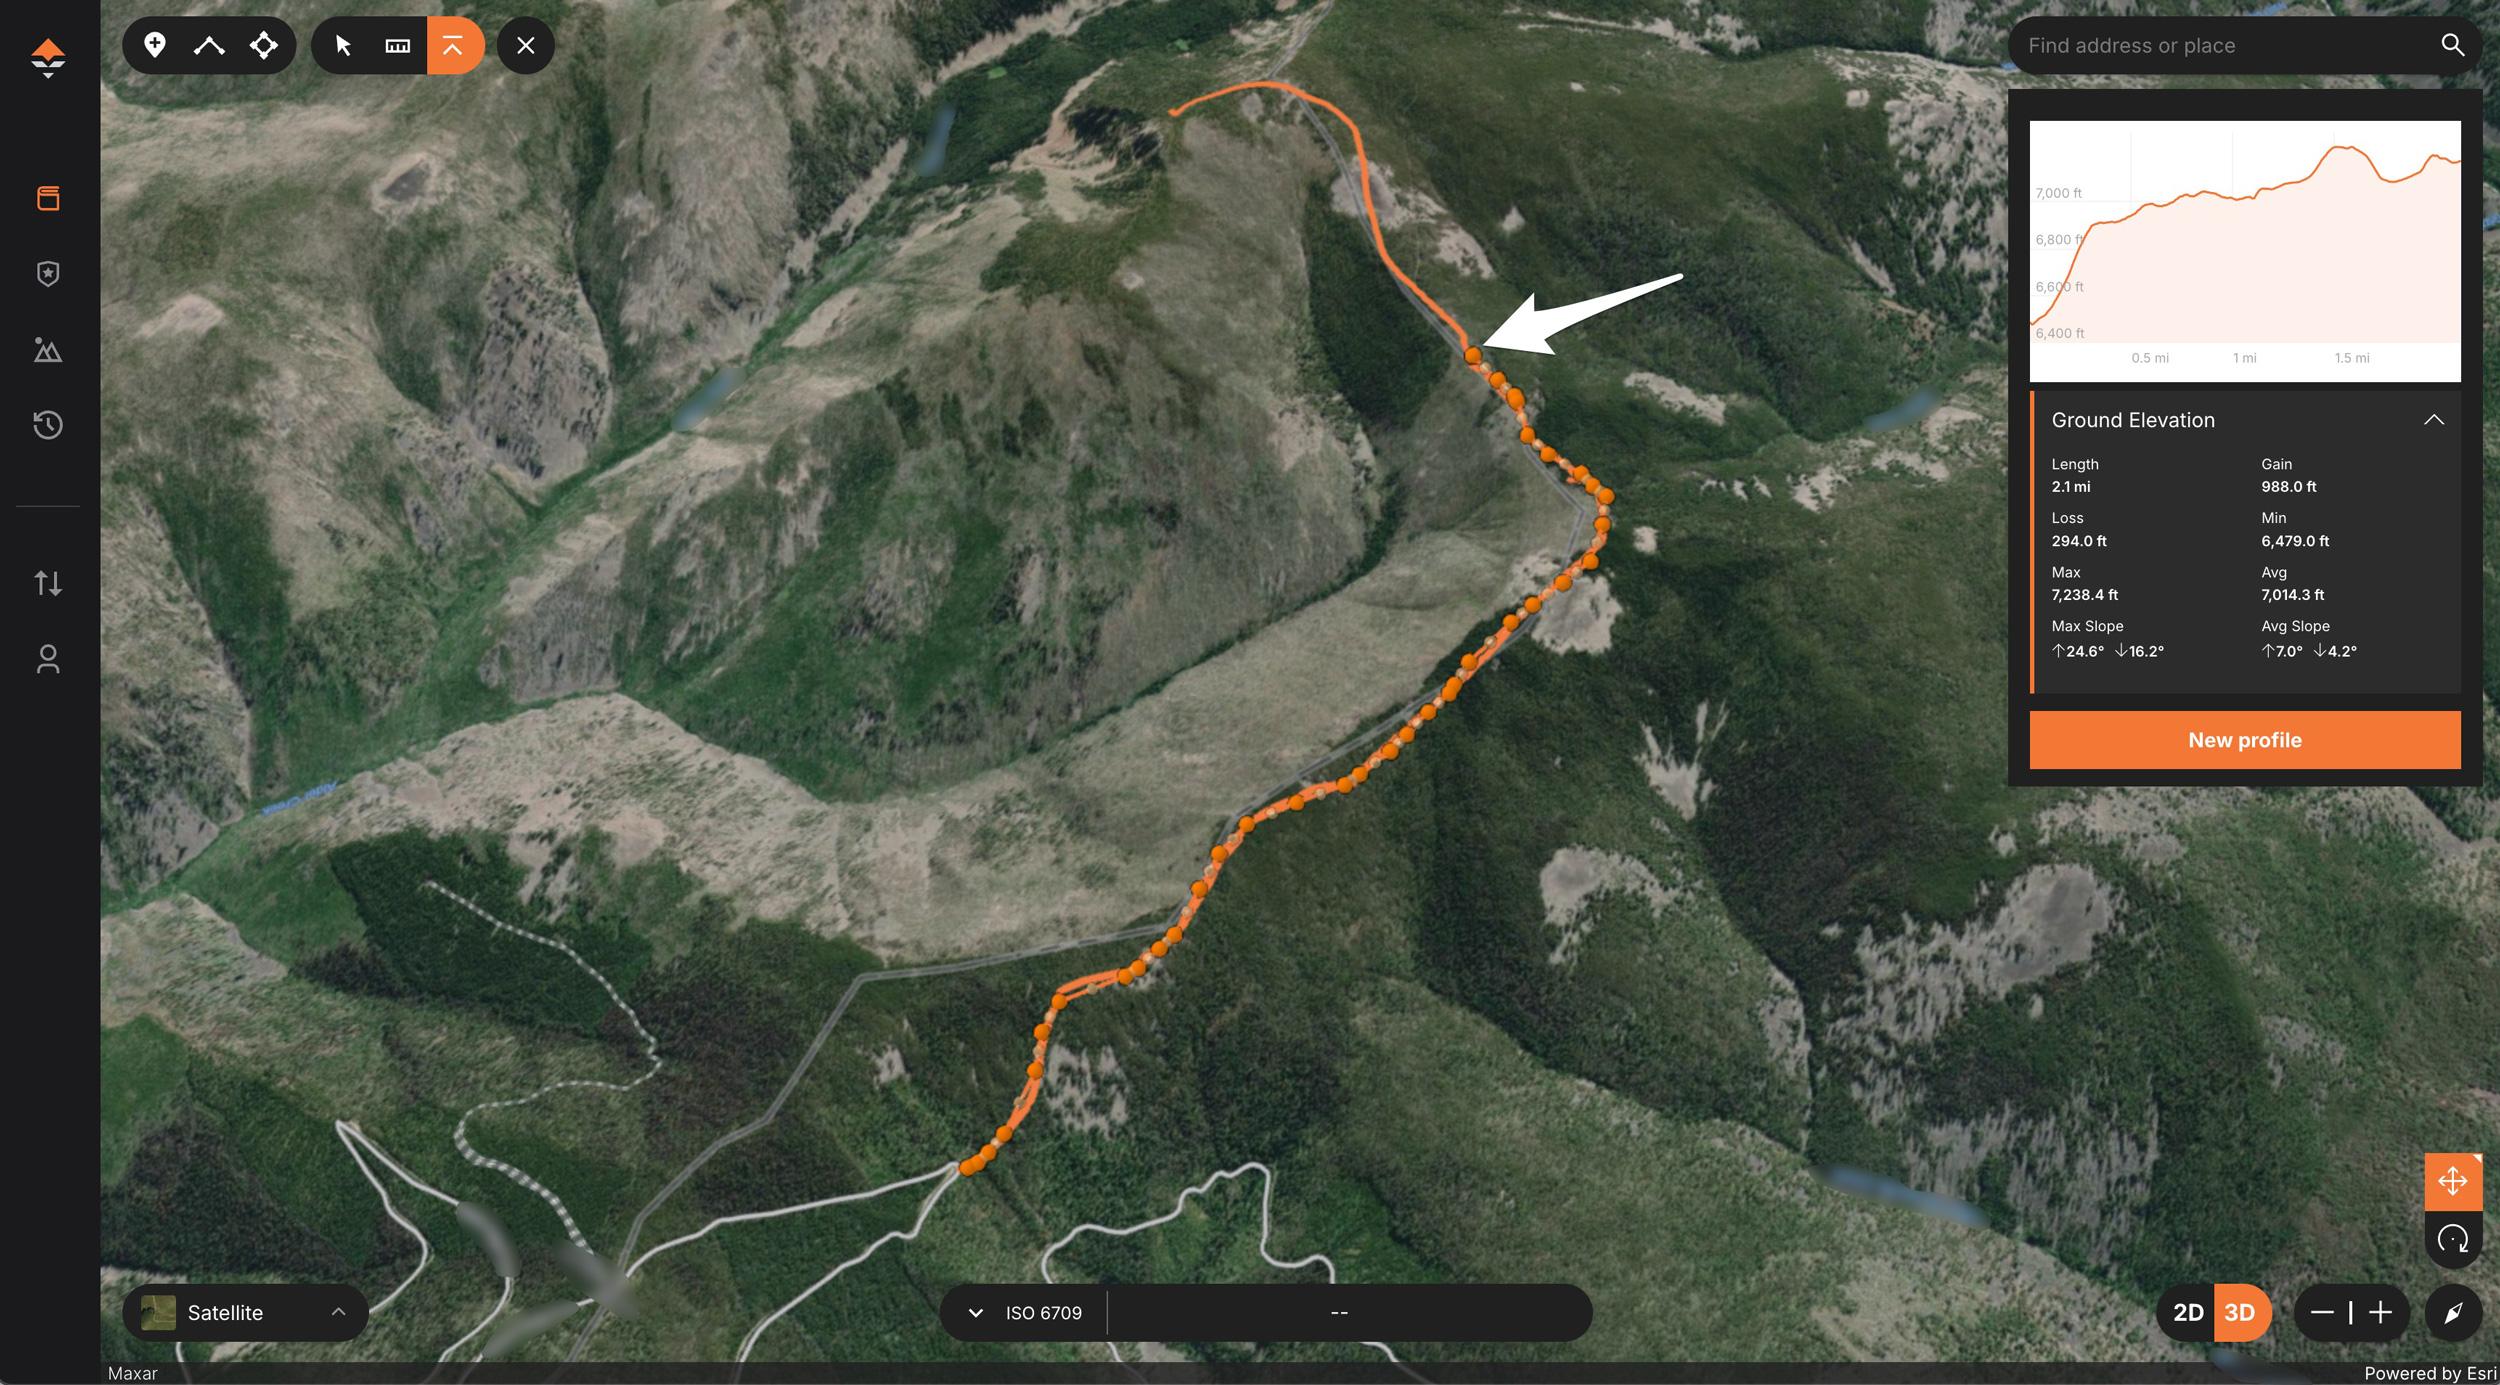
Mapping out the elevation profile for a short hiking route for an elk hunting area.
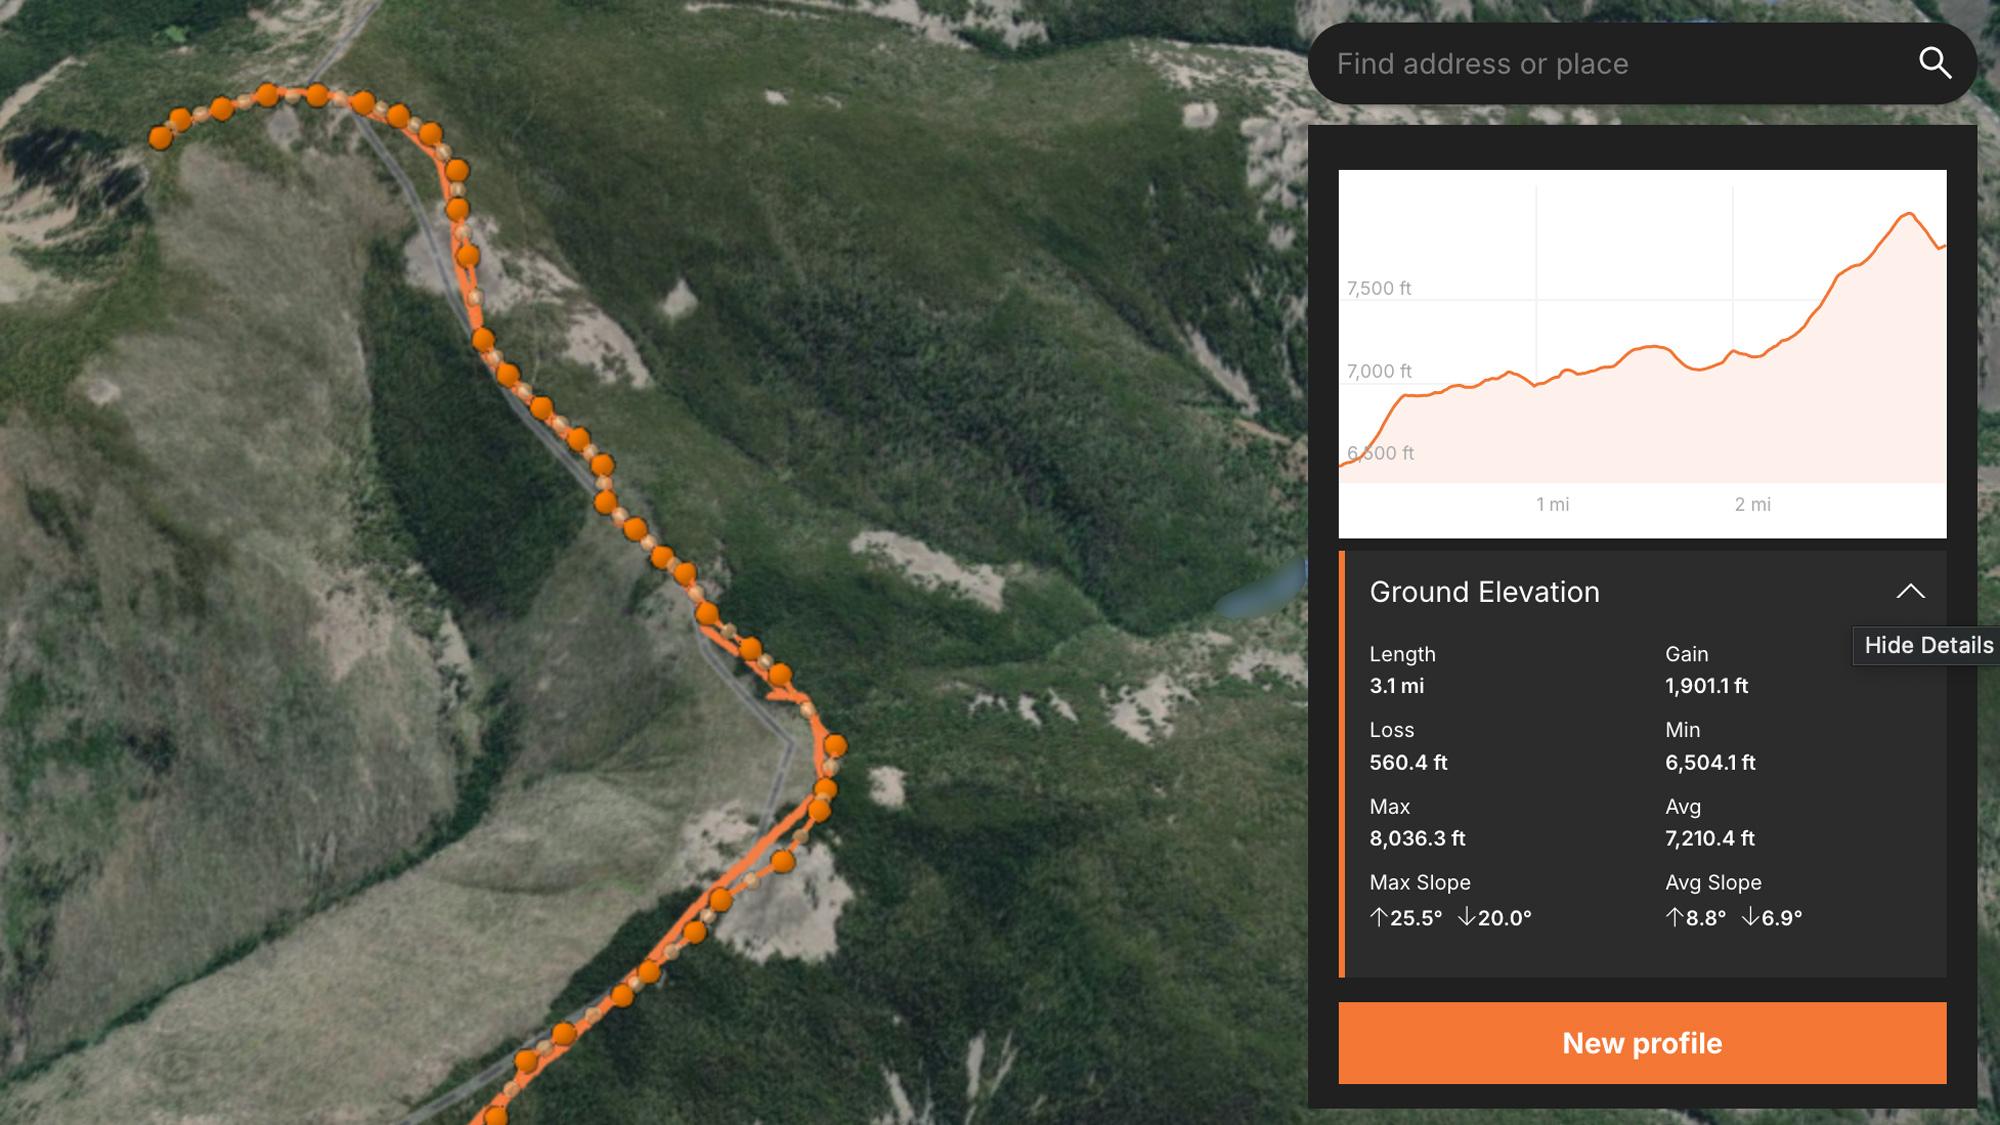
Example of the GOHUNT Elevation Profile tool on maps.
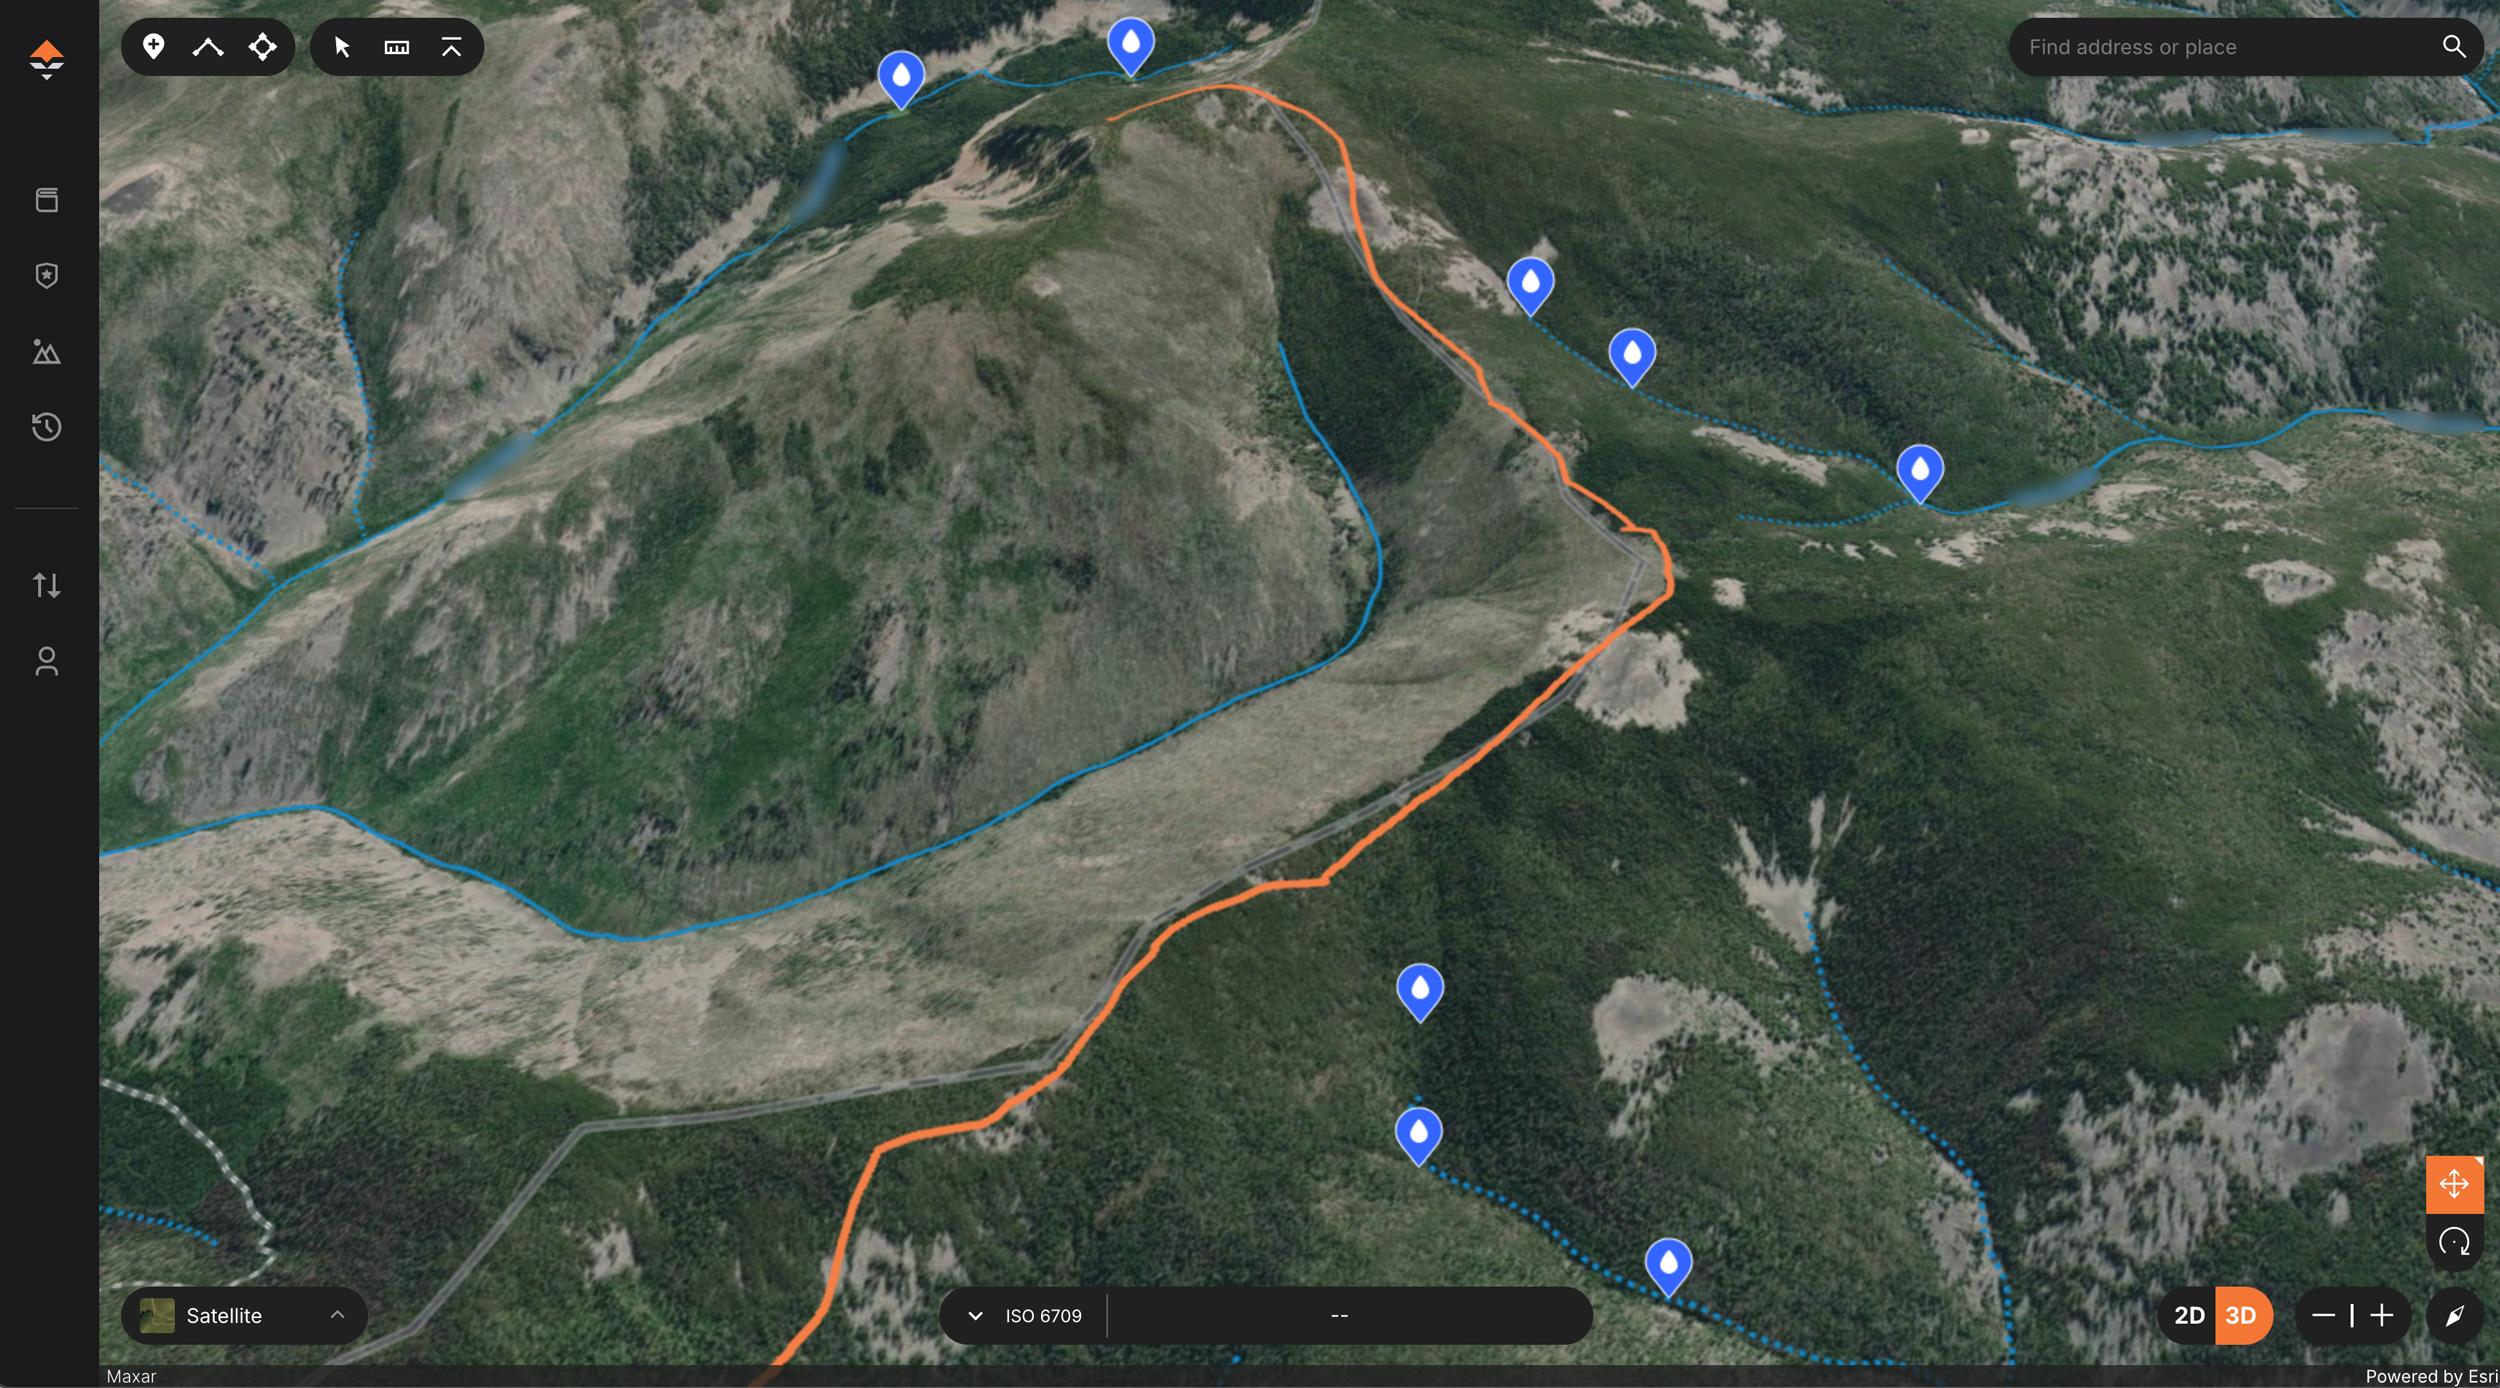
Mapping out potential water sources using satellite imagery and water layers on GOHUNT Maps.
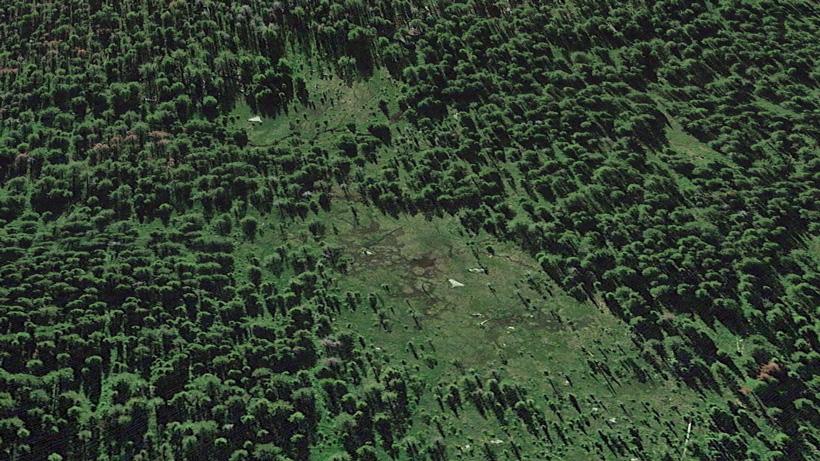
Possible wallow area.
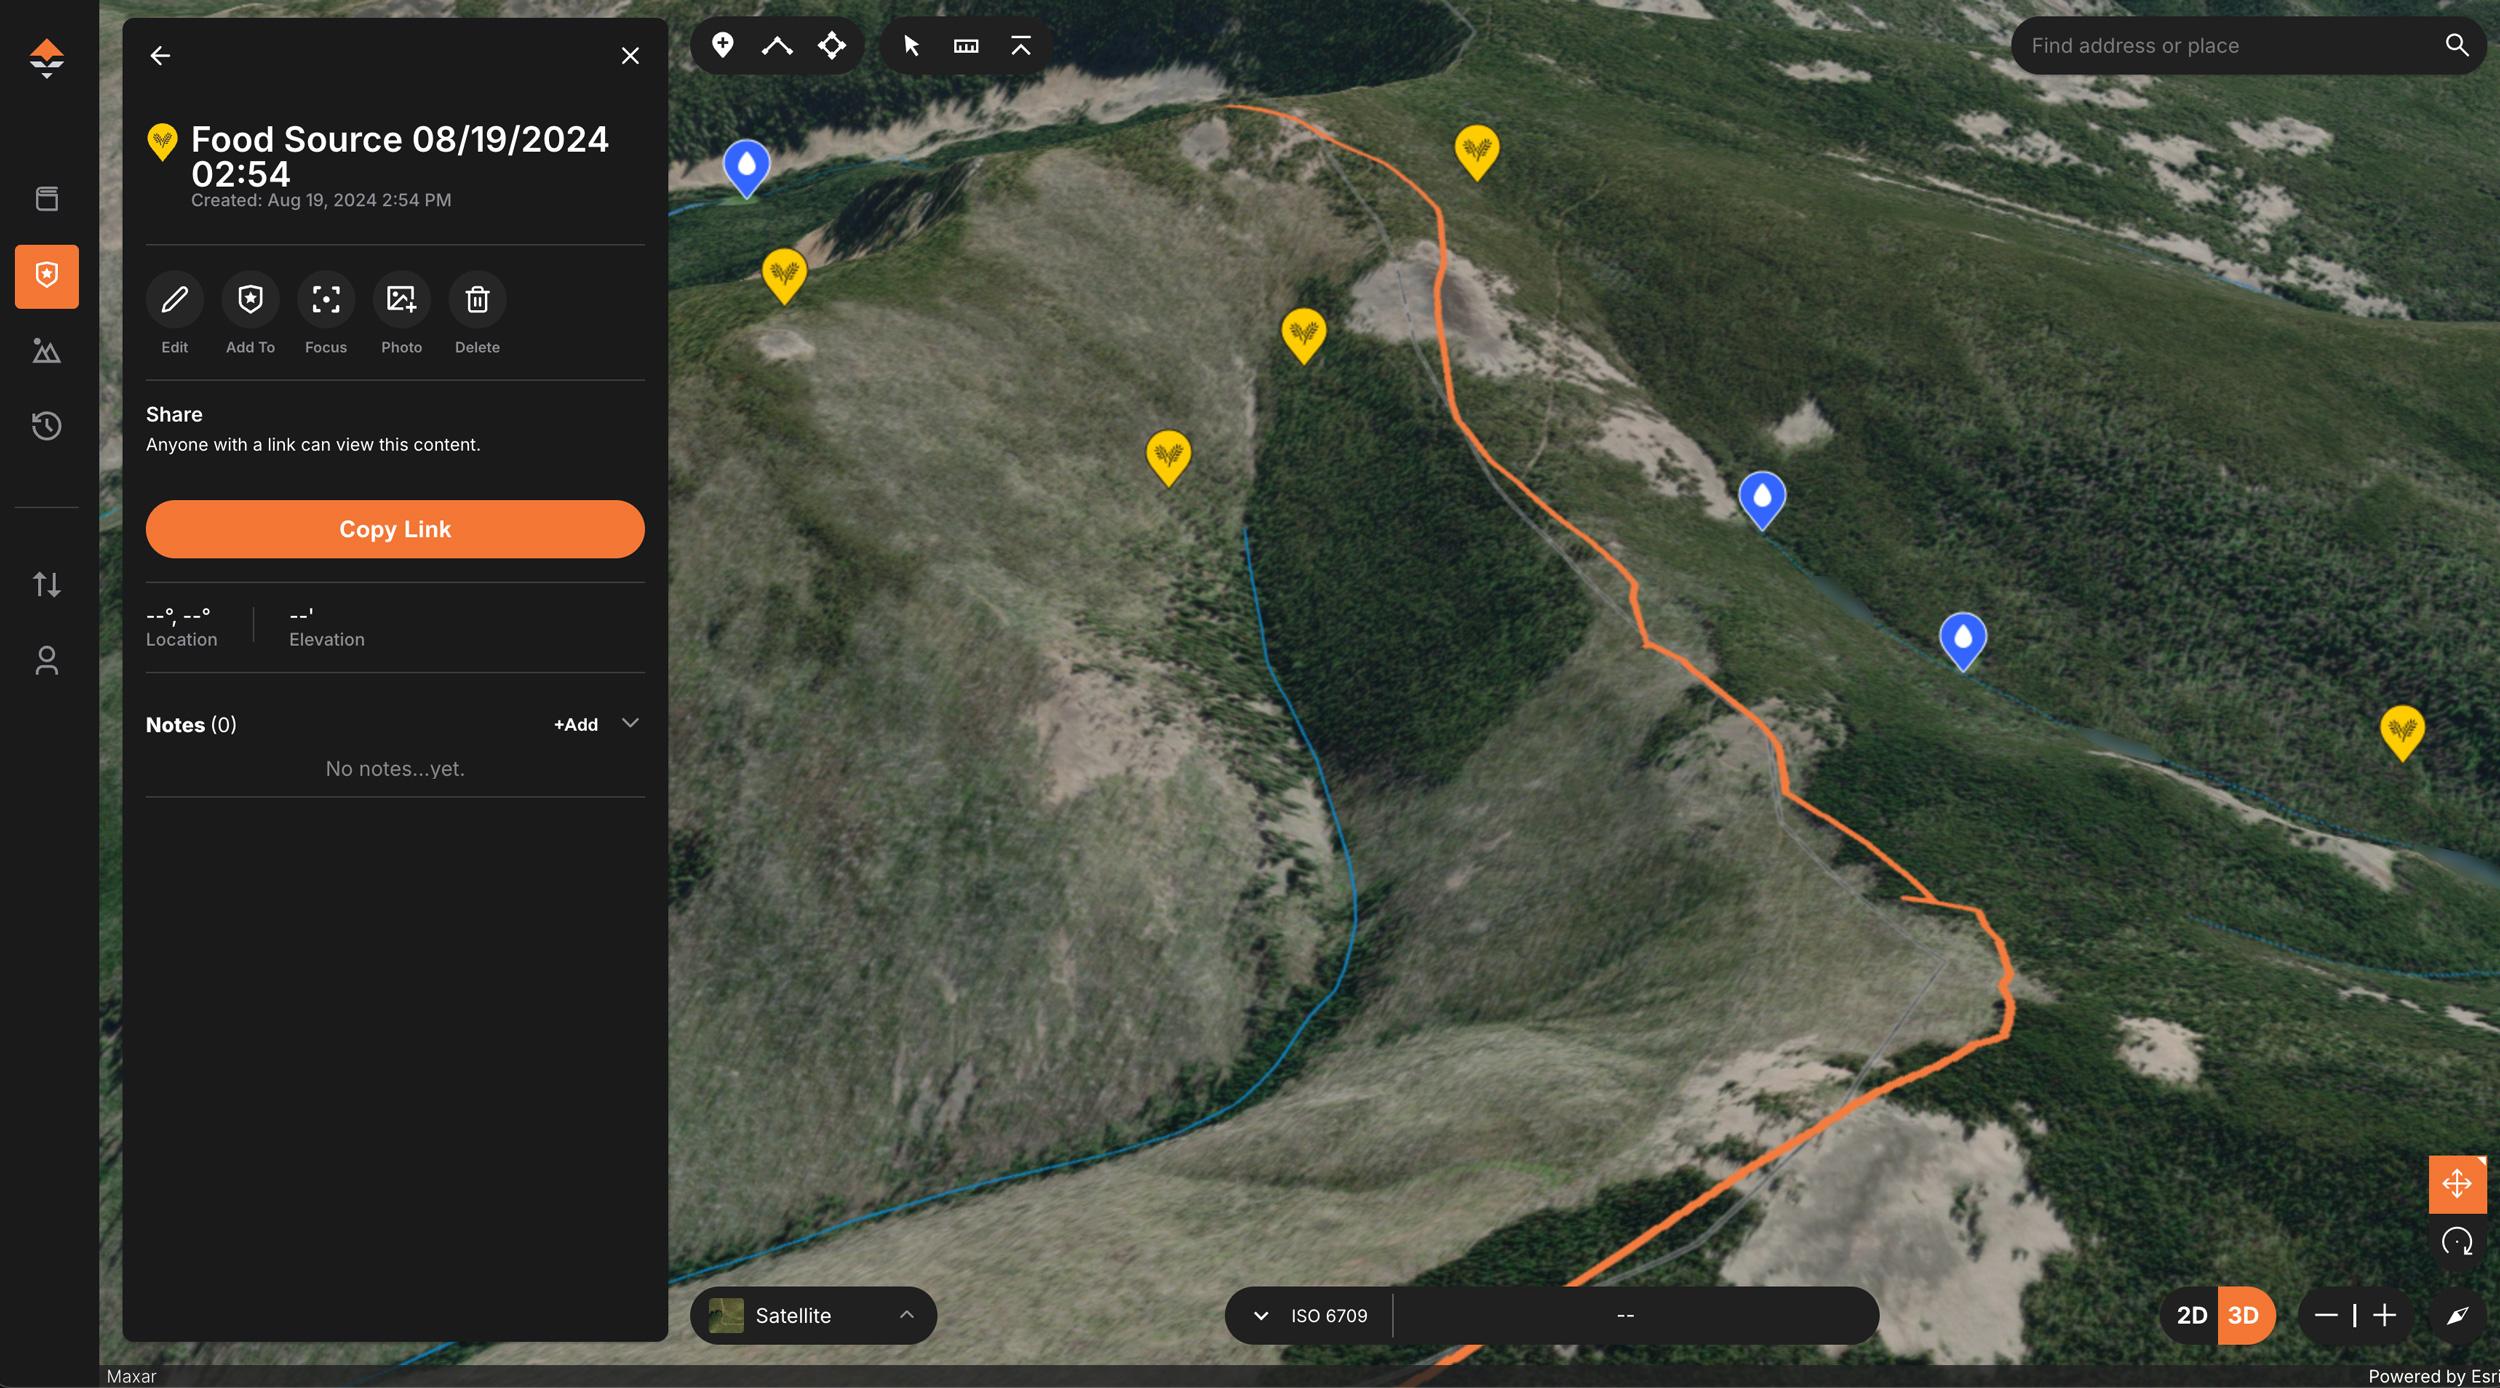
Identifying areas on a map when e-scouting for elk feed.
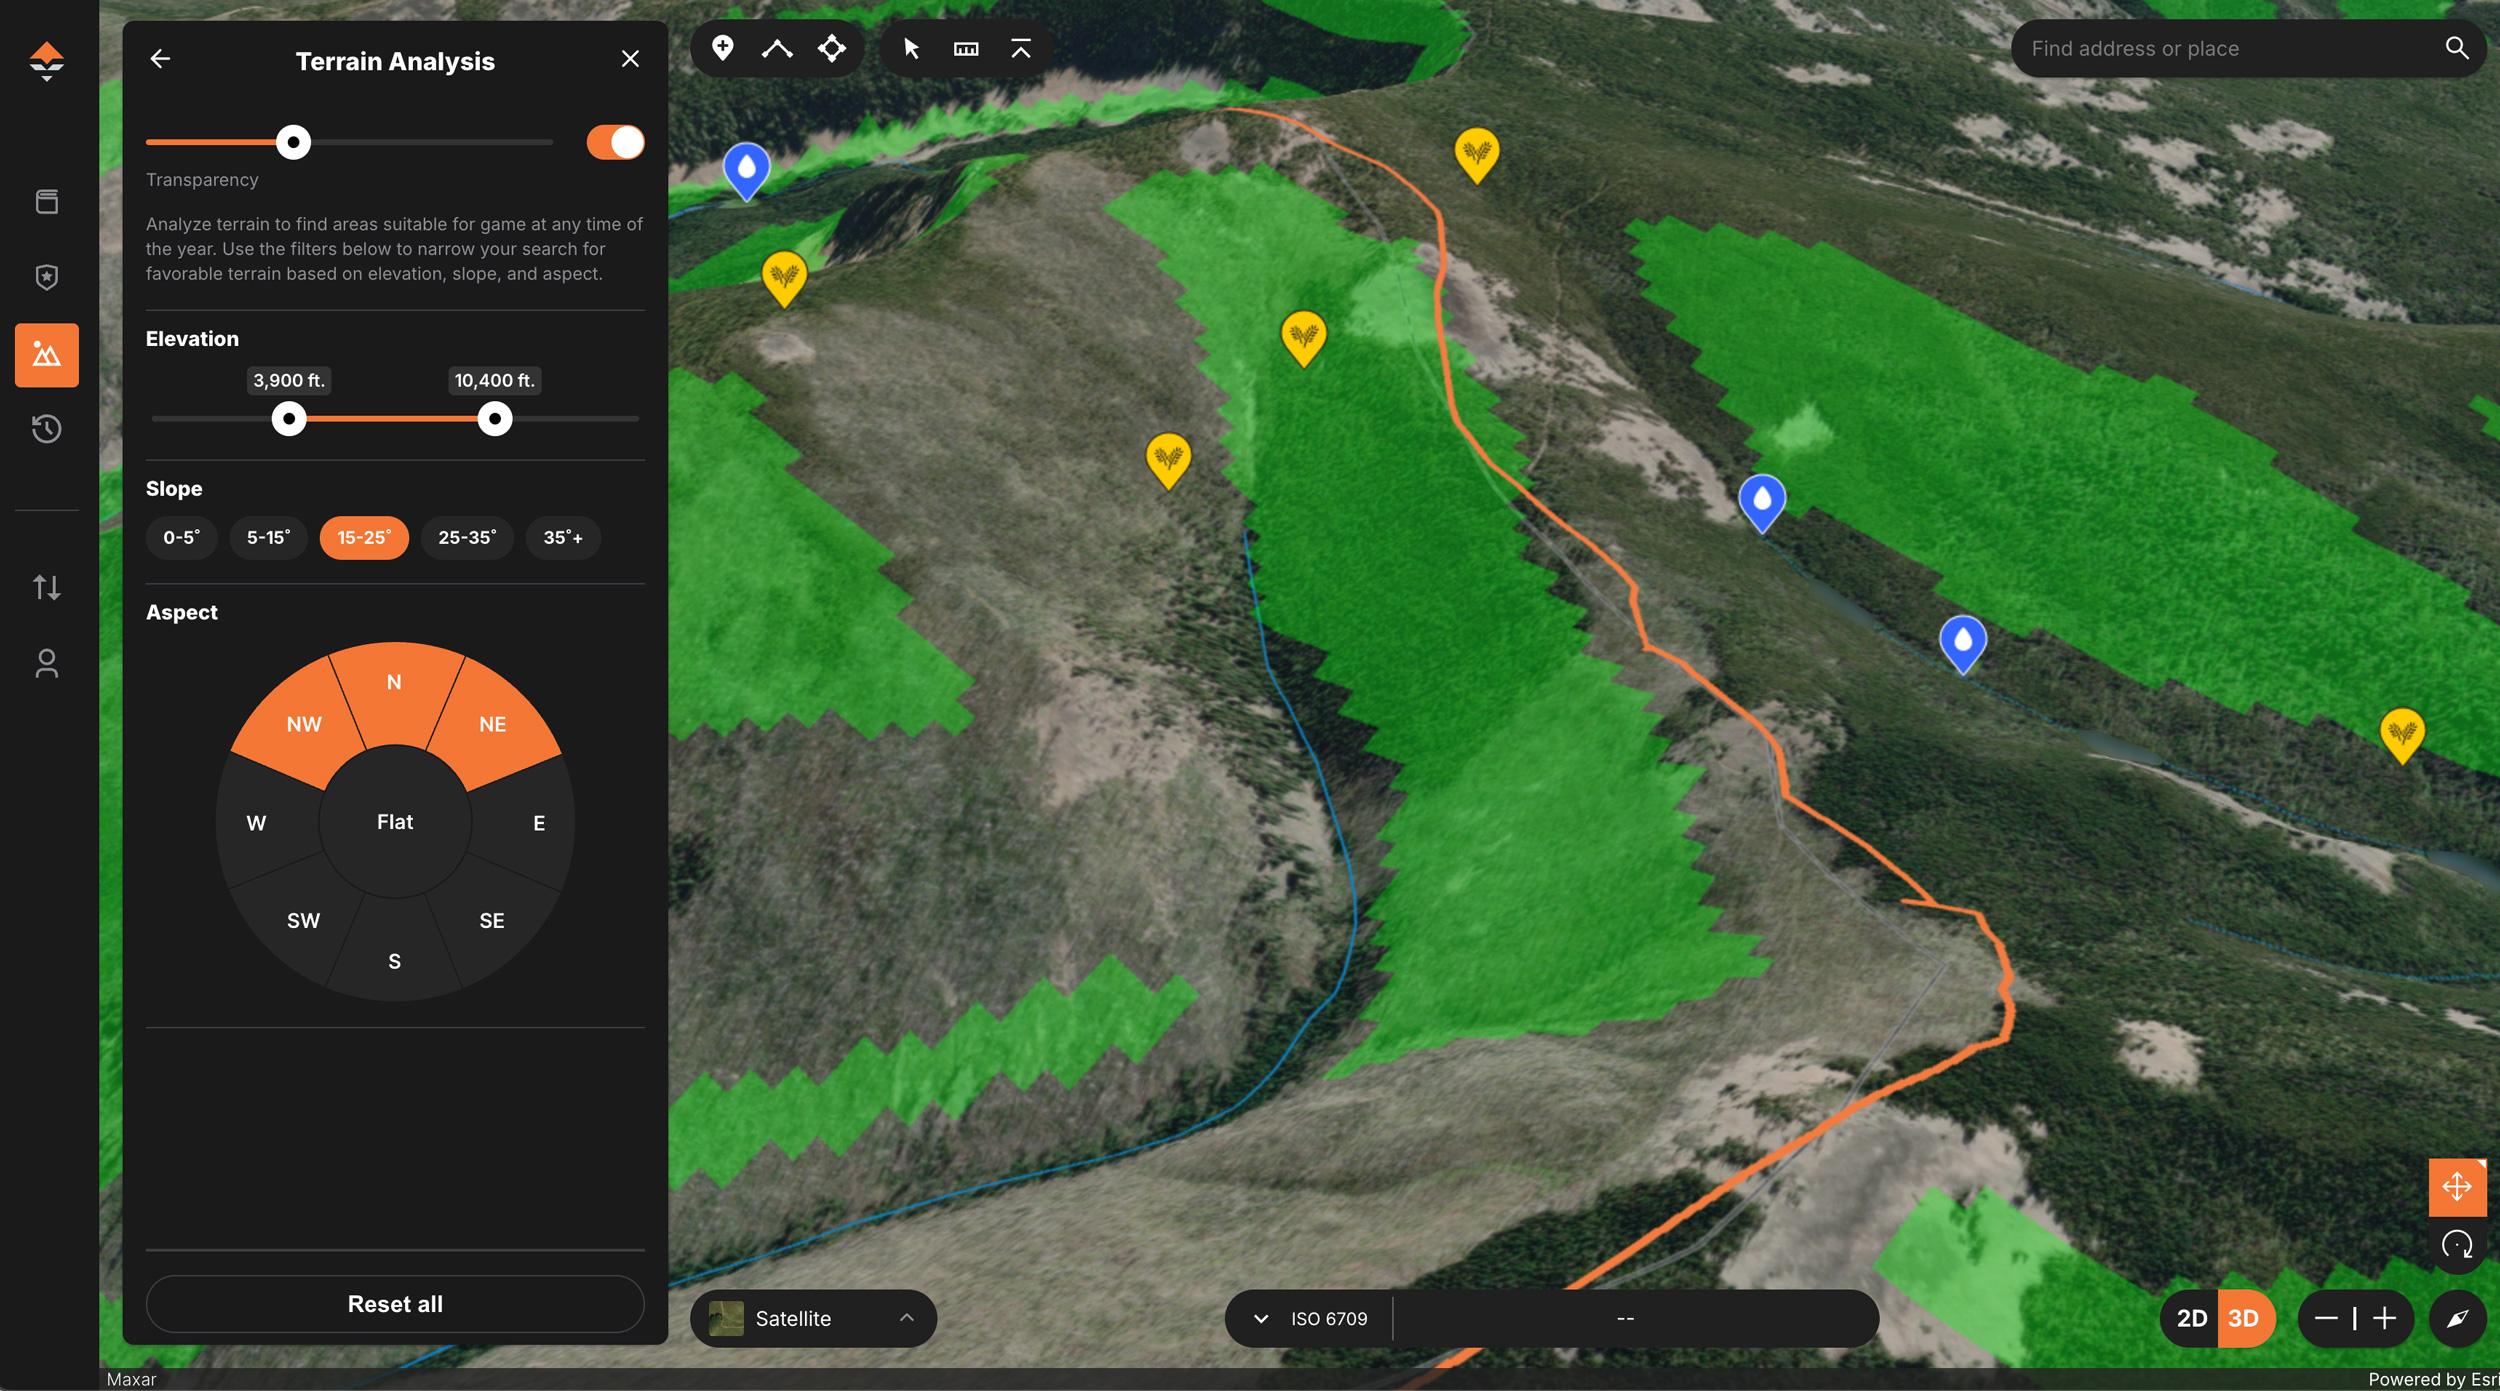
Using GOHUNT's Terrain Analysis Tool to find bedding areas for elk.
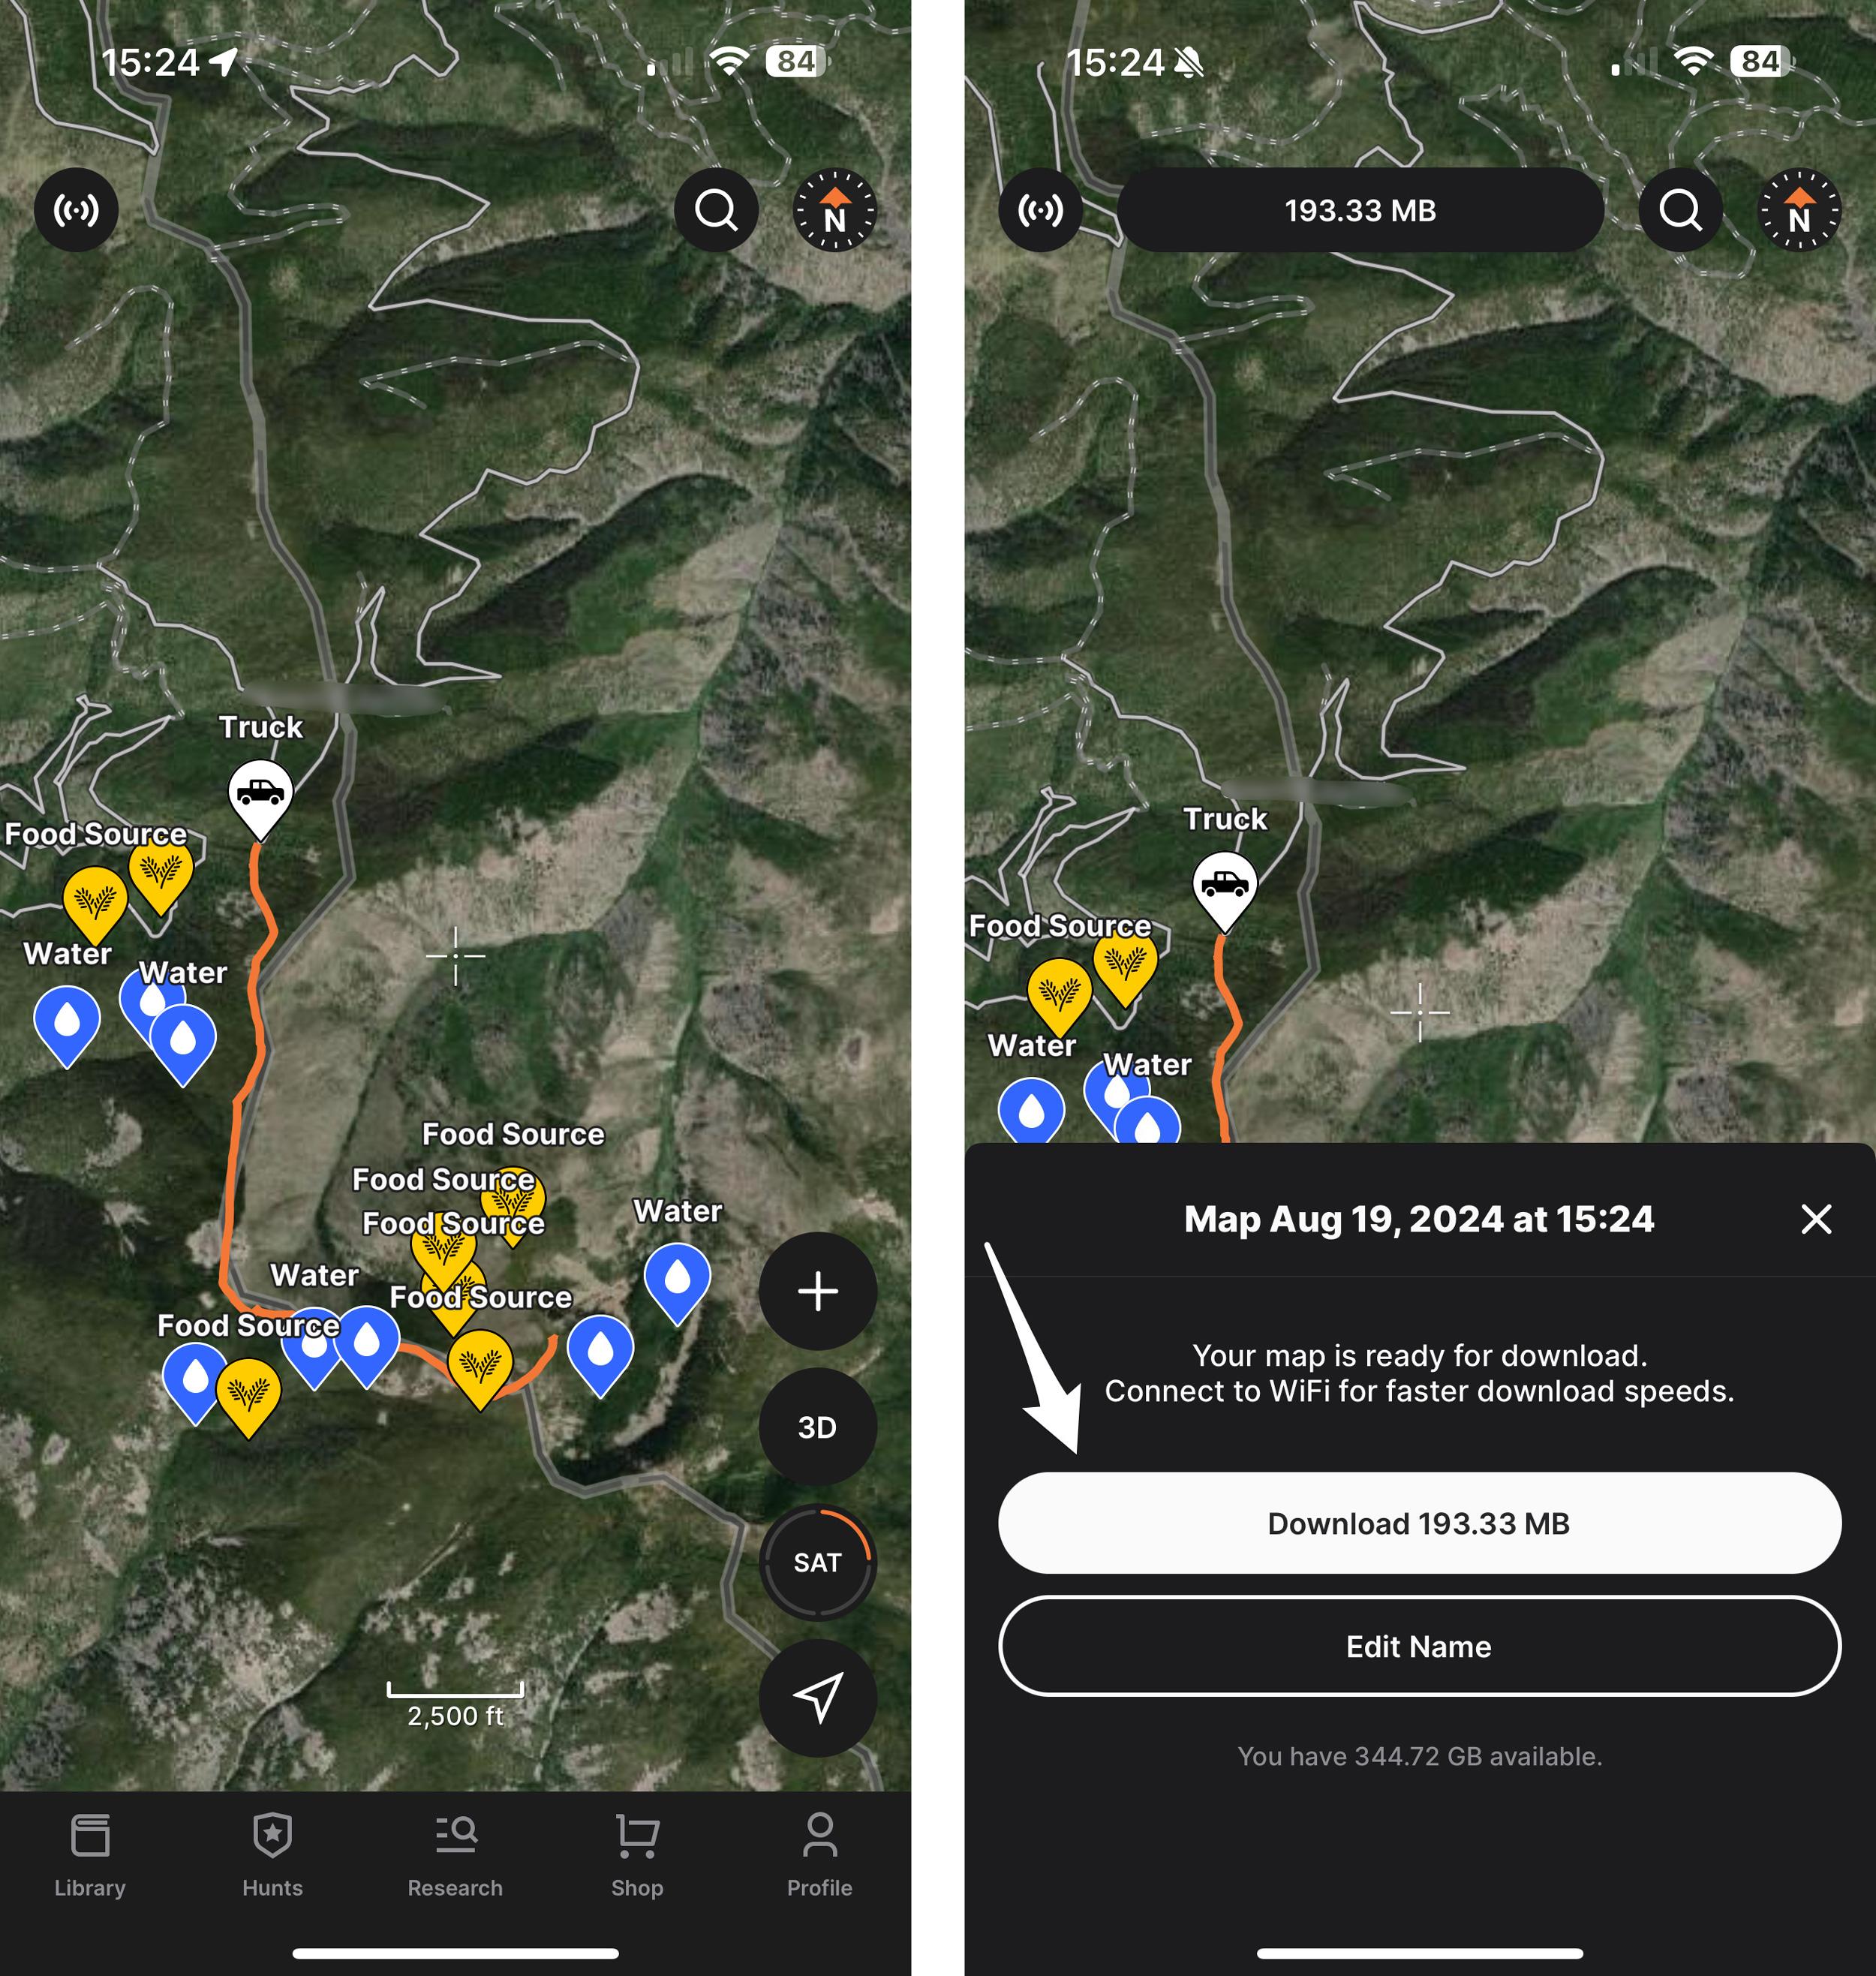
All e-scouting elk waypoints on GOHUNT mobile app and downloading area for offline use.
After reading the first part in this elk scouting series, you’ve likely established a few good units that have caught your eye and appear to offer everything you are looking for in a hunting experience. For this article, I’ll be looking for an area to hunt elk during the archery season with a general season elk tag in a random state.
In this article, I will touch on how to use tools found on GOHUNT Maps that I use when e-scouting new elk areas from home. I will also cover helpful hints and tricks I’ve learned within the programs to further our elk scouting effectiveness. So stay tuned...
Technology provides so many avenues for scouting that it can almost seem at times that there are too many options. At the base core of the e-scouting process, we need a good topographical map and satellite imagery. Other resources that can often be helpful include previous fire histories, yearly rainfall statistics, state-specific harvest reports, and online forums, which can be very beneficial. GOHUNT Insider is a wealth of information when it comes to historical temperatures and precipitations, harvest reports, etc. And GOHUNT Maps has you covered when you're looking for all your e-scouting needs.
When it comes to topographical maps, my favorite is our GOHUNT custom topo map. The team at GOHUNT went out and built a topographical map based on the needs of hunters. While using the maps found on GOHUNT, I have access to terrain, topographical maps, and aerial images as well as fire histories, slope gradients, and much more.
A quality 3D web map like GOHUNT Maps is something every elk hunter should have in their e-scouting arsenal. With our maps, you can be set free in a 3D world with high-quality satellite imagery of your prospective elk spots. I use maps to identify feeding, bedding, and water areas as well as mark waypoints that will also transfer right to my mobile app.
Once I have a list of units that I am interested in hunting, I begin taking the landscape apart one hunt district at a time. To start this, I open GOHUNT Maps, turn on the hunt district layer, and then manipulate the map over a preselected area. I like to have the camera fairly zoomed out while using satellite imagery for this step, as it helps when scanning the district for pockets of dense timber cover, north slopes, and seclusion from roads. Periodically, as I come upon likely-looking areas, I will also check the topographical maps in an effort to uncover any hidden roads or ATV trails. Swapping over to GOHUNT's custom topographical map is easy, and it can be turned on by changing the basemap in the lower left portion of the screen if you're on the web version of GOHUNT maps.
This process of scanning a bunch of hunt districts on satellite imagery can take some time but will be well worth it come September when I’m trying to escape the crowds and hunting elk.
With some time and effort, you will begin pulling some of the prime areas out of a given district and painting a picture for a game plan of success. Generally speaking, I will likely nix eight out of 10 spots that initially piqued my interest before I’m done based on terrain, access, or reciprocity to roads.
Once I’ve found a few locations that I feel comfortable will likely hold elk, I begin to meticulously analyze the area and formulate a plan. The key factors I am looking for when looking for elk country are food, water, cover (bedding), and remoteness. These are four necessities all elk need without exception, and locating an area that possesses all four within close proximity will be key. To keep things organized and tidy I like to break each one of these necessities down into individual categories so I can focus on one aspect at a time. This will ultimately keep me from passing up areas of interest that I may have previously overlooked. Food, cover, and water can be done in any order but because seclusion and low pressure are high on my priority list I check for remoteness and distance to roads first.
The location part for elk hunting is fairly simple. Essentially, I am checking to see how remote my new prospective area is while also looking to see how easy it will be for me and others to access this area. My preferred distance from roads will vary largely from spot to spot based on terrain. Areas that possess trails or gated roads may require me to get two or more miles from the truck, whereas a roadless area may only require one mile. Generally speaking, the harder the effort, the less likely other hunters will attempt the hike.
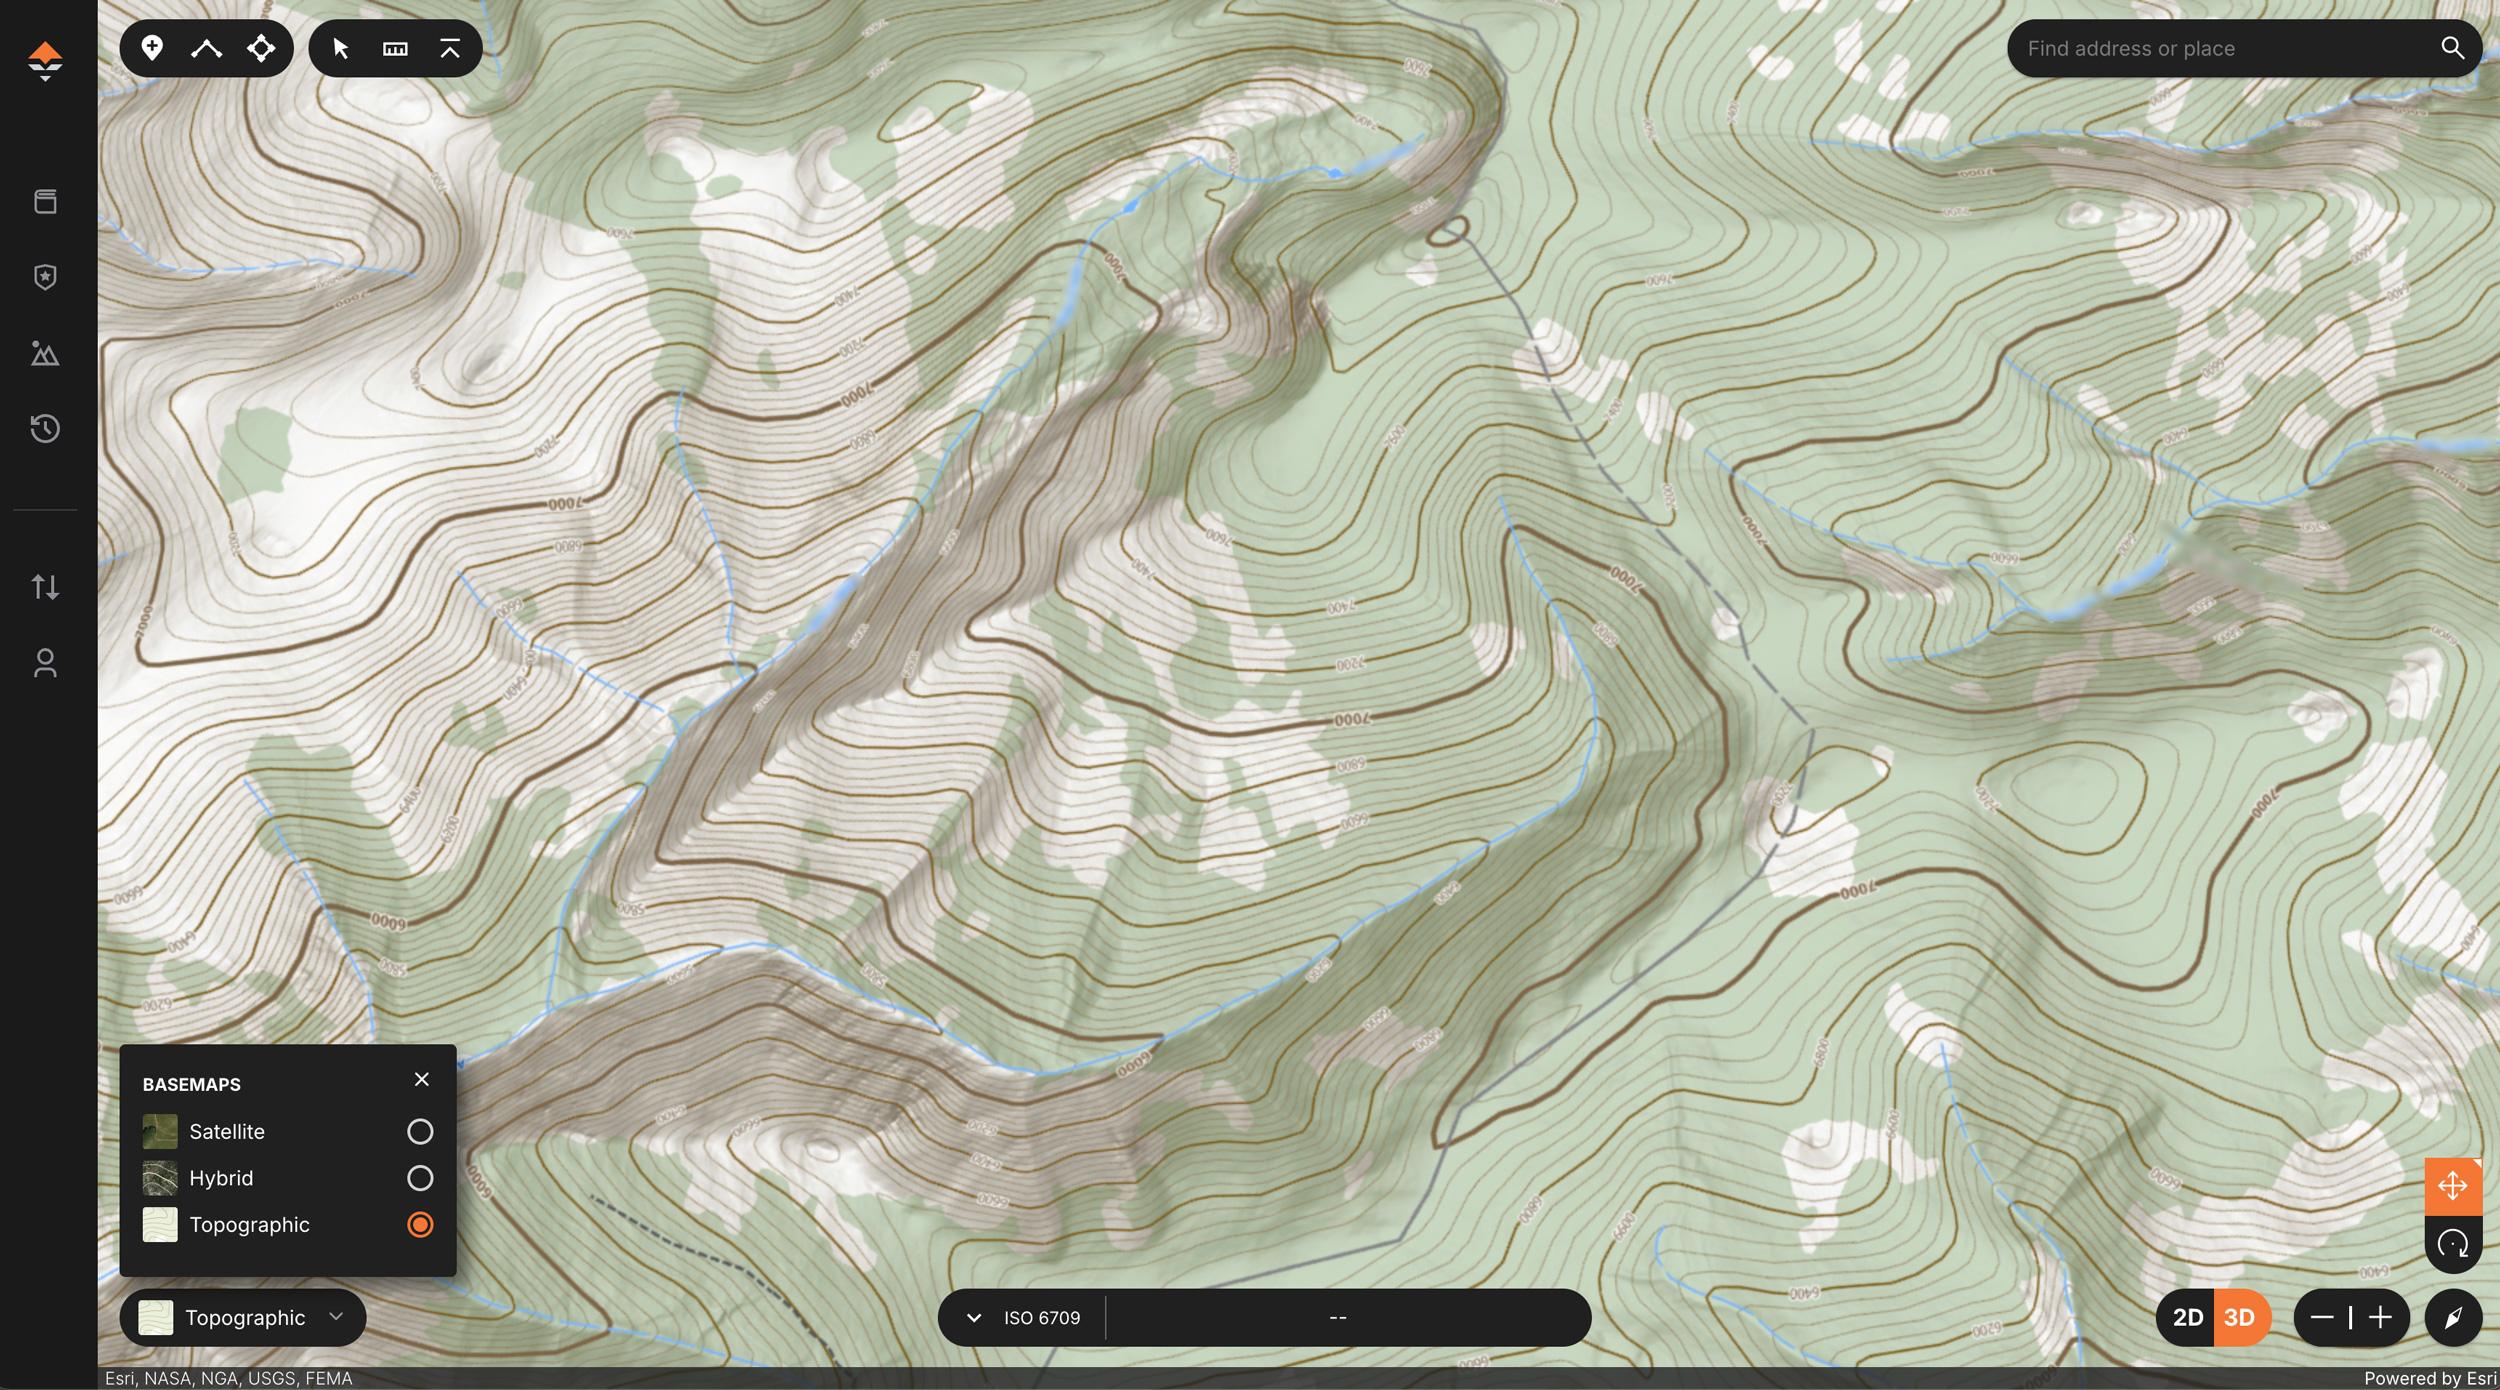
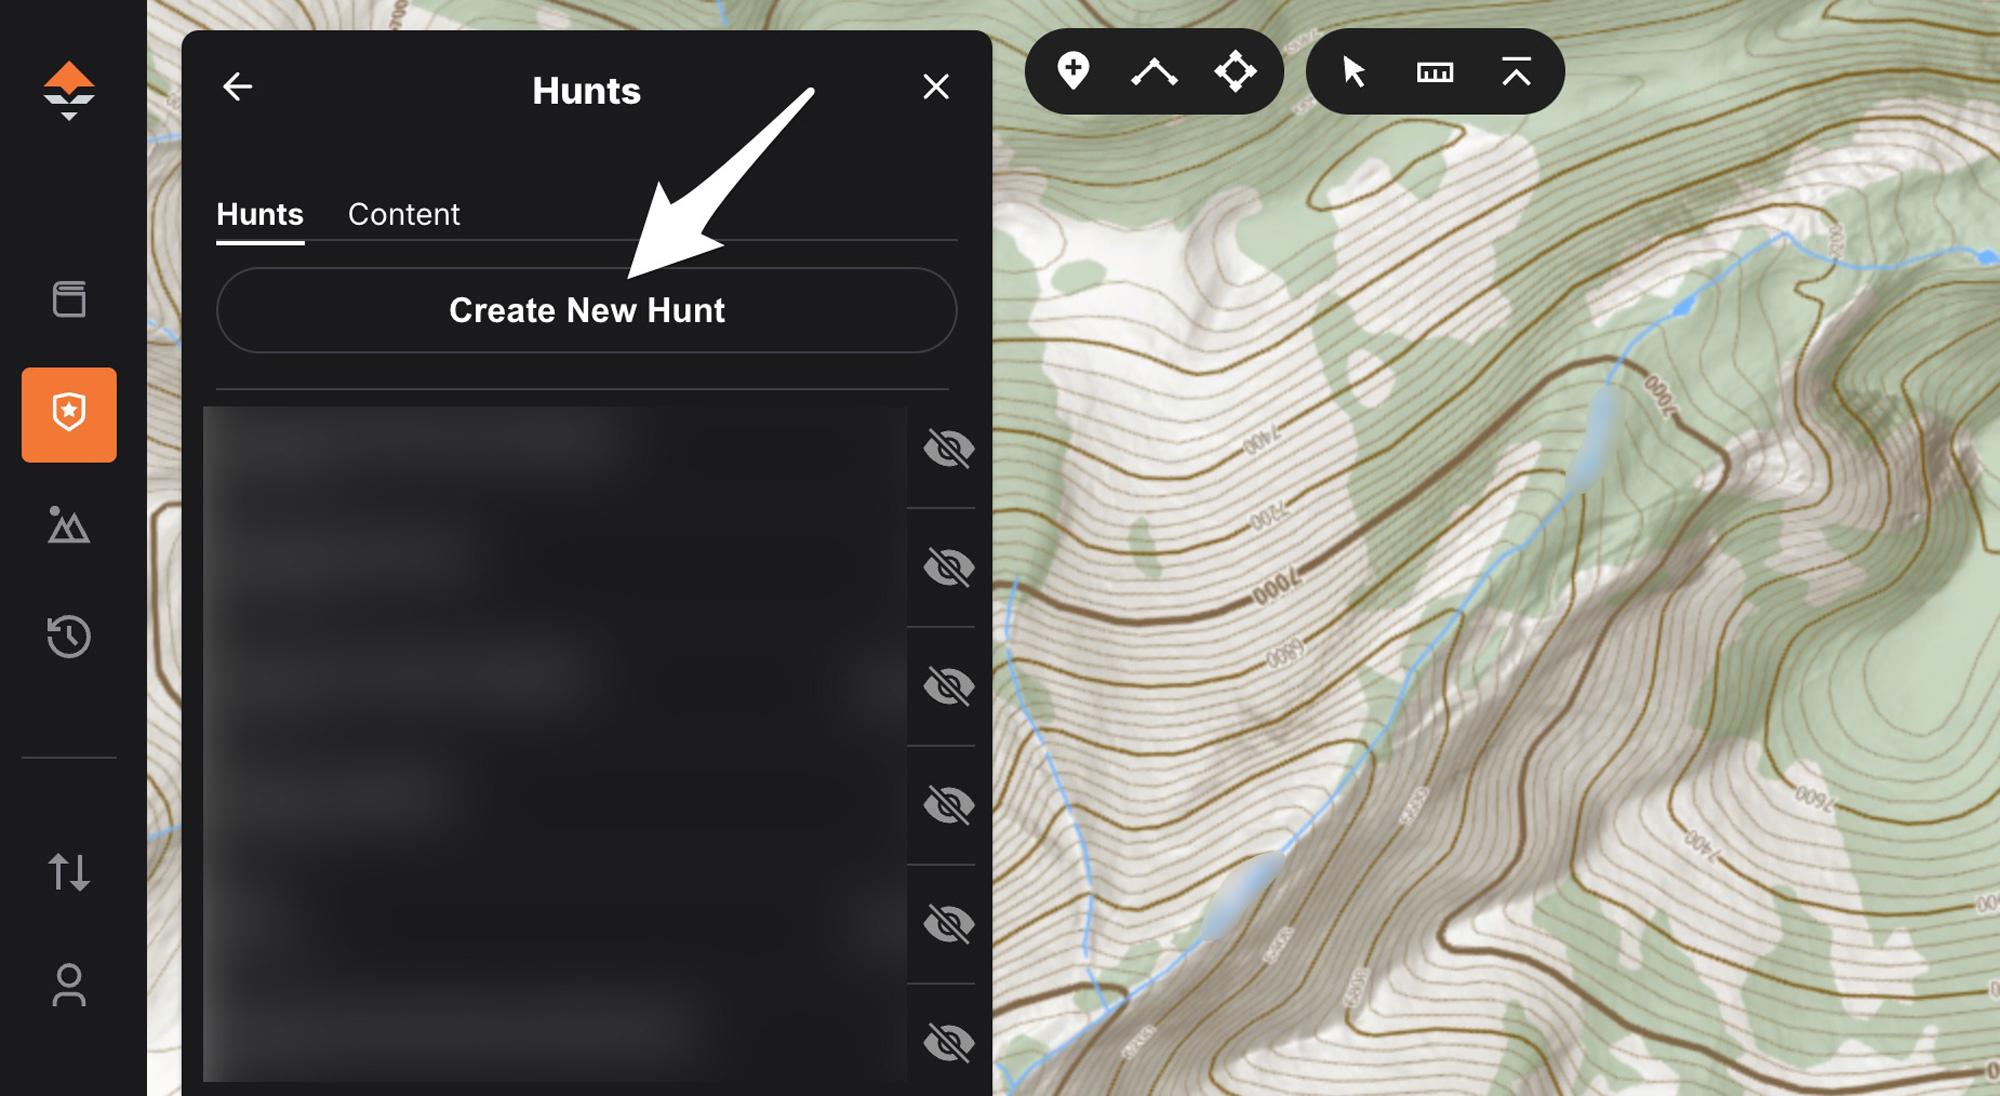
Before I begin checking my area for hike in distance, I like to get a new Hunt folder created for this particular area, which will lead to a more organized process down the road. I have separate file folders for whitetail, mule deer, elk, etc., and these can be organized any way that makes sense to you. New folders can be added at any time by simply clicking on “Hunts” in the toolbar on the left side of the screen and then selecting "Create New Hunt." Now you can name your folder and finish by selecting “Save.” By creating separate folders for each of my prospective elk areas, it’s much easier to read and organize the waypoints I’ll mark in the following steps.
To start this initial part of marking waypoints in my e-scouting efforts, I first mark my shortest hike I expect to encounter elk and then the furthest point I anticipate hiking for elk. This will give me a rough idea of how far I need to go in and will also help me establish distance boundaries.
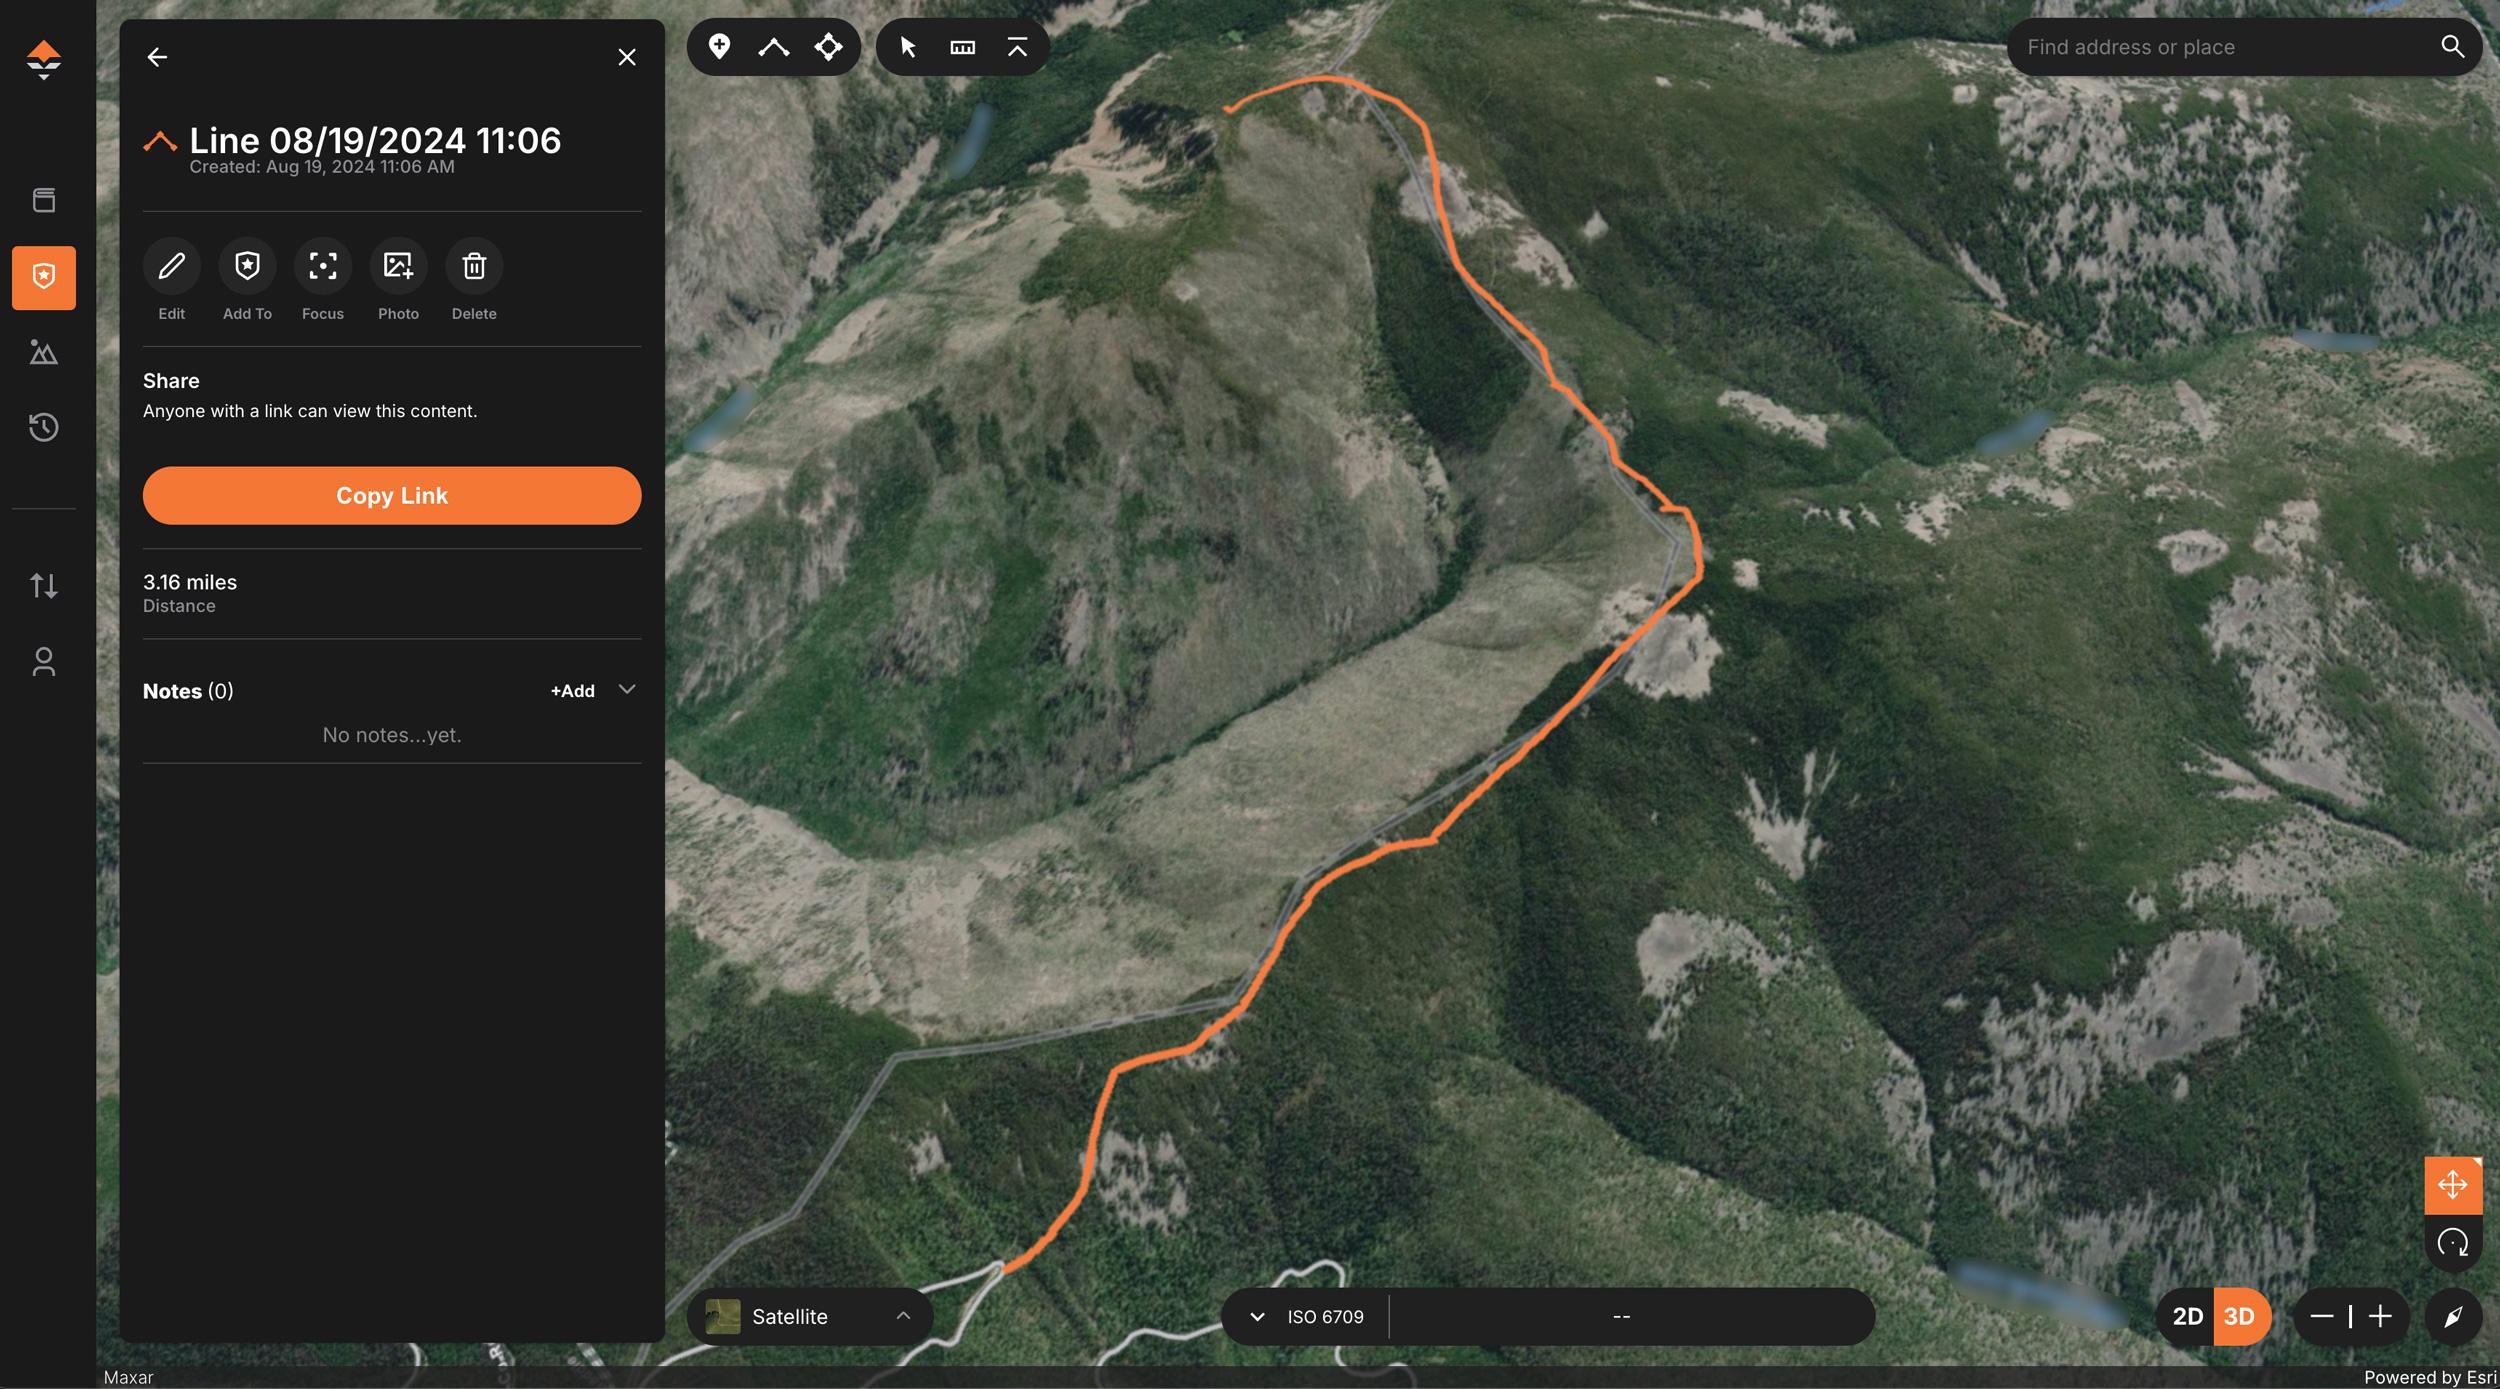
To measure these distances, click on the “Draw a line” icon on the upper floating toolbar. To begin creating your line route to measure distance, simply click on your starting point and then begin building your path by holding down the left mouse button. Once your desired route is mapped, double-click to end the path. click on “Save.” You will be redirected to name your route as well as select different color options for the line.
Once I have my short and long route mapped out, I can analyze the distance and elevation gain/loss and make an educated guess on whether or not this area shows promise.
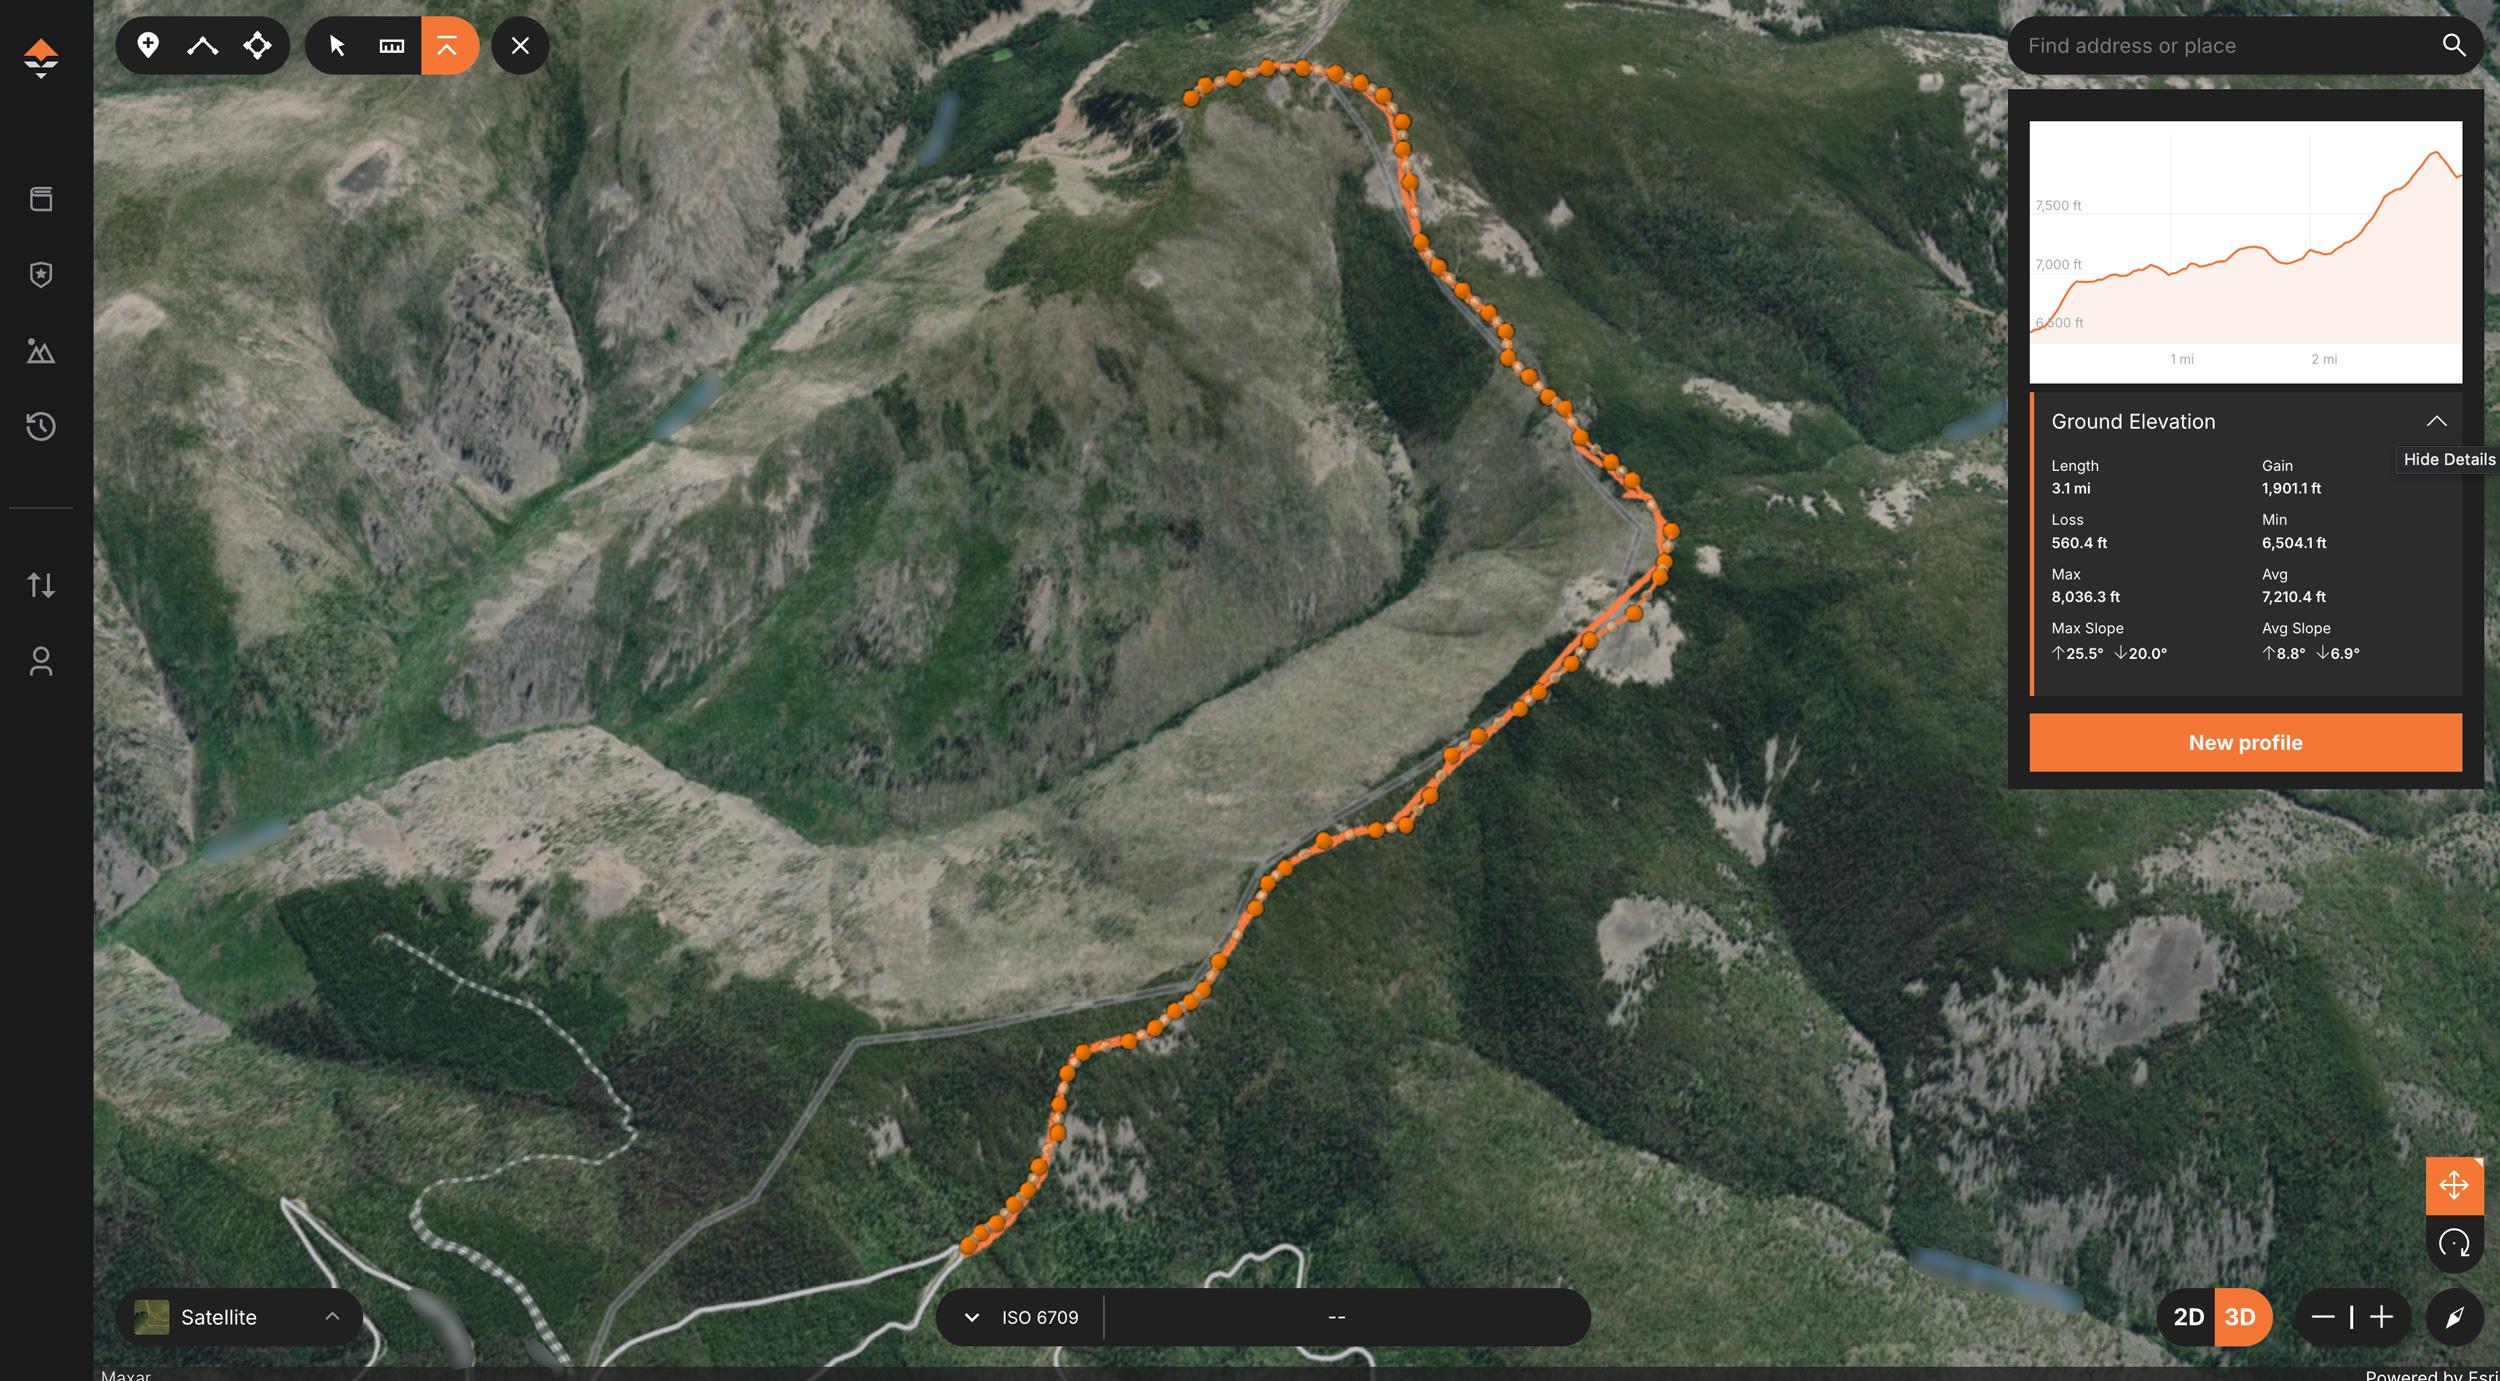
To look at this information. click on the “Elevation Profile” button on the floating toolbar and then trace your previous line with this tool.
For my example area, the short hike showed a distance of approximately 2.1 miles with a 988-foot elevation gain, and the long hike showed a distance of approximately 3.1 miles with an elevation gain of 1,900 feet. This shows me a few things:
With some serious schedule changes, I will likely be spending my September as a solo elk hunter, and hiking in distances of 1.5 to four miles will be about perfect for this endeavor. Any further in and I stand a significant chance of losing meat on a packout. Using the measured distances and elevation profile, I can also find other access points that may be shorter, steeper, or flatter, which can be a valuable time saver. Now that I know this area meets my criteria for remoteness, I can begin picking it apart for elk habitat and other necessities.
Elk need water every day, and that's a fact that we can exploit, specifically in the early season. By mapping areas likely to hold water, I will uncover water holes and wallows and, consequently, also uncover water sources for myself if packing a water purifier. While elk rarely use the same watering area day after day, it’s important to locate these spots as they can be go to areas when the hunting is slow or the days are hot. To locate these spots, I will look for obvious signs of water (ponds, creeks, etc.) as well as low-lying depressions that appear greener than surrounding areas. In this early scouting phase, it is important to mark everything that looks intriguing. Once you find an area that looks like it holds water, simply click on the “Drop a waypoint” icon and then mark the waypoint to the desired location. I will generally name my waypoints as “Water #1” with the number increasing for each spot of sign.
As you can see in the example above, I’ve marked six locations that will likely hold water, as well as two unnamed lakes. I like areas with lakes as these will generally have more standing water in the immediate area for wallows and can also provide a great location for a camp if overnighting. Be sure to zoom in completely on areas of interest as wallows can often be spotted on satellite imagery on GOHUNT Maps.
The next main component I will look for will be food sources. During the first few weeks of the season, elk will generally be eating nutrient-rich grasses found in openings and burn areas. Once the rut kicks in, look for elk to begin grazing on shrubs and forbs found in the denser areas. By identifying areas of possible feed, I can establish good glassing points and areas to keep an eye on during the first and last hours of daylight. I consider this step one of the least important, as food sources can be hard to identify with aerial imagery. Still, these can be great early stepping stones if the elk are proving difficult to locate during the season.
In the above picture, I’ve identified some areas that should hold feed, though I expect a large portion of the resident elk’s diet to come from the burn on the east side of this area. As my hike takes me across most of this burn, I will need to stop and glass in regular intervals in hopes of finding elk as they move up and out of this drainage.
Cover for elk can generally be described as areas that provide security and bedding. Not only can these be important when locating elk midday, but they can also be useful if a herd happens to be spooked and retreats to areas of sanctuary.
For this, I would like to focus on areas of heavy timber cover on north, northwest, and northeast-facing slopes, as well as areas located at the upper two-thirds of the elevation of the surrounding ridges. Using GOHUNT's Terrain Analysis Tool is perfect for this! Turn on the Terrain Analysis tool on GOHUNT Maps, select the level of transparency to allow you to see the highlighted areas and the satellite imagery at the same time, then set your elevation parameter for the area you are e-scouting, and finally, select the slope degree range and the aspect ratio.
For the above example, I selected 5-25 degrees (typically, those slope degrees contain the most optimal bedding areas for elk) and turned on north, northwest, and northeast-facing slopes. Next, I'll do a quick check to see if there is feed around or close to those north-facing slopes. Most of the time, terrain that is feed for an elk on a map will appear as open areas that resemble meadows, burns, or edge habitat.
Bedding areas are spots I will not enter unless prompted by a bugling bull, but they can be great areas to hunt the fringes during midday in hopes of drawing a bull away from his cows.
The next step in my process is pretty simple. All of the waypoints you enter when using GOHUNT Maps on the web during your e-scouting process will seamlessly transfer over to your mobile app. The biggest part will be ensuring you have downloaded your maps on the mobile app for offline use.
Now, everything is ready to be taken into the field on a boots-on-the-ground scouting trip for elk.
If you don't have a GPS, it’s not a huge deal and can be worked around. Fortunately, maps can be printed off so you can take your waypoints with us. Depending on your hunting area, it may be necessary to print off a few maps in an effort to maintain picture quality. While the printed maps certainly won't lead you to an exact spot like our GOHUNT Maps mobile app can, they will still give you a starting point, which is essentially all that you will need during the scouting process.
The third and final segment of this scouting series, I cover actual in-the-field scouting practices for elk and what to do with your gathered information once you return home.
This article was originally published on July 26, 2016, and has been updated with more information.
At two miles, my short hike is a great starting point to distance myself from the crowds and will likely weed out 90% of the other hunters.
The short hike features only 988 feet of elevation gain (small for this area of this state) but the bulk of which is in the first half mile of the hike; this will also weed out nearly all of the competition.
The long hike features roughly 1,000 feet of elevation gain after the two-mile mark, which will further hinder the spirits of anyone who has made it to this point.