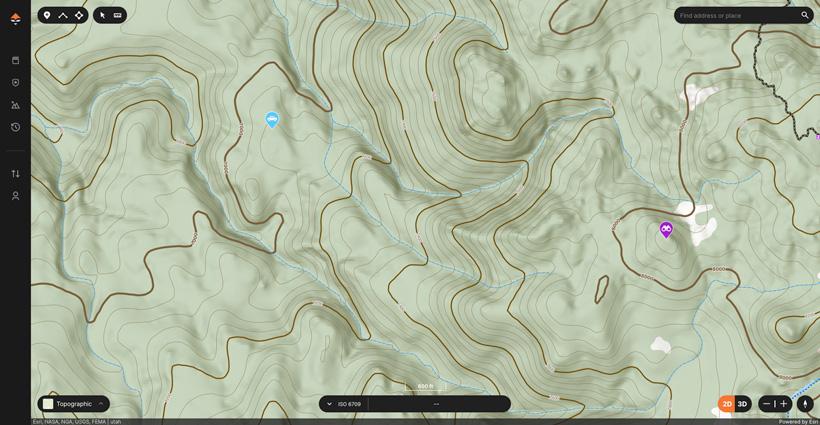


Recently, GOHUNT released our new custom topo that is built directly with the hunter in mind. This features an incredibly accurate shaded relief along with topo lines to create a visually stunning and easy to read topographic reference. I always considered myself a bit of a “topo-nerd” and I have to say that I have been gushing over this map since its release! Generally, I am a person who rarely uses a satellite base map while in the field and, instead, rely almost solely on the topo maps for navigation.
With this, my primary focus when heading into a specific area is always locating the best and most efficient travel routes while also putting myself in the best position to punch a tag.
Using the new GOHUNT topo, I can quickly identify easy travel routes as well as any potential roadblocks or interesting terrain features that I may encounter along the way.
In the following example, I will run through a quick scenario on Maps and how I can use GOHUNT topo to best decide my route to a particular spot. You will notice below a purple glassing point I have identified on the right hand side of the map along with an arbitrary starting point noted by the blue truck icon in the upper left. In this particular scenario, we will imagine that we are parking our vehicle at the blue truck waypoint with the goal in mind of navigating our way to the purple glassing point.
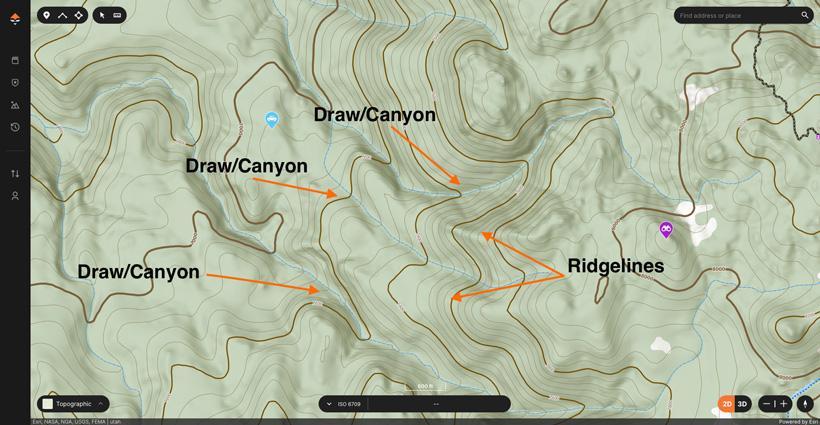
In the below screenshot you will see a quick breakdown of terrain features noted in the topo information.
Typically speaking, a good ridgeline will provide some of the easiest walking and climbing conditions as most draws and drainages tend to be heavily vegetated in the bottoms. This will largely depend on the terrain and local fauna, but it is a good rule of thumb. For me, big ridgelines are my go-to for quickly moving through country and for giving myself the best opportunity to potentially find game while traveling from spot to spot.
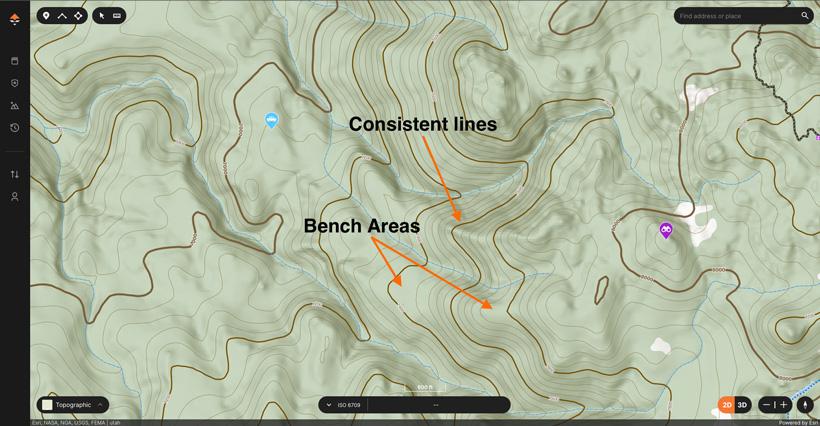
After identifying a few potential ridges for my climb, I like to then look at some of the specifics of each one. Primarily, I identify how steep the ridge is and whether there are any obstacles I might encounter such as knife ridges, cliffs, etc. In the below screenshot, you will notice that the upper ridge has contour lines that are closer together and more consistent. This will likely lead to a slightly steeper climb at a constant rate, but, likely, a quicker trip to the top. The lower ridge has lines that are further spaces or more sporadic. This tells me that this ridge has a few flatter or benched out areas and is going to be a more gradual, but longer climb.
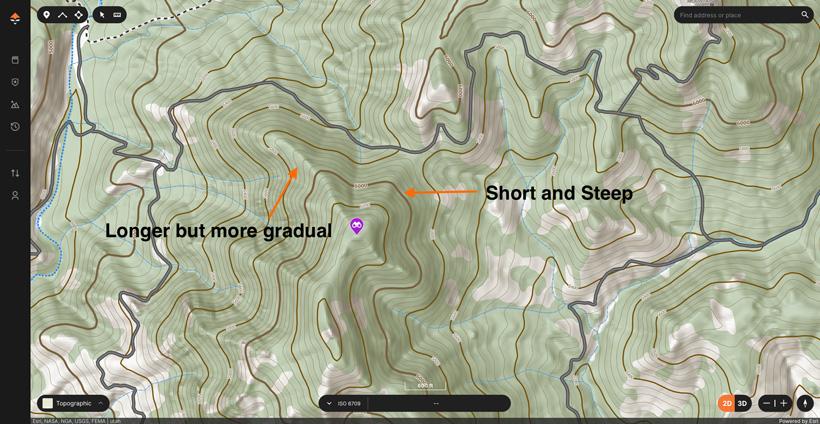
Choosing which ridge to climb up will largely depend on my approach in the morning. If I want to get to my glassing point by daylight I may opt for the quicker, but steeper climb on the upper ridge. However, If I want to hunt my way into the glassing location, the lower ridge with benches will provide a comfortable and slow hunt where I can glass on my way.The below screenshot is from a different area, but does a good job of illustrating another example of certain ridgelines ending at the same point, but providing a different type of hike.