


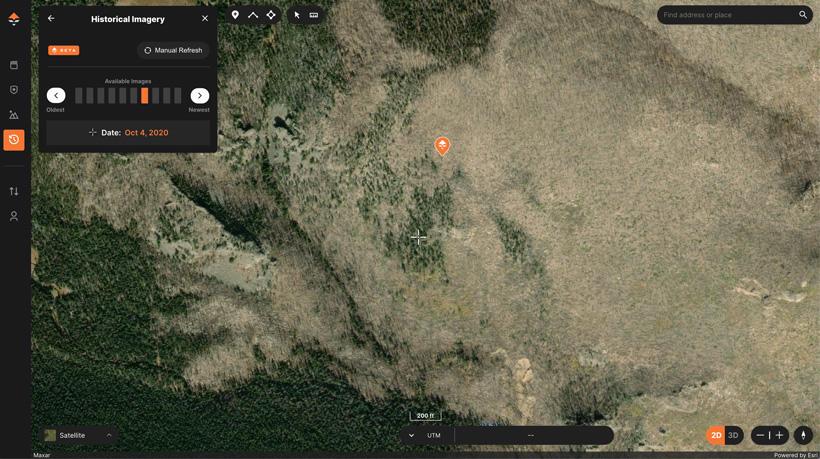
Earlier this week, we launched a brand new tool to our web version of GOHUNT Maps called Historical Imagery. This tool really helps when trying to find that extra little bit of e-scouting intel by checking out satellite imagery from different months and years. Learn more about the launch of Historical Imagery here.
The best part… there’s literally a plethora of different ways to use our Historical Imagery tool. This article is the kick-off to a series we are doing showcasing some of the ways you can use historical satellite imagery for your e-scouting efforts. The first up is a way you can use this tool when checking out burns.
So how would a person use historical imagery for a wildfire/burned area? It’s no secret that burns can be productive to hunt. They are definitely not an end-all-be-all, though. Just because you found a burn on a map, doesn’t mean there will be a ton of animals living in and around it. But if you have some areas that are burned, learning how to hunt a burn can be another tool in your toolkit.
One of the main ways I like to use Historical Imagery for burns is by going back in time to see how the burn is aging. What I mean by that is using prior year imagery to see what the burned area looked like when it was fresh, a few years later, and then what is the burn looking like after it gets more and more years post-wildfire. Some burns age fairly decently, and the terrain is still easy to hunt, other burns, you’ll get a ton of trees that will fall down, making it a fun experience to hunt and hike through (that intel could be used to guage hunter pressure as those burns with criss-crossed downed trees is a pain to hike in, so it could keep people out for the most part).
When looking at the progression of a burn, you’ll be able to notice small changes over time.
Also, when it comes to burns aging, as the burn progresses and trees fall or limbs fall off, you can get an idea of how much you can glass into a certain area of the burn. I even like to see if there’s imagery of a burn with a little snow on the ground as that can be nice to see to show you how much you can see into a particular burn or if the burn is too thick to glass.
A quick burn example using Historical Imagery
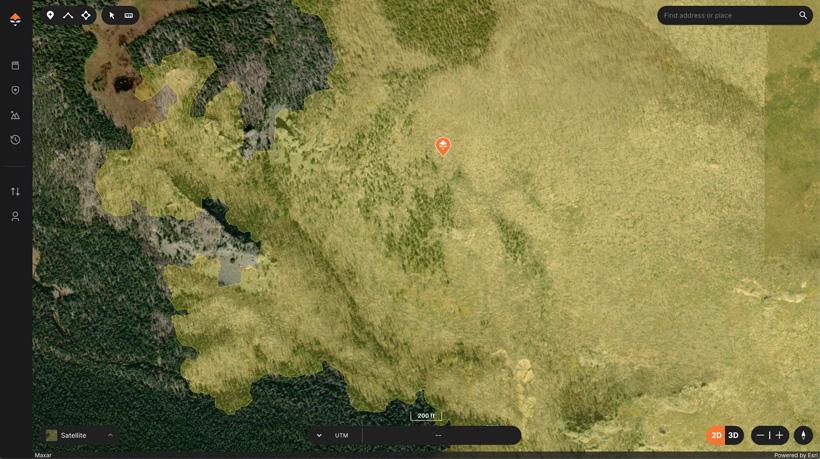
The above image shows an area that was burned by a fire in 2010. I used the wildfire layer on GOHUNT Maps to highlight the burn in the screenshot. I could then adjust the transparency as needed, or in my case, I just turned it off after I pinpointed the burn.
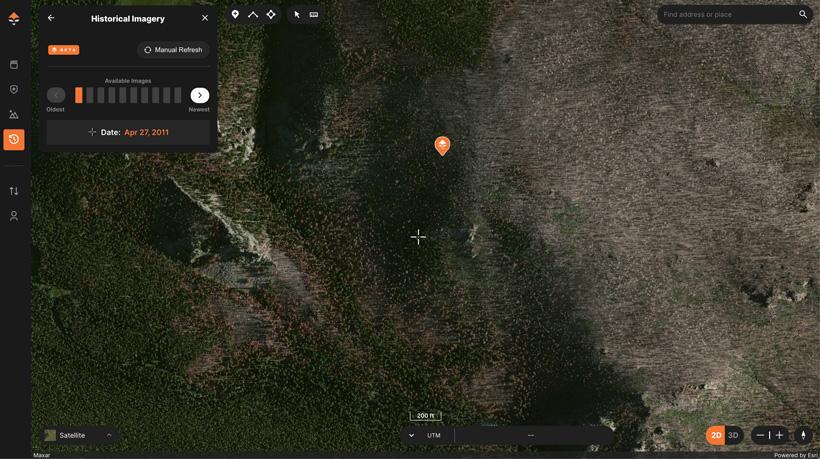
In the above image you can now you can see the satellite imagery of that same area one year after the burn. You'll notice that from this view, not a lot of green shows up. But if I'd zoom in, I bet I could see some greenup in the image. The main point of this image is to show what a burn looks like on satellite imagery after one year, and letting you know that you could start to analyze a burn for areas near the edge or pockets that show new green growth.
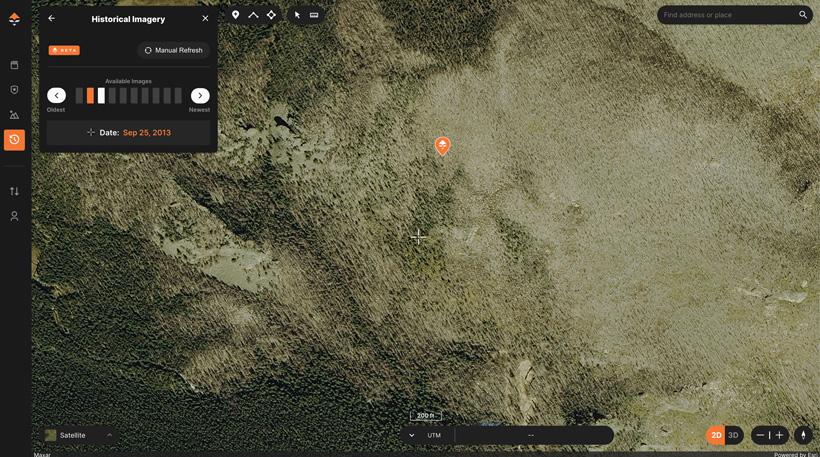
Looking at the same place and adjusting the historcial image slider, now the above image is three years after the burn. You can really start to see where the pockets of greenup are located near the edge habitat, as well as small pockets of green in some of the middle areas. Again, zooming in would allow you to see more detail.
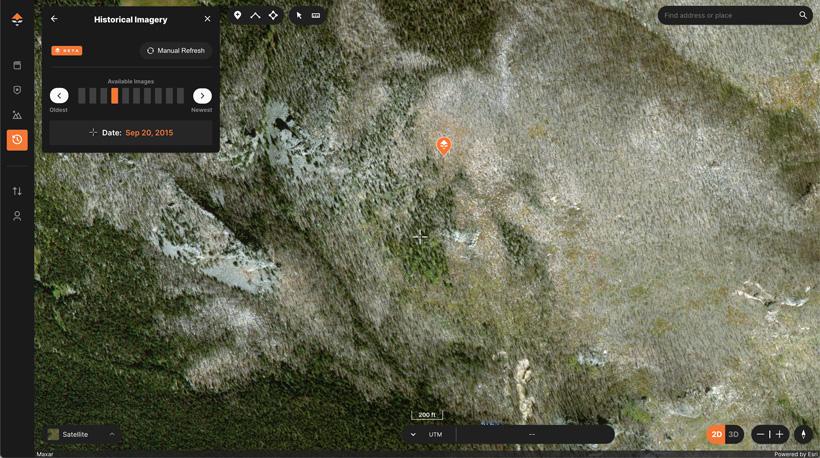
The above image is now five years after the burn. Again, you can easily see areas that are more green than others. One thing that is interesting, you can really see those green areas near edge habitat and random pockets very easy in this image.
And finally, the above image is 10 years after the burn, where now you can start to see bigger changes.
In my honest opinion, when to hunt after a burn greatly depends on the type of burn, the amount of timber in the stand, and when in the year it burned. Did it burn hot? What was the timber/vegetation like before burn? How steep is the terrain? This little puzzle could become easier now with Historical Imagery as you can see how the burn is changing as time goes on. This is then information you could use to your advantage in other fresher burns with some of this intel you have gained from your e-scouting and boots-on-the-ground scouting.
For example, in the above images of that burn, I can see some great green-up in the imagery. It’s hard to say exactly how long hunting this burn could be “great,” but at least it gives you an idea of when the vegetation is getting better for a burn in your area. And even as a burn ages 10 plus years, it doesn’t exactly mean it will not be a solid spot to hunt anymore, but looking at our Historical Imagery as the burn ages, you’ll be able to see to what degree the burn changes, where some of the vegetation is growing back at, is the area becoming overgrown with new trees, and you might even be able to put a plan in place for how to hunt that burn based on green pockets.
From my experience, I’ve hunted burns of all ages, some even close to when they burned, and some decades after it burned. While every area is different, one thing I’ve learned is it does seem that elk really do great on a recent burns, as grasses are usually the first to grow back. Whereas the ideal vegetation for mule deer usually takes a little longer (maybe a year or two). That’s not hard science evidence, just what I personally have observed. And now with Historical Imagery, you can visually see how things are changing in a burn, and cross reference with what you observed for animal activty after putting boots on the ground or hunting it. This is all about data collection.
If you can find a burn with some recent imagery after the fire, that could clue you in to areas that might be worth investigating due to cover and feed.
If you’re not familiar with GOHUNT, check out the link below to learn more about everything we cover to make your e-scouting and hunting efforts more successful. Everything you need to have the best season ever can be found in our Insider account. You can also check out our maps and research tools on a 7-day free trial.