


Photo credits: Stefan Wilson
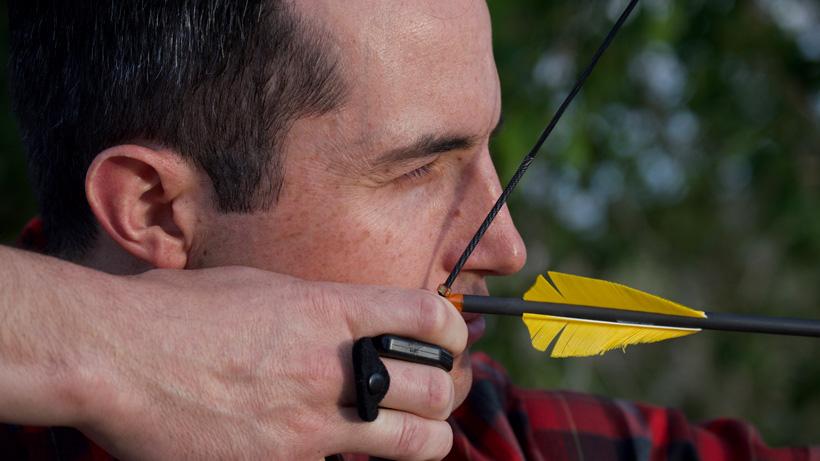
Corner of Mouth
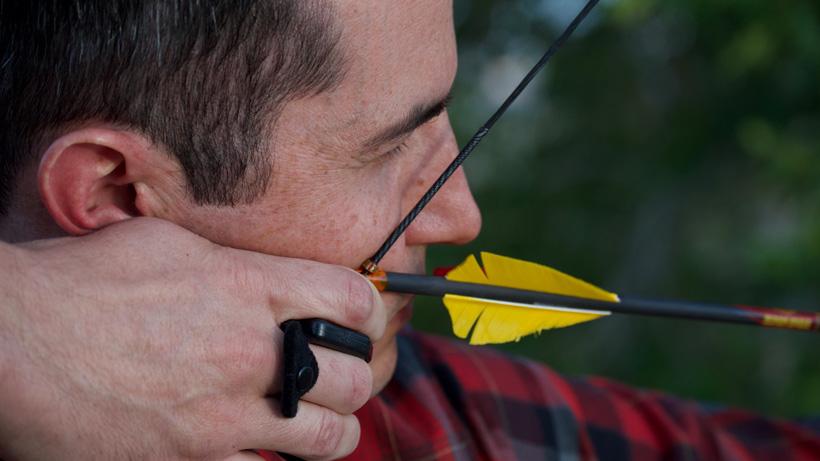
Knuckle on ear

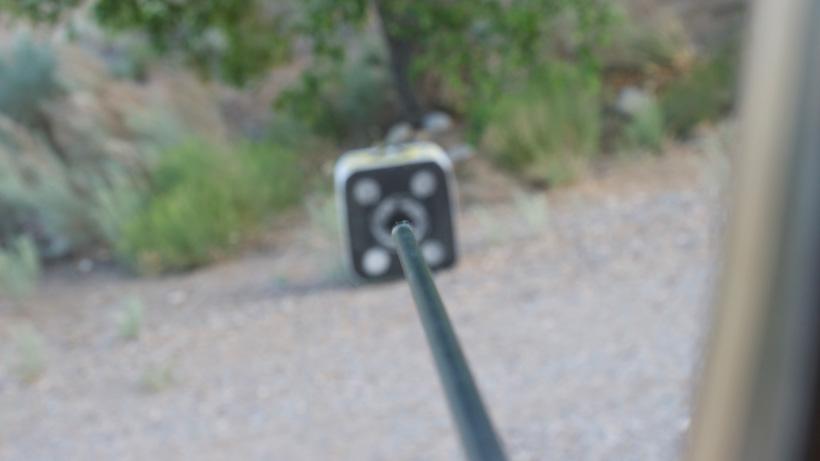
Point aiming
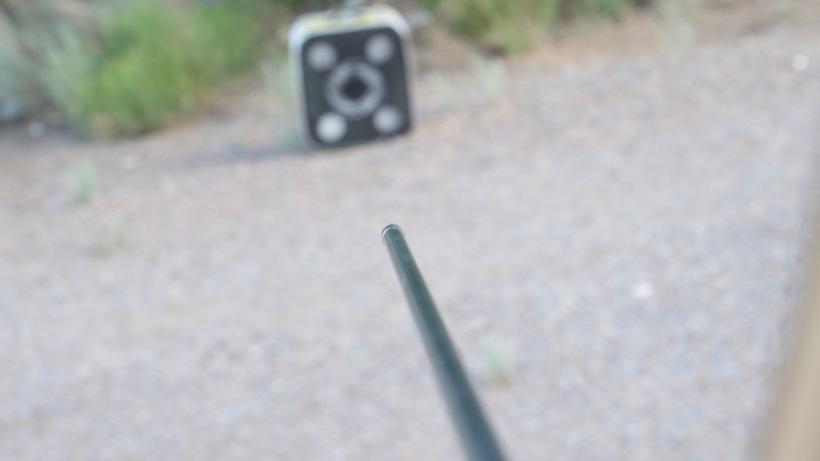
Gap aiming
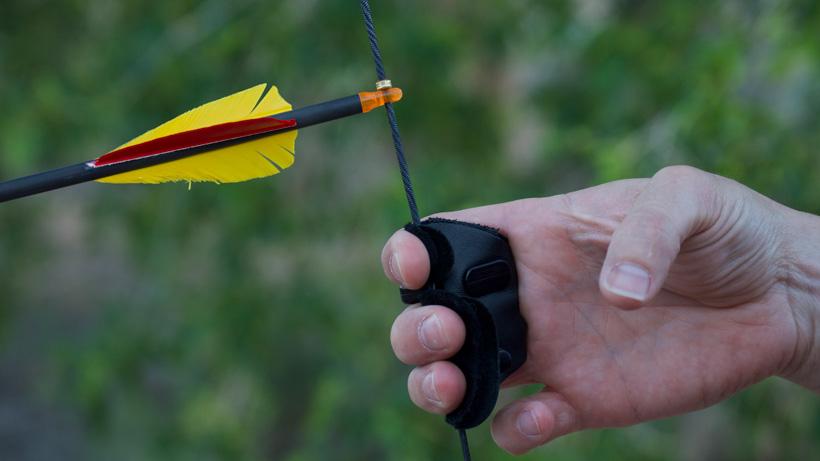
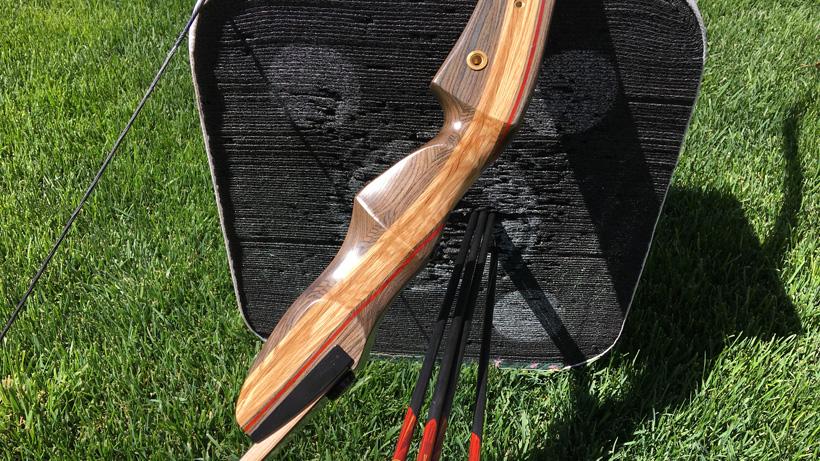

Photo credits: Stefan Wilson
In Part 1, we discussed the essential gear needed to get started traditional bowhunting. You can check out the first article here. In this article, we will focus on proper technique for shooting your recurve or longbow as well as some ethical practices to keep in mind when making the switch from a compound to a traditional bow.
Shooting a traditional bow is simpler than shooting a compound in the sense that you do not have multiple pins, a peep, a release and other components to worry about. Shooting a traditional bow; however, is not simply a matter of pulling back the string and letting the arrow fly. There are very technical elements to your form and aiming that will make or break your ability to become proficient with a recurve or longbow.
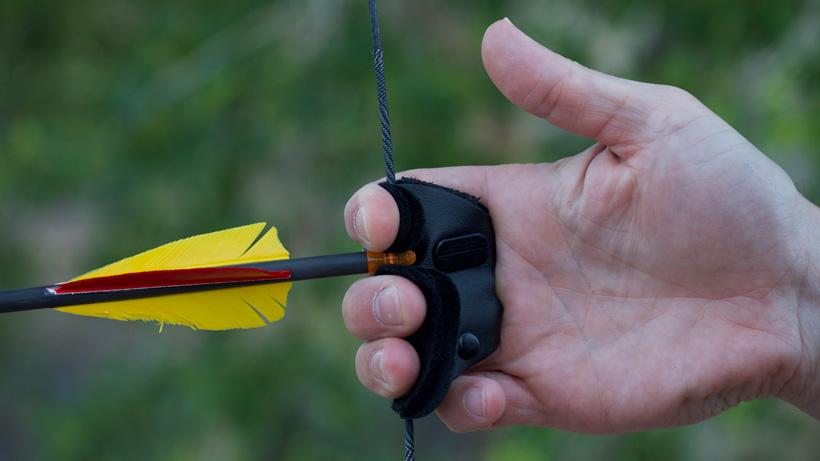
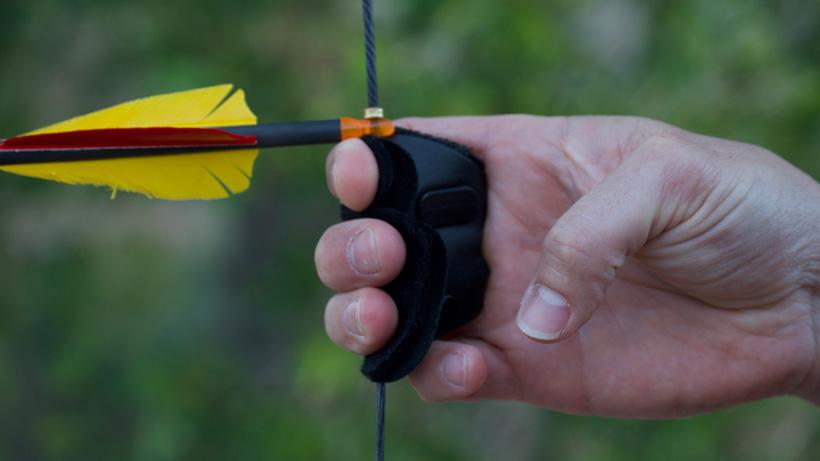
The first step in proper technique is deciding your finger position. There are two main options when it comes to this: split-finger and three-under. (Some people utilize a thumb release, but this is not common so it will not be covered in this article.)
The split-finger position involves positioning your index finger above the nocking point of your arrow with your middle and ring fingers below. This position is favorable if you utilize the instinctive aiming method (more on that later) or if you prefer a larger sight picture when at full draw. This is because split-finger causes the arrow to sit lower in relation to your face, thus allowing you to have more visibility at full draw.
Three-under is exactly what it sounds like: your three fingers (index, middle and ring) are all positioned below the nocking point of your arrow. This position is favorable if you use the tip of the arrow for aiming purposes or if you use the string-crawling method of aiming (more on that later).
Regardless of which position you decide works best, try them both out extensively to really get a good idea of which one you prefer. Just because it works well for one person does not mean it will work well for you.
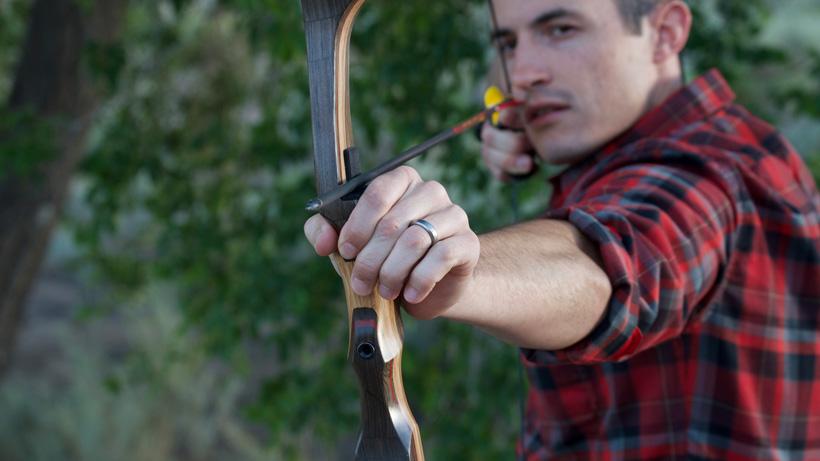
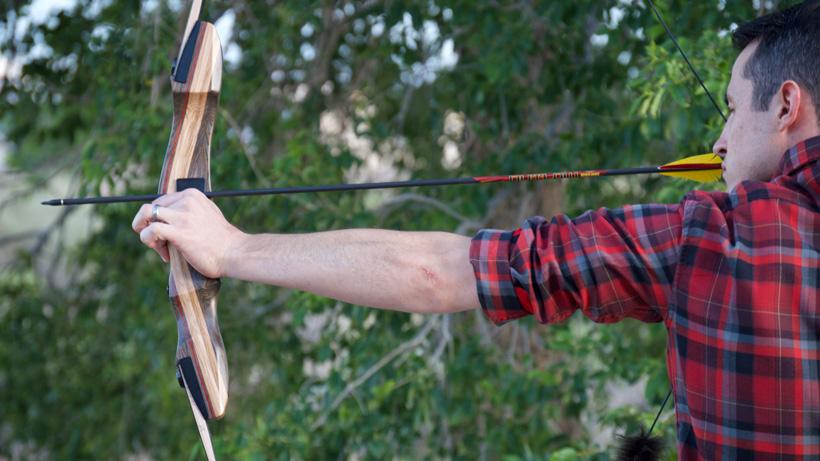
Proper grip on the bow is similar to a compound bow, except the bow with have a slight cant (tilt) to it. You should not grip the bow, but should have a loose grip with your top finger and thumb, allowing the bow grip to rest against your palm at a slight angle. Your middle, ring and little finger should not be gripping the bow at all (see below).
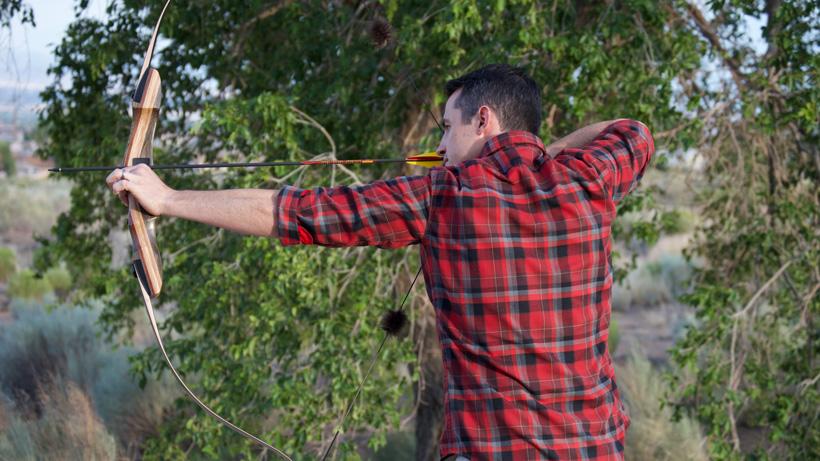
Shooting a traditional bow starts with proper form. To begin, find a comfortable semi-open stance. You do not want your front foot so open that it is difficult to fully draw your bow and point toward your target. You also do not want your stance so closed that it makes it difficult get your eyes on target while maintaining your anchor point.
You do not want your bow arm (the arm that holds the bow extended at full draw) to be bent. Bending your bow arm can cause soft tissue damage in your elbow as your ligaments fight to hold the bow against the full draw weight; instead, straighten your arm so that your muscles and joints can all work together. Your arm should be straight, but not hyper-extended. Practice coming to full draw until you can get a feel for this.
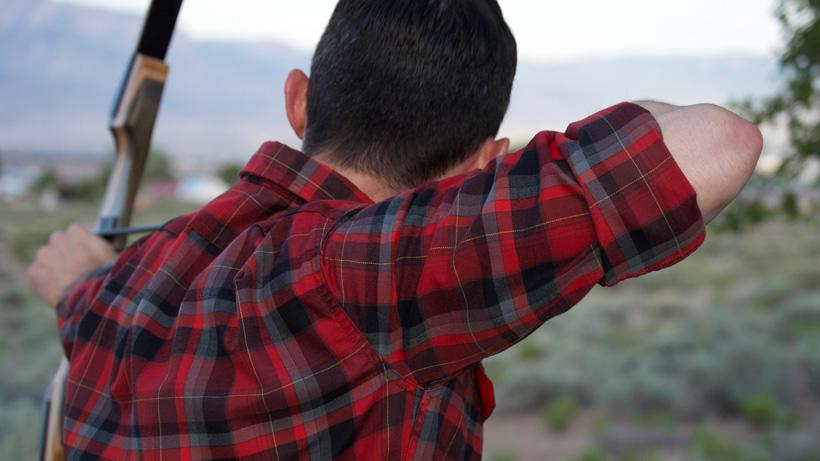
Your string arm (the arm that draws the string back) should come back so your hand comes straight to your anchor point. It will feel normal to use your arm to draw the bow back, but you want to focus on drawing the bow by imagining that the squeezing of your shoulder blades together is actually drawing the bow back. This will ensure that you take advantage of your full draw length (the longer the draw length, the faster your arrow will fly) as well as get your upper body into proper alignment at full draw. Drawing back using your arm will likely cause you to draw short and lose some performance out of your bow.
Everything about your draw and anchor must be consistent from shot to shot. Variations in the draw process will cause erratic groups and are the enemy of consistent, accurate shooting. Practice the process of drawing and anchoring your shot until it becomes second nature to do it exactly the same every time. Also, practicing your draw without releasing your arrow (draw, hold, then let down) will help you to avoid developing target panic.
Just as with a compound bow, a consistent anchor point is absolutely essential to being accurate with your traditional bow. You can really anchor anywhere on your face, neck or head, but there are two options that make the most sense.
The first anchor point is to bring the point of your index finger to the corner of your mount. This gives you a very specific point of contact on your face that is very close to the nocking point of the arrow. It also keeps the arrow in front of your face so that it does not contact your face anywhere as this would cause erratic flight.
The other option (which I personally prefer) it the rounded point of the knuckle at the base of your thumb on the back of your jawbone just below your ear.
The key to any anchor point is consistency. Hit the same anchor point every single time to ensure that your groups are consistent. As with everything else, try both options out (or a different anchor point if it works better for you) to find what you prefer.
A quick note about anchoring: Aiming will be much, much easier for you if you first find an anchor where the nock is vertically aligned with (directly under) your dominant eye. This will ensure that your sight picture will have the arrow aligned with the target. If the nock is not vertically aligned with your eye, then you will find that your arrows will hit to the side of your point of aim.
The release of the arrow is incredibly important to accuracy with your traditional bow. Your bow hand should at no time grip the bow. Just keep your index finger and thumbs positioned so that the bow doesn't fall out of your hand, but can, instead, freely tilt after the arrow has been released. Your release hand should slowly slide off the string as you use your shoulder blade to pull your arm back away from the string. The release should be a surprise each time, just as with a compound. If you develop a habit of releasing now! you will grab the bow with your support hand and throw the flight of the arrow off target. Practice proper release by shooting blank bale until you have the form and release down.
Once you have the draw form and release down, now it is time to learn how to aim. Do not focus on aiming until you have the form down. This helps you focus on one thing at a time and not develop bad habits. Once you have proper draw, anchoring, and release techniques, then you can start focusing on putting the arrow exactly where you want it. There are multiple ways of doing this.
Some people find it easier to use a sight on their traditional bow. and that is totally OK. As long as you have a consistent anchor point, this is the quickest way to become proficient at specific ranges; however, if your anchor point is not perfectly consistent, you can develop a serious handicap in which you will not be able to rely on your pins. If you go the site route, spend extra time with your anchor point to maximize the effectiveness of your sight.
Some may not want to put a sight on a traditional bow. This is a personal choice. Do what you are most comfortable with. If you don't want to use a sight, then there a few other options.
Instinctive shooting does not actually use an "aiming" method. Instead, it forces you to be dependent on your subconscious to make the necessary corrections to your arrow flight while your conscious mind focuses solely on your target. To instinctively aim, pick a point on your target and focus on absolutely nothing but that point; the smaller the point, the more minute your focus. When this is mastered, your arrow will go where you are looking. It requires the least conscious thought, but it also requires the most practice. It takes archers anywhere from months to years to become proficient with this method, especially at varying ranges. Let's face it: Not every deer or elk stands at exactly 15 yards. Practice is paramount to proficient instinctive aiming.
Gap shooting is a very common method of aiming which utilizes the tip of your broadhead in relation to your target. Every bow/arrow set-up will have a "point-on" distance (the exact distance at which your arrow will strike your target when you place the tip of your broadhead on the point of aim in your sight picture when at full draw). To "gap" your target, you must then adjust your point of aim in relation to the animal. If it is closer than your point-on distance, then you must aim below your target. If it is further away, then you must aim above your target. To be proficient at this method, you must become proficient at judging yardage as well as knowing how to determine proper compensation.
Let me paint a scenario to make this more clear: Imagine that your point on distance is 40 yards. Now imagine that your target is at 20 yards. If you just placed the tip of your broadhead on your target when at full draw, then you would shoot high because your target is closer than your point-on distance. Instead, based on your set-up you would need to aim 15" low in relation to your target (depending on your bow's speed/arrow weight). This means that you would need to be able to know what 15" is against your target while standing 20 yards away.
* This is completely hypothetical and is meant to be an example. You have to determine your specific point-on and gap based on your gear.
The biggest drawback to this method is that if you estimate the range wrong or you estimate your gap wrong, you will miss your target. While this doesn't matter as much on paper, if you wounded an animal because of a mental mistake, that would be much harder to accept.
String crawling is a method of aiming in which you move your hand up and down the string below the nocking point of the arrow to change the trajectory of the arrow. Since your anchor point remains the same, moving your hand down the string a few inches will cause the arrow to be higher in your field of vision, allowing you to use the tip of the broadhead as your point of aim regardless of distance. Simply slide your hand down further for closer shots and higher for longer shots up to your point-on distance with your hand up to the nocking point.
This is a great method of aiming if you prefer the three-under method and like being able to use the tip of your broadhead against the target. It is very difficult; however, to get an accurate reading on the yardage of your target, adjust your position on the string, and execute a shot on a potentially mobile target.
While all of these methods are quite different from one another, what is consistent between all of them is the need to practice extensively in order to become proficient with one of them. My advice would be to try all of them out and see which one works best for you. Once you know which one is more comfortable for you, practice until it is second nature.
If you are planning to use a traditional bow for bowhunting at any point there are a few things to keep in mind.
If you want to become proficient with a traditional bow, you have to practice and practice and practice. Do not fool yourself into thinking you can shoot for a couple of weeks and be good. You will likely need to establish a shooting regimen every day for months to even begin to feel like you are scratching the surface. Many people who are skilled traditional archers will tell you it took them years to reach a level where they felt like they were proficient. Start practicing now.
Your range will shrink. Your bow will be slower. Your arrows will be heavier. You will not have all of the modern advancements that your compound bow has. These are all non-negotiables and occur when you switch to a traditional bow. Accept them and don't act like your gear is the exception. Check your ego at the door and recognize that this is a more challenging way of hunting. You must adapt your hunting to fit the gear you have.
You need to know your gear incredibly well, which means that you must practice extensively and know your effective range. This includes both your maximum effective range (the furthest distance at which you can consistently hit your target) and your adjustments for yardages within your effective range. Never take a longer shot than you have routinely practiced. While you might think you can make the shot, if you have not proven over and over in practice that you can make that shot, then it is not a shot you should take. You owe it to that animal to make a clean, quick kill. Taking a shot at a distance you have not practiced is not ethical, especially with traditional gear.
Since you will be shooting a recurve or a longbow, which are inherently slower than a compound bow, speed cannot be your focus. It can be tempting to think, "My bow is slower so I will use a lighter arrow in order to get a bit more speed." The problem with this is that a lighter arrow traveling fast has less momentum than a heavy arrow traveling slower. To put it in other terms, a bowling ball moving at 10 mph has more momentum than a baseball thrown at 100 mph. Choose a heavy arrow, in the 9 to 11 gpi (grains per inch) range and make sure that your broadhead is as razor-sharp as possible. These factors will increase penetration, which will increase your ability to execute lethal shots on game.
Since traditional bows are slower than their compound counterparts, it might be tempting to pull a heavier draw weight in order to gain more speed. However, there is a significant drop off in your ability to shoot your traditional bow well when pulling a higher draw weight. It is better to shoot a 40 lb recurve that you shoot with very good form than to shoot a 50 to 55 lb recurve that you do not shoot well. Shot placement and arrow penetration are key. When it comes to draw weight, stick with a draw weight that you shoot well, but also make sure that you are pulling your state's minimum required draw weight (check your state’s regulations to confirm what the requirement is).
Since your effective range will be limited and the performance of your gear will be reduced compared to your compound bow, you will need to become more proficient in the other aspects of hunting. Since your range is limited, you will need to become better at stalking closer to your prey. You will also need to become more proficient at calling your prey closer to you. Learn how to use your optics better and spend more time scouting to locate and pattern animals. What you will find is that the handicap of the traditional gear will actually make you a more well-rounded, proficient hunter.
You are going to miss. Period. At times, you will miss shots that would have been nearly automatic with a compound; other times, you will miss out on even getting a shot because you cannot close the distance since the bull or buck will hang up just outside of your effective range. Let me give you a piece of advice: The phrase “I could have shot him with my compound” will become a sickness if you let it. Don’t think like that because you didn’t have your compound—you had your recurve and you couldn’t shoot him at that range with your recurve. End of story. The sooner you accept this, the sooner you can get over your missed opportunities and try again. That is when the true learning happens. I firmly believe that we learn the most when miss and you will learn a lot when you hunt with a traditional bow
You have just undertaken one of the last remaining true challenges in hunting: bowhunting with traditional gear. If you successfully fill a tag—any tag—it is a trophy. Whether it is a trophy bull or buck or cow or doe, you should be proud of the hard work, dedication, and persistence it took to take that animal.
I hope these articles have led you to consider hanging up the compound for a while and taking on a new challenge. Or perhaps you have never shot a bow and you want to start by shooting a recurve or longbow. Either way, may your aim be true and your hunts memorable as you seek to live the trad life and become a traditional bowhunter.