

Traditional archery has experienced a significant upswing in popularity as more hunters seek out a new challenge and others search for ways to return to the traditional roots of the archery hunting lifestyle. If you have considered giving traditional bowhunting a try, this article is for you. This series of articles will detail the basics of getting into traditional archery and, while it won’t cover everything, it will cover the information you need to get started. Part I will detail the basic gear needed to get into traditional archery. Part II will go over proper technique as well as ethical practices for traditional bowhunting.
No matter what your motives may be for getting into traditional archery, I can promise you this: it will not be easy, but it will be fun and rewarding. Becoming proficient takes a lot of time, practice, and a little bit of money. It will be frustrating, but also very exciting. If you are willing to take on this challenge it will definitely make you a better hunter and a more well-rounded archer.
First, let’s start with gear. Traditional archery does not have as extensive of a list of required gear compared to the compound side of archery. With a compound bow, you need a release, arrows, bow, rest, sight, peep, stabilizer, and other items. With a traditional set-up, all you need is a bow and some arrows. However, there are a few other items that are highly recommended to maximize your bow’s potential.
A quick word about traditional archery gear: some "purists" will say that anything aside from a stick, string and wooden arrows are not traditional because it utilizes modern technology and is, therefore, no longer "traditional." For example, if the bow has an arrow rest or if the arrows are anything other than wood, it is not traditional. While I absolutely respect their decision to be so committed to the old way of doing things, I disagree that modern improvements are not traditional.
For me, traditional archery is about the style of shooting and the mentality that accompanies it more than it is about the gear. Do not let the opinions of others dissuade you from finding what will work best for you. After all, this is something you are doing and you need to find what works best for you so that you can enjoy it as much as possible.
Here are the items you will need to get started in traditional archery:
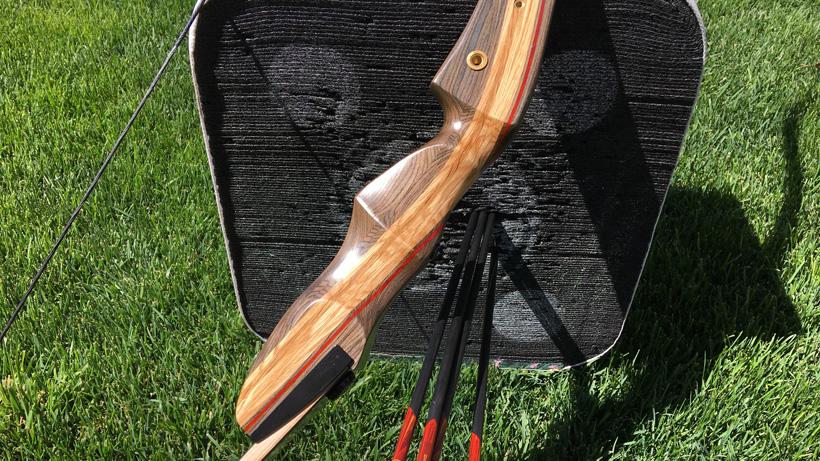
Of course you need a bow, but what kind of traditional bow you select is completely up to you. There are multiple types of traditional bows and each one has some pros and cons:
Start with an easy to manage draw weight until you can get the form down. Drawing too much weight out of the gate is a great way to develop terrible form and never become proficient with a bow. I recommend starting with a 25 to 35lb draw weight. You might not be able to hunt with that weight (depending on state regulations), but you will be able to get the technique down before stepping up to a hunting weight.
A takedown bow is a bow that has removable limbs for easy storage and portability. If you start with a takedown bow, you can increase weight over time by just buying new limbs rather than buying an entirely new bow. Some great options for low cost takedown bows that are still great bows for hunting are the PSE Night Hawk, Samick Sage and Fleetwood Edge. Once you build the strength and hone in your technique, then you can go out and buy a nice, high-end bow. You will be far deadlier with it and you will enjoy shooting it much more in the long run than if you went out and bought a high dollar, high poundage bow right out of the gate.
A quick word regarding buying your first bow: it can get easy to get lost in the weeds of all the different options regarding one-piece or takedown bows, takedown risers and limbs. The best advice I can offer you is to go to your local shop and have them show you the options so that you can find what will work best for you. Weight, grip shape, length, draw weight, limb materials, riser material, and ability to accessorize are all variables that will affect your decision. It makes more sense to get some professional help on this decision than to take a shot in the dark (pun slightly intended) and hope you like what you ordered online but never actually tried.
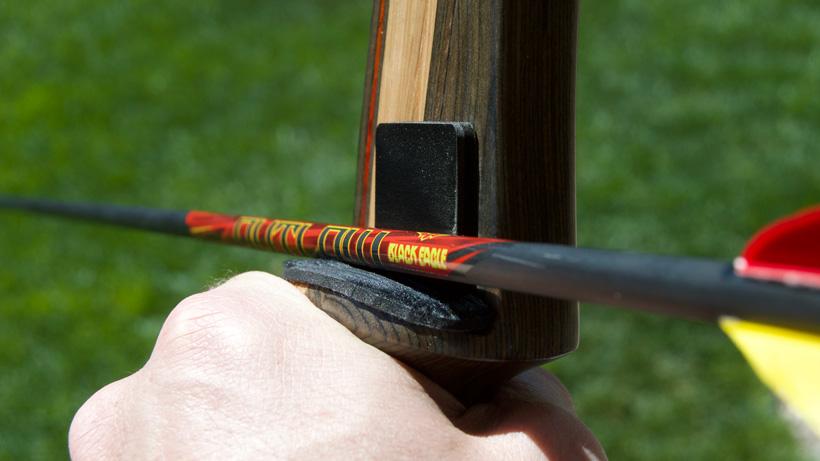
Modern advancements in arrow technology have made this the Golden Age for bowhunters and traditional archery is no exception. While you can still shoot wood arrows like they did centuries ago, finding consistent spine across a selection of wood arrows is very difficult. I suggest starting out with some low cost aluminum arrows or, better yet, some carbon arrows designed specifically for traditional bows. Companies like Black Eagle Arrows, Easton and Gold Tip have developed arrows that are designed specifically for traditional bows yet utilize the latest in carbon arrow technology.
When selecting an arrow, focus on weight, not speed. You can check out this article for how to select the perfect arrow here. Momentum is the name of the game in traditional archery, not speed, and to gain momentum you have to have a decent amount of weight. The rule of thumb is to shoot an arrow with 9 to 11 grains for every pound of draw weight. Additionally, momentum is further helped by having a high FOC (front of center) for your arrows. Shooting heavy inserts and 125, 150, or 200 grain broadheads will ensure better down range accuracy as well as deeper penetration thanks to increased front weight. It is not uncommon to see traditional bowhunters shooting 500, 600, or even 700 grain arrows. Heavy arrows will be slower, but they will also be deadlier thanks to the increase in penetration. You can check out how to build the perfect arrow in this two part series: Part 1 and Part 2.
Once you have selected your arrow, determining your arrow spine is absolutely essential. While shooting an over-stiff arrow from a compound with a drop-away rest has its benefits, shooting an over/under-stiff arrow from a traditional bow will have drastic and negative effects. Archer's Paradox is a term that refers to the phenomenon of the dynamic spine causing the arrow to bend as it is released, allowing a properly spined arrow to bend at precisely the right moment to clear the shelf of the riser without making contact. If it’s too stiff, your arrow will strike the riser with its tail end and plane hard to one side mid-flight. If it’s too weak, your arrow will not stabilize quickly enough, causing erratic flight and huge groups. To shoot accurately, you must select a properly spined arrow.
The best way to determine proper arrow spine is to first consult your local dealer for the recommended spine of a given arrow based on your draw weight and draw length. Next, shoot bare shafts of the recommended spine, adjusting front weight and length accordingly until you get consistent arrow flight (adding weight to the front of the arrow will weaken the spine of the arrow and cutting length off of the arrow will stiffen it). To do this, shoot a group with bare shaft arrows and then a group with fletched shaft of the same length and weight. If they do not group, you have some adjusting to do. As a general rule, if your bare shafts are hitting to the left, your arrows are too stiff; if they are grouping to the right, they are too weak. Once they group together, then you have the perfect arrow spine, length, and front of center for your traditional set-up. I recognize that this will be time-consuming and require some upfront cost; however, traditional archery does require time and upfront investment to get it right.
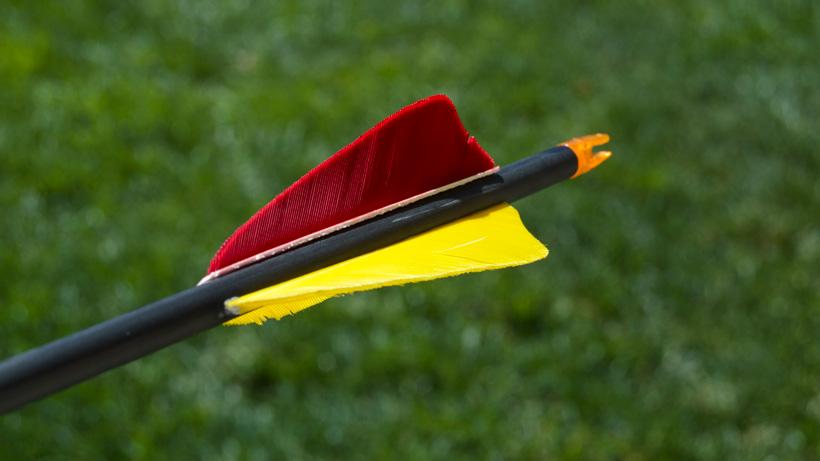
When it comes to fletchings on your arrows, you can shoot vanes or feathers. This depends on whether you are shooting "off the shelf" (the natural cut-out on the riser) or using an arrow rest. If you're shooting off the shelf, feathers will be more forgiving than vanes in the event that they make contact with the riser. If you're shooting off of a rest, then you can shoot whatever fletchings you like because your arrow will have full clearance as it passes over the riser. You can check out this article for how to select the perfect fletching here.
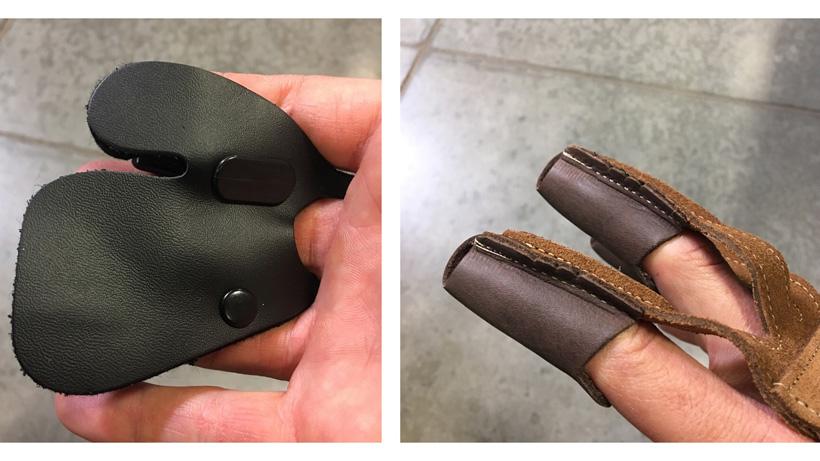
It is completely acceptable to shoot your traditional bow with your bare fingers; in fact, that was the only option for centuries! However, a finger tab or glove can help smooth out your release and aid in consistency, especially when you are starting out. Finger tabs are very simple and rest against your fingers, giving you even contact on the string. You can buy finger tabs that have a face fabric of cordovan leather or horse hair. Leather tabs break in nicely and will last for years. Horsehair tabs are nice and smooth when new, but can breakdown over time and are not as durable as leather. I highly recommend using a leather tab if you choose to shoot with a tab. The biggest drawback with a tab is that you have to be careful not to lose it when it is not on your hand since it is relatively small.
Shooting gloves (also known as fingers) slide over the top of your index, middle and ring fingers and have a strap that secures it to your wrist. Shooting gloves can be made of suede or cordovan leather and are nice because you do not have to ensure you did not drop it somewhere like you do with a tab. However, the drawback with gloves is that the crease that is made at your knuckles when you bend your fingers can cause your release to be jumpy because it is not as smooth and seamless as a tab. Both options are inexpensive so I would recommend trying both out to see which one you prefer.
A bow stringer is essentially a long string that has a sock end that fits over the tip of your limb and an adjustable tensioner on the other and. By placing your feet evenly on the string and pulling up on the bow, you can safely bend the limbs to remove the tension on your bowstring and remove it from/place it back on your bow.
This might not seem important, but I can assure you that it is. While there are plenty of examples of people placing the end of their bow against their feet to string their bows, this can lead to damaged or twisted limbs, especially as you increase the draw weight of your bow. Do not even risk it! Buy a quality bow stringer and you will never have to worry about damaging the limbs of your bow.
There are other accessories that are not as essential as your bow or arrows, but they can make your traditional archery experience better depending on your personal preferences.
That covers the basic gear you will need to get started. It’s important to experiment with arrows, release styles, etc., so treat this list as a guide to get you started; it is not the end all be all of gear selection. In Part II, we will cover proper form for shooting your traditional bow and some good habits to develop to become a more proficient traditional bowhunter. Part II can be found here.
Recurve bows are what most people think of when they imagine a traditional bow. The limbs curve back and then forward in a slight "S" shape, hence the name "recurve." They are among the shorter traditional bows (48" to 62") and are capable of generating more speed than a longbow, but they are also slightly louder than a longbow.
Longbows, as their name implies, are typically longer than recurves (64" to 68") and are not as fast. They are, however, quieter and smoother than most recurves. If speed is your primary concern, a longbow is not for you; however, if comfort and stealth are your biggest priorities, then a longbow could be a great option.
Hybrid bows (also known as a reflex/deflex bow) are a nice middle ground. These bows have a slight reflex curve to the limb, but are not as extreme as a recurve; they are a hybrid design that seeks to capitalize on the best parts of both bow designs. The hybrid design allows for wider, shorter limbs than a traditional longbow, allowing for a smooth shooting, yet high-performing design.
Arm guard – If you have a tendency to hit your forearm with the string after your release, an arm guard is a cheap barrier against a nasty bruise. While this is usually a symptom of improper form, it can be a hard habit to break so an arm guard might be the solution. Then you can work on your form without paying dearly every time your form breaks down.
Stabilizer – Traditional bows are much lighter than their compound counterparts. While a compound might weigh 4 lbs without accessories, a traditional bow will only weigh between 1.5 to 2 lbs. With it being so light, you may find it tough to hold steady on target. A stabilizer can help to not only steady your bow at full draw, but also cut down on vibration and hand shock after the shot. Many modern traditional bows will have a fitting on the front of the riser to accept any stabilizer.
Quiver – You could go old school and wear a back quiver if you want, but if you want to keep your arrows attached to your bow, then you have a few options. You can get any compound bow quiver and utilize the riser's threaded inserts that fit any standard bow mounted quiver or you can get a slide-on quiver like the ones made by Selwa, that are made specifically for traditional bows. These have more of a traditional look and can even be ordered with a leather hood. Honestly, they look pretty slick!
Arrow rest – You can shoot off the shelf of the riser and be plenty accurate; however any variation in arrow spine will lead to larger groups down range. A flipper arrow rest is a very basic, low cost solution to allow for greater clearance for your arrows as they pass the riser and can tighten up your groups significantly.
String silencers – These come in all shapes and sizes, but their purpose remains the same: quiet the string and reduce vibration. A traditional bow naturally has harmonics that transfer from the string to the limbs and into the riser. String silencers help to reduce this by limiting the amount of movement in the string after the shot. I use beaver ball silencers because they are naturally water-repellant so they do not soak up moisture in bad weather.