


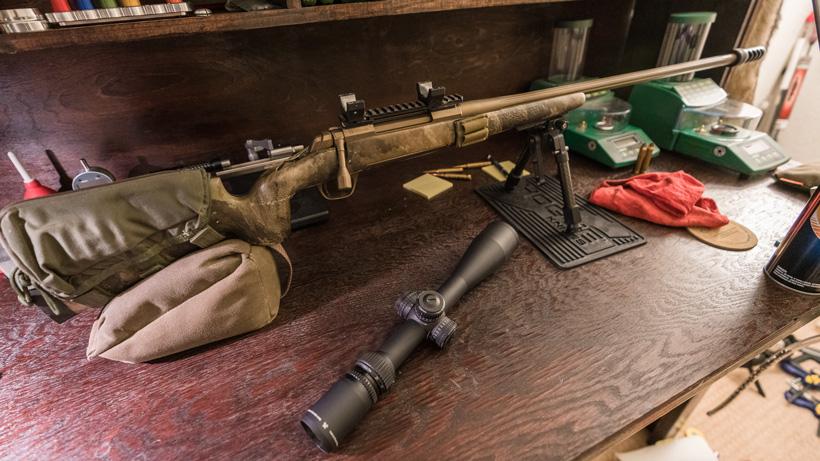
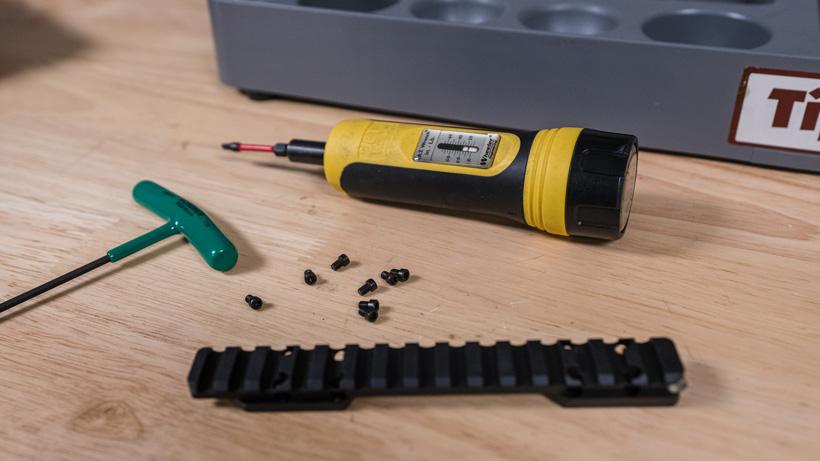
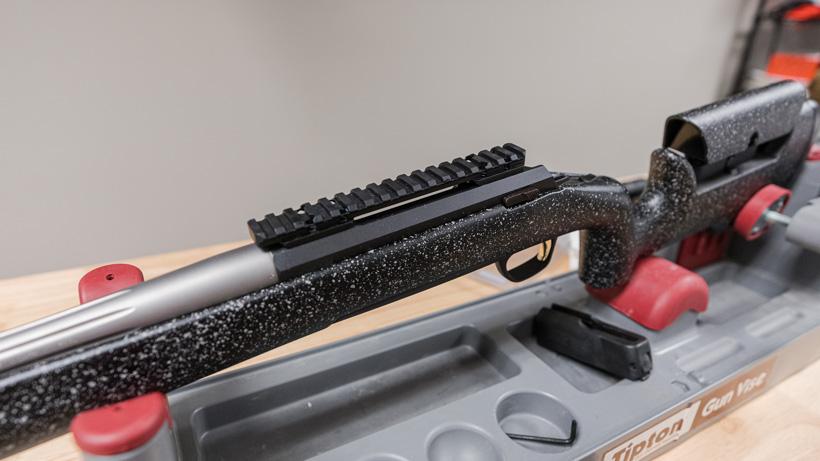
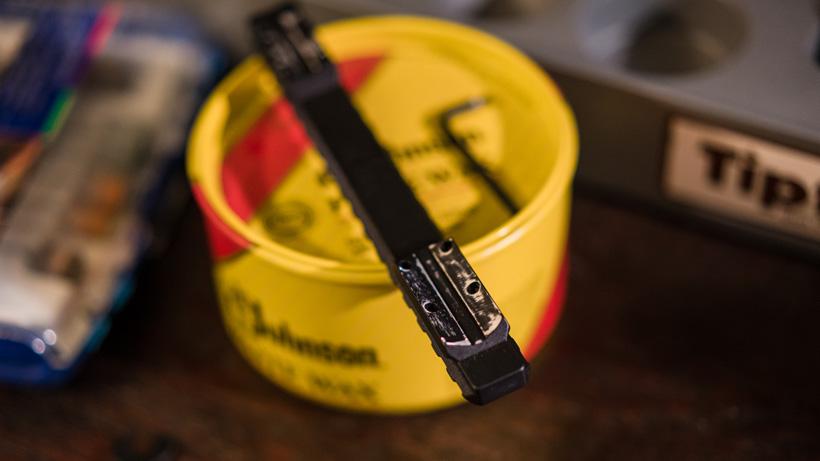
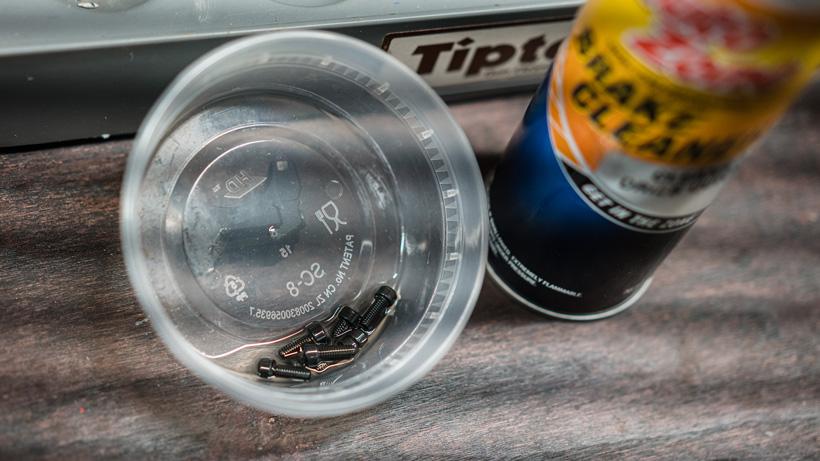
Cleaning the scope ring screws by soaking for a bit in non-chlorinated brake cleaner.
If you use Loctite... make sure to use the blue 242 version or the purple.
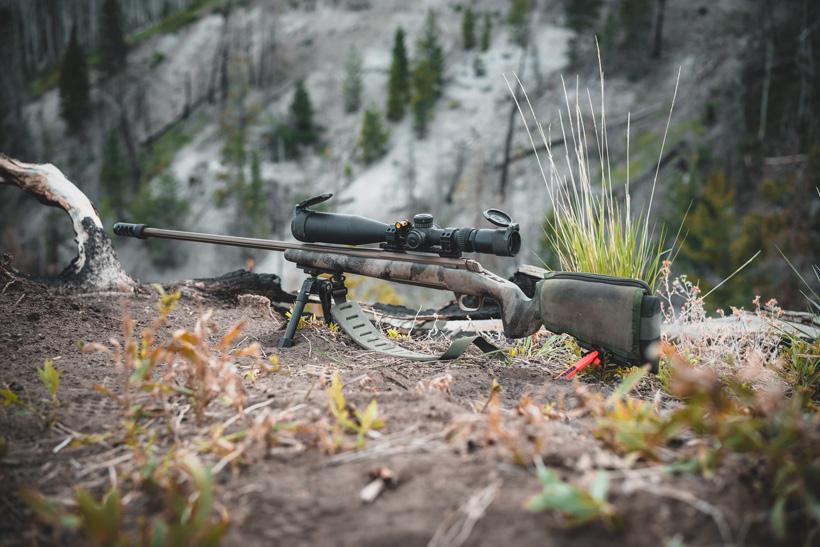
What follows are the exact steps I use when installing a riflescope on a bolt action precision hunting rifle. Anything I do to my rifle (or even my bow) I always document the process step by step. It's just something I've always done as a way to test and validate anything that has to do with precision. I do this as a great way to see trends in what works, doesn't work, or later you can see if there is a better way to do it that improves accuracy or speeds up the process. Just like everything... there are things that work and things that slightly work but don't really add any benefit in terms of accuracy. So this is why I say that you should always document what you're doing when setting up a rifle to see if it works for you.
With that said, there are a plethora of ways to mount a riflescope, this is just the process that works well for me. You can have the most expensive rifle in the world, but if you don't have a properly mounted riflescope, you might not be able to produce accurate and repeatable groups. What you're going to see below is going to be several different rifles in the photos, but the process is still the same. Most of the time when I set up rifles for myself or friends, I get into a groove sometimes and forget to bust my camera out.
What follows are the methods I’ve been using to accurately mount a riflescope to a rifle.
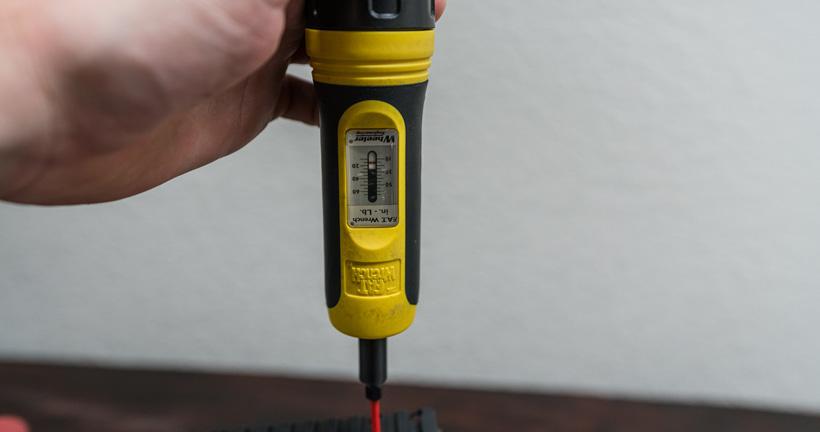
A torque wrench is a very important piece of equipment. Yes, they are expensive, but save yourself the hassle and get a good quality torque wrench. There are digital ones and non-digital versions. I got mine a long time ago, but if I was going to do it again I would probably go with the digital version of the Wheeler F.A.T Wrench; one nice part about the digital version is the accuracy is + or - 2%. Note: When I'm done using a torque wrench, I always like to return it to zero and I never use a torque wrench to loosen screws I've torqued down. Just something I do to ensure I get the maximum life out of my tools.
The first step in this process goes without saying, but you should always ensure the rifle is unloaded. I’ll take it a step further and remove the bolt.
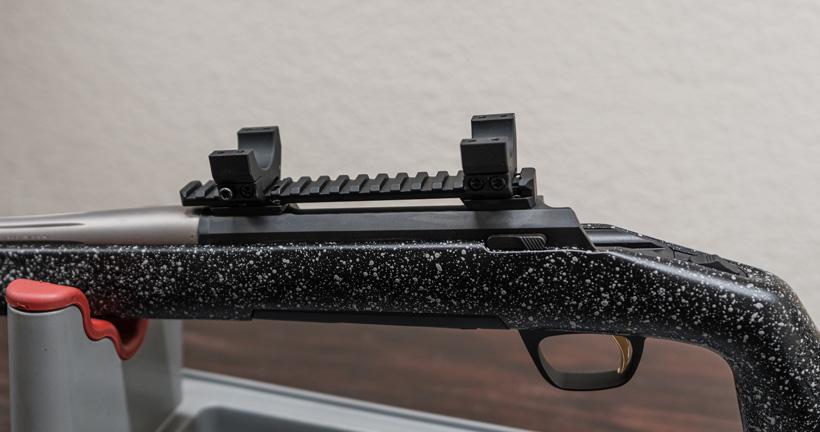
If you purchase a new gun that comes with a picatinny rail already installed as a perk to buying the gun, I suggest removing it and then reinstalling it unless a gunsmith installed it for you. I do this for several reasons. One, I feel like you should always ensure that everything is torqued to spec and two, I'm always looking to get the most accuracy from any rifle I work on and I like to tinker on things, so removing the rail and re-installing it to ensure it is square is part of the process for me.
Before I go any further, there are lots of methods out there on how to attach a picatinny rail. My preferred method is to bed the picatinny rail to the action. If you're not comfortable with the process or you're looking to simplify your scope setup, you can skip the bedding process and just apply blue Loctite to the screws and call it good.
When I set up rifles I try to do everything I can to gain accuracy, so I take the extra time to bed the picatinny rail. But in saying that, you definitely can have a perfectly accurate rifle without bedding the picatinny rail.
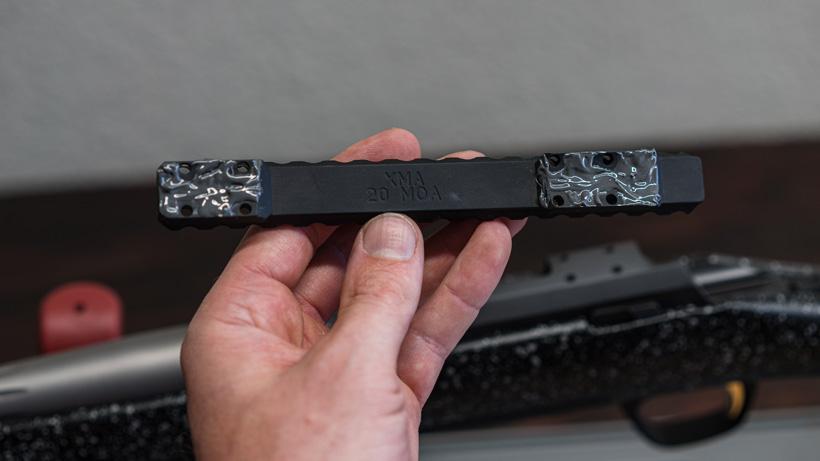
I prefer to use a picatinny rail on all my rifles because it’s another way I can control that everything is level and true, plus I select a rail that has 20 MOA built into it which is really nice when practicing at distance. With this setup, you also don’t have to worry as much if your two-piece scope rings are mounted perfectly square. Also, a picatinny rail allows you a lot of adjustability on the forward and rearward position of the riflescope for eye relief.
I've seen certain brands of picatinny rails that have some play/flex in them. You might not notice this just by looking, but if I would install the rail on the rifle and use a few screws in the back, I could tap the front of the rail and it would bounce just ever so slightly. So that to me means there is too much play in the rail. So if I would attach that to the action, the rail might have an ever so slight bend in it, that bend would put a little undue stress on the rail. Then that has the potential to put torque on the scope. All of those things I look to get rid of. My dad has been doing this test for years, so I still bed rails to this day.
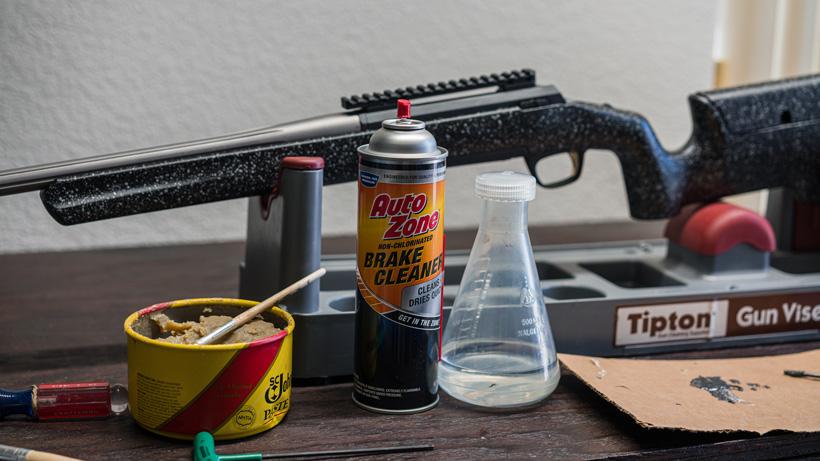
No matter what, any screw that comes with the picatinny rail or even the rifle scope rings could have grease or oil on it from the factory. I don't like grease or oils as this could make things come loose down the road. So to remove that, I will spray some non-chlorinated brake cleaner in a container and soak the screws for a bit.
The first part of this setup is to mount the rifle in the vice. I will mock up the rail on the rifle and will run the screws through the rail and into the action. I just want to check to ensure everything fits perfectly and there aren't any burs on any of the threads.
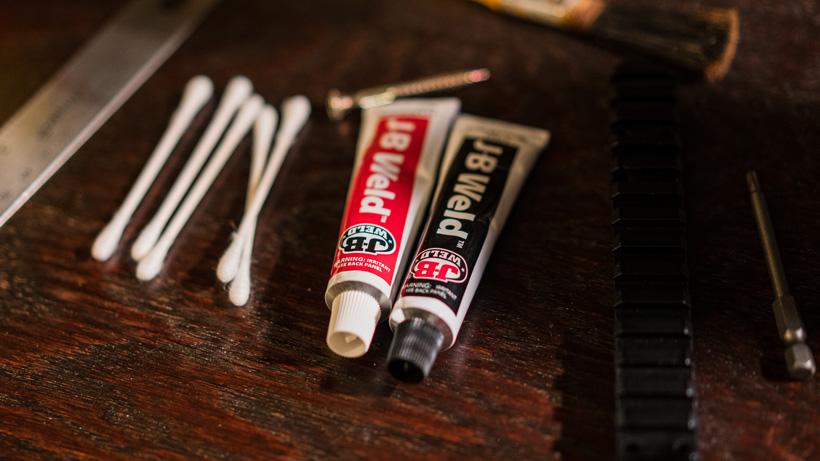
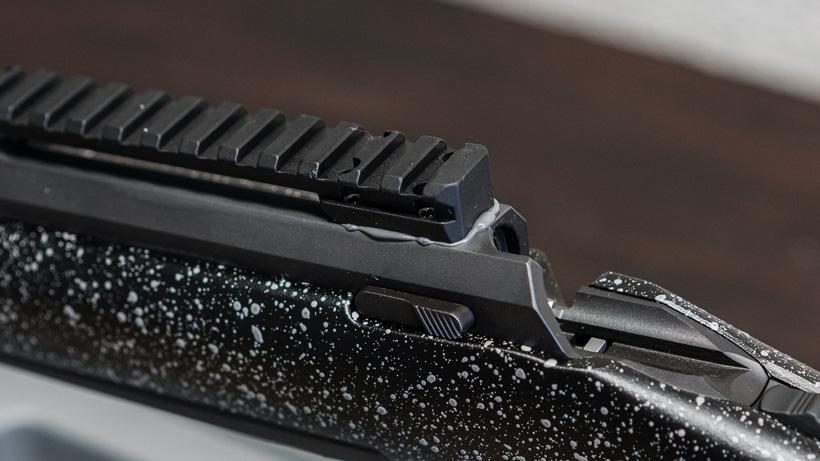
After the initial mock-up, I'll take a Dremel tool and rough up the bottom surface of the rail. This helps to ensure the JB Weld bonds to the rail. Then I spray off the rail with a non-chlorinated brake cleaner. I never see the need to want to remove the rail off of my action so I do not apply any release agent on the action side. I like to think of this as a secondary method that adheres the rail to the action. On my personal rifles, I've even made a few small marks with a Dremel on the action to further ensure the JB Weld makes a tight bond. Note: these are my hunting rifles only and I will never convert them to anything else.
After this process, take a rag and spray some brake cleaner on it and clean off the top of the action. You could also use acetone for this cleaning process to remove oils. In the above image, the clear jug has acetone in it.
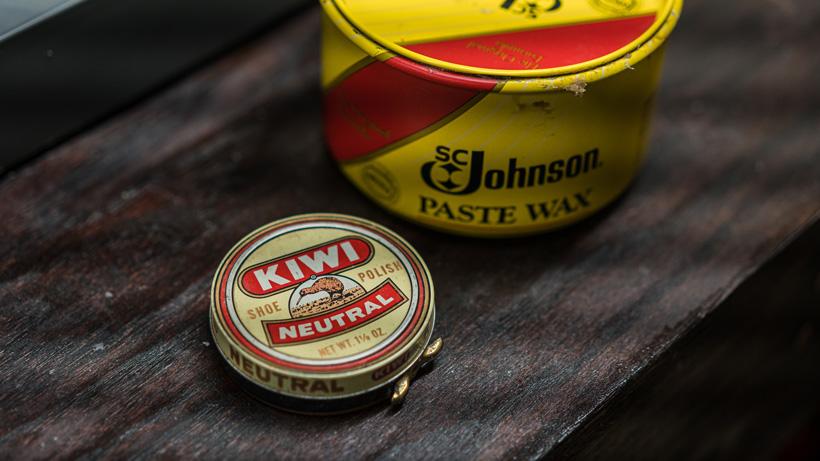
Take some release agent (paste wax, kiwi wax, etc) and apply it to the screws. I mainly use Johnson Paste Wax but you could also use Kiwi Shoe Polish. I believe one container of paste wax will last a lifetime.
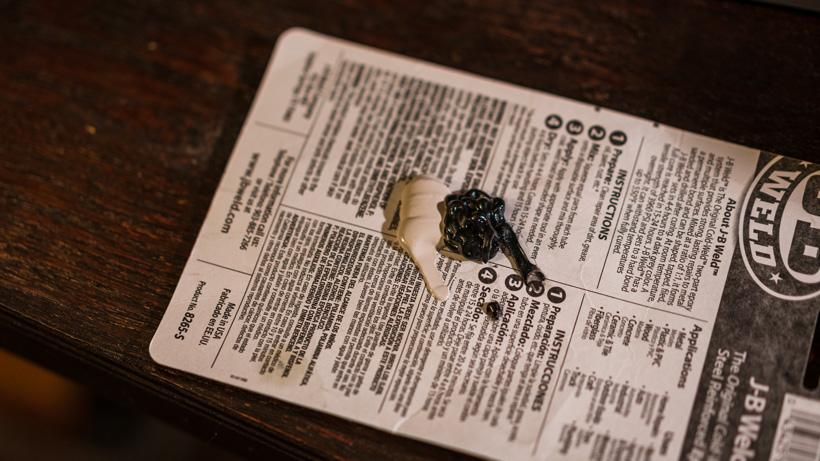
Grab the JB Weld and a piece of cardboard and clean off a spot on a desk or table to work.
Mix up some JB Weld and be sure to use equal parts of the steel and hardener.
Then add the JB Weld to the picatinny rail being careful not to get too close to the screw holes. I use an old nail to mix and apply the JB Weld epoxy to the rail.
When I'm ready to install the rail on the rifle, I will start each screw slowly and just lightly tighten them down in a criss-cross pattern. Do not torque down the screws at this stage. I'll leave the rifle sitting there with the screws lightly threaded in the action for at least 24 hours.
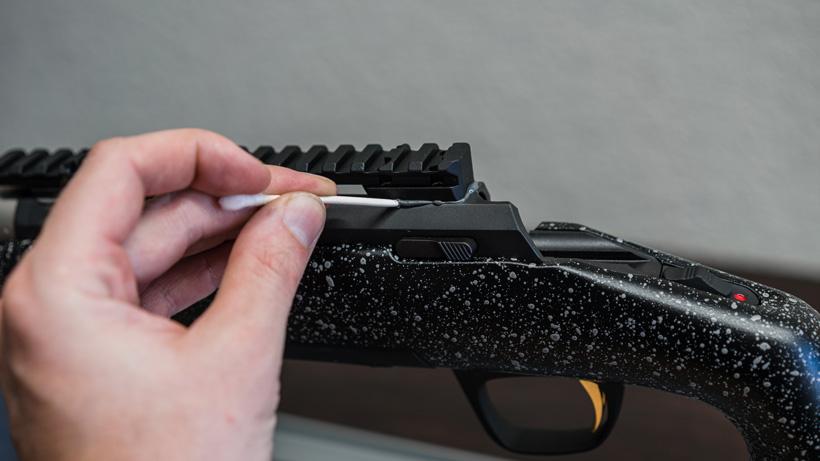
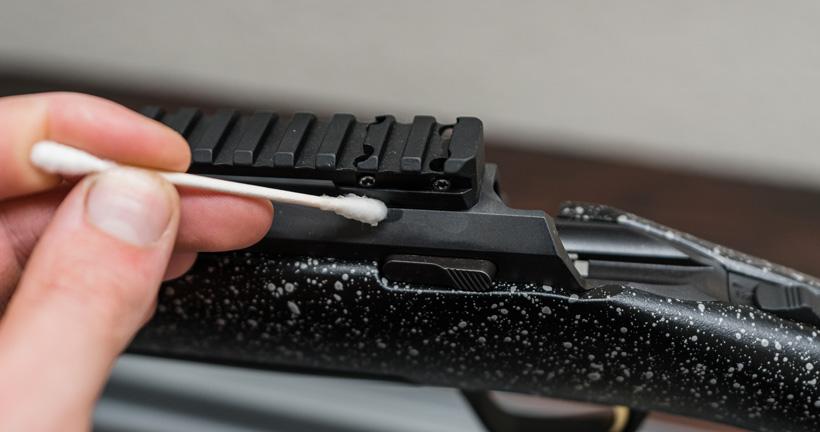
After the picatinny rail has been sitting there for roughly an hour, I'll snap off part of a q-tip and I'll scrape away some of the JB Weld to clean things up. Then I'll dip a q-tip in acetone and remove the extra JB Weld that is on the rail or action.
The next day is when we will torque it down.
Once it's been roughly 24 hours, I will remove the screws to clean off the paste wax. Again, I'll soak the screws for a bit in non-chlorinated brake cleaner. Once the screw are cleaned and dried, I will then place a small drop of blue Loctite on each of the rail screws. This ensures nothing will get loose over time while hunting or riding in a truck to and from your hunting spot. When I say small, I mean small. To accomplish this, I'll drop some blue loctite on a plastic section of my gun vice, then I'll take a toothpick and dip it in the loctite and apply a tiny drop to the threads of each screw.
Next, I'll slowly thread each screw onto the rail and action. At this stage, I'm just getting them all started by using a hex tool by hand. Now I'll increase the torque on the screws and go in a criss-cross pattern on the back and front of the rail. I start in the middle of the rail and work my way outward.
Now, after I get them all evenly placed the rail, then I will grab the torque wrench and adjust it to 18 inch-pounds (number based on what is recommended by the manufacture and in my case, Browning X-Bolt's are 18 inch pounds). Do not overtighten and strip out the screws or action here! Note: make sure you're using INCH POUNDS and not FOOT POUNDS. There is a HUGE difference there.
The final step is to clean off the top side of the picatinny rail with brake cleaner.
The entire process I'm walking through is based on horizontal split rings. I personally don't like vertical split rings, they can work, but in my mind, it's not what I'm looking for.
I prefer to use the lowest size ring height that still clears the rail, barrel, etc. This just means it will be easier to get a good cheek weld and I don't have to go overboard on adding a giant custom cheek piece to my stock. In saying that, for me... most of the time when using a 20 MOA picatinny rail I will need some sort of cheek height extension on my stock.
Side tangent...
I'm going to take a quick second to talk about setting up a rifle to fit you. If you want lower rings because you believe it helps with accuracy, then by all means do that. If you have neck or back problems and can't get that low into a rifle and you have something on the back comb of the stock that allows you to raise up your cheek height, then by all means shoot with taller rings.
If you haven't yet, now is when I will clean off the screws of the lower rings to remove any oils that might be on them from the factory. I'll pull apart the rings and once again spray them off with brake cleaner and then rub them with a towel. You can also use q-tips to get inside the screw holes. An air hose is also great to really ensure everything is out of the rings.
Next, place your lower rings on the picatinny rail but don't tighten the screws up all the way. I like to place my scope rings on the picatinny rail with the screws on the opposite side away from the bolt where you feed the ammo. It's just a personal preference, this might be more important if you're using rings that have a nut on them.
This is the point when I'll take the riflescope and mock up where I would like the scope/rings to sit. I prefer keeping my rails as far apart as possible to ensure everything is squared up and in my mind, this makes sense for accuracy as then the scope is properly aligned and gives it a better "bite" on the rail. Ring space consideration is also important if you want to add any sort of level to the scope or possibly a different accessory to the picatinny rail. The beauty of a picatinny rail is you'll get more adjustment out of where you put your rings. Note: at this stage, it where you put your rings doesn't have to be perfect, as you still will have some forward/backward adjustment to work with later after setting the eye relief.
I prefer to set the eye relief at the scope's highest magnification as that is where I shoot most often. I do this before I lock the lower rings in place (make sure everything fits and the bell of the scope isn't in the way). To do this you will want to snug up the lower rings to the rail, then place the scope in place and slightly snug up the top rings around the riflescope. Trust me here... if you don't snug up the top rings and you grab your rifle and bump something, you don't want your expensive riflescope to land on the ground.
If you're setting up a gun for a friend, make sure they are with you at this stage of the scope mounting. What works for you in terms of eye relief might not work for your friend.
When setting eye relief, I like to set my eye relief while in the prone position as that is where I do 99% of my shooting. The easiest way that I like to test this is by getting my cheek into the gun, closing my eyes and then opening them. If I can’t see the full view edge to edge in the riflescope I will push the scope forward or backward. You might need to move your rings around during this stage if they come in contact with the bell, turret, etc. Once I get it set, I will take a piece of tape, and place it next to the rings or I will take a silver sharpie marker and make a small mark on the riflescope (you can easily remove that with acetone or brake cleaner later). This ensures that after I lap my rings, I know exactly where the riflescope is supposed to be.
Note: Keep in mind that if you’re going to attach a level to your scope, you'll want to make sure you have enough room on the forward or backward side of the turret cap for the level. You can gain room by moving around the rings. And you should attach the scope level around the scope before you fully mount the rings. Some scope levels will not fit once you've locked down the rings.
Also, if you're going to attach anything to the picatinny rail, make sure you place anything on the rail ahead of time during this scope mounting process to also ensure you have enough clearance with the ring spacing.
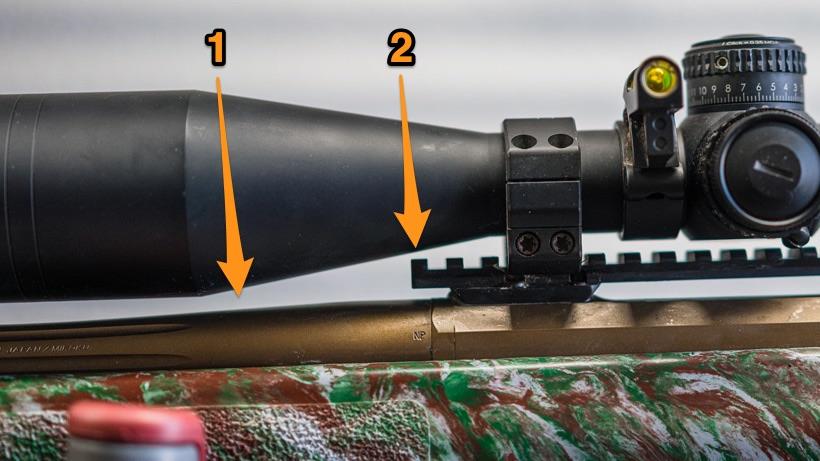
Before you move on, it's also very important to make sure the bell on the objective side clears the picatinny rail and also the barrel. The two areas I'm talking about here are labeled in the above photo.
You don't want your scope to come in contact with the rail. If I were to slide the riflescope back and had the rings moved further backward, the scope would come into contact with the picatinny rail. Also, you don't want the bell of the scope hitting the barrel. Take some extra time to make sure you have enough room in case anything flexes under heavy recoil.
For this setup, I’m using Vortex Precision Matched scope rings. I really love these rings due to how solid they are. Once you know where you will attach the rings on the scope, apply a small amount of blue Loctite to the threads and thread them in while alternating back and forth. I will apply 50 inch pounds to my torque wrench and slowly approach this setting and alternate from one bolt to the other. Note: When I'm starting to torque the lower rings down, I will push the rings forward on the picatinny rail to accommodate the recoil.
If you don't believe in lapping riflescope rings, you can easily just read over this section. Some will say if you buy high-quality scope rings, this process isn't really necessary. I always check the rings to ensure they are properly aligned. Machining tolerances are phenomenal nowadays so just ensure you're buying good rings and you can avoid this step if you don't feel comfortable doing it or think it's a waste of time.
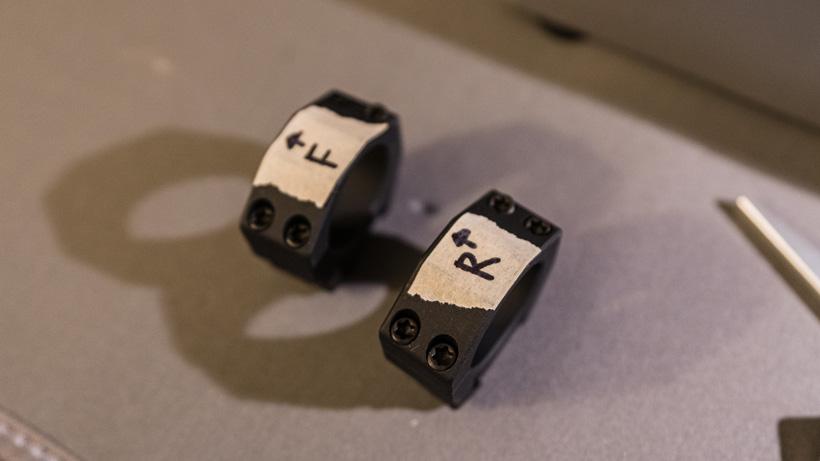
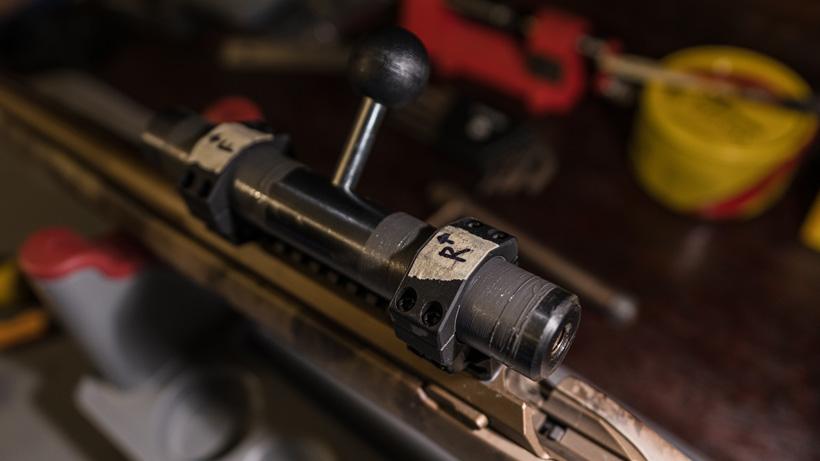
Before I touch on lapping, I want to point out that even if I don't lap the rings, I'll still put a piece of tape on the top of the scope rings and then mark the tape to indicate which rings I'm working with. This helps keep things consistent as one scope ring is a precision match. So I'll label the front and the rear and also place an arrow that points to the direction of the muzzle. This ensures that when I take apart the rings, I don't accidentally flip around the top ring. They were made a certain way, so I keep them aligned from the factory.
If you're going to lap rings, make sure the lower rings are mounted in the correct spot on your picatinny rail and they are torqued down.
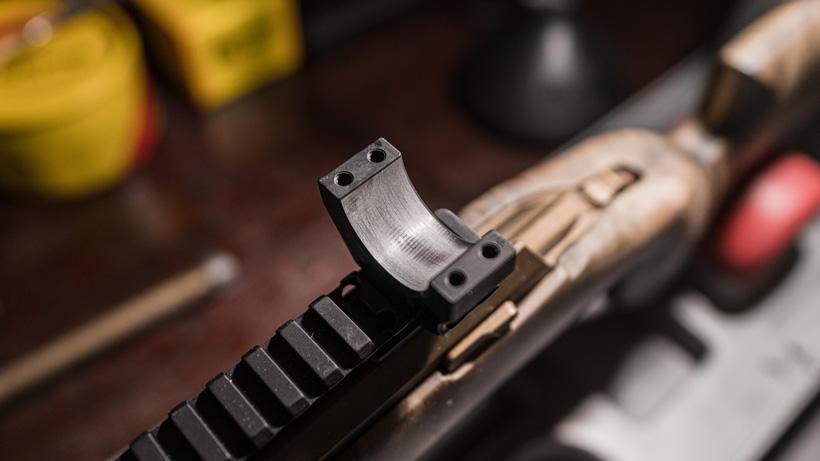
No matter what scope rings I use, I always lap my rings. Again, some people say that the rings they buy are of the highest tolerances and don’t need to be lapped, but I personally feel like it can’t hurt. No matter how tight their tolerances are, in my head I’d rather know that I did everything I could to ensure I have a great shooting rifle. I've lapped Vortex, Seekins, and even Nightforce rings. At the end of the day, if you don't want to lap rings, you can definitely get by without this step. I will toss some caution out there to not purchase cheap rings. Ensuring you have a properly mounted scope takes into account the entire process. Start with quality items, and you will end up with a quality product. Lapping is basically the process of removing material to ensure the perfect fit around your scope and it smooths out any possible imperfections. I like to lap the top and bottom rings.
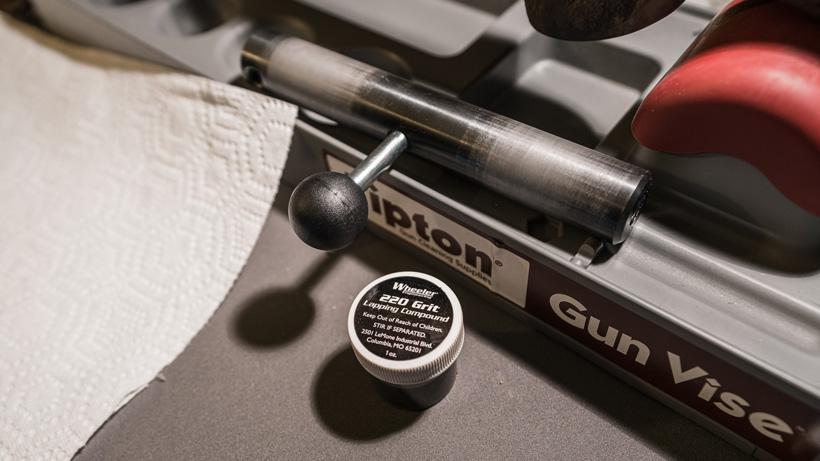
Apply lapping compound to the lower and upper rings.
Place the correct sized lapping bar into the lower rings. Then attach the top rings and slowly thread in the screws. You don't want to go so tight that you can't move the laping bar. Now you will take the lapping rod and move it side to side and forward and backward with the handle. This process takes some time and you will notice that you eventually might need to tighten up the screws a little bit at a time.
After several minutes of this, stop and wipe away the lapping compound, you’ll notice areas that got lapped and areas that didn’t. I have an old book from Sinclair International at home and they recommend a 75% rule. So I’ll keep lapping until at least 75% of the surface area of the rings are lapped.
Cleaning the scope ring screws by soaking for a bit in non-chlorinated brake cleaner.
Once this process is complete, you can wipe off the compound with a paper towel. I like to keep all of the scope rings and screws clean and dry. So I'll spray everything off with a non-chlorinated brake cleaner after this process.
This is one area where some might say I get a little overboard. But... I'm looking for precision and this process just works for me. Again, there are definitely other methods that you can use to level your riflescope (flashlight down the scope, just using a plumb bob, etc). But, this process works for me and normally I can get it perfect with the use of levels.
Levels are tools that are very useful and honestly pay for themselves every time you press the trigger.
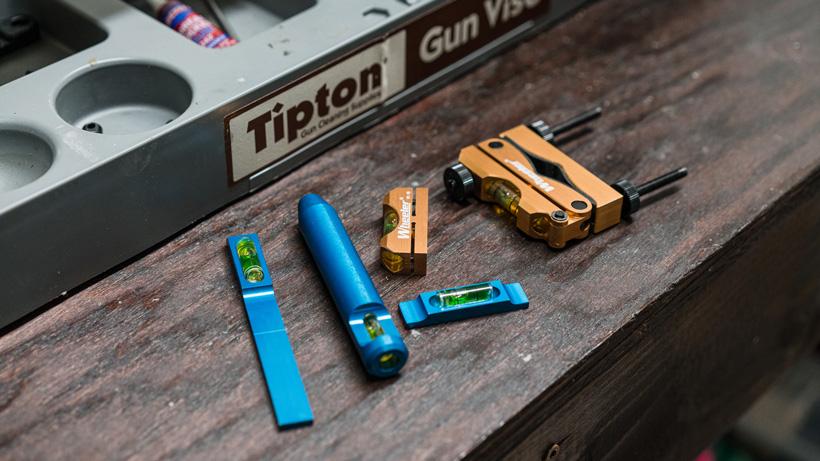
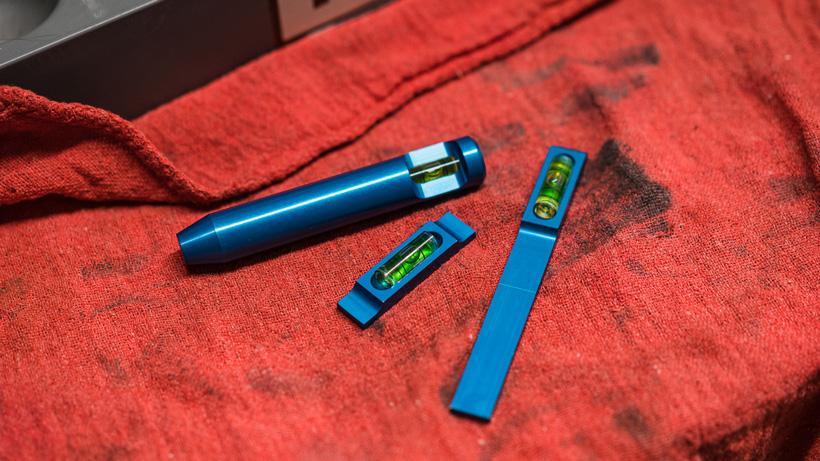
I have levels from several different companies, but my favorite system is a three level scope leveling kit from Shawn Carlock of Defensive Edge. My dad has a few rifles that were built by Shawn and I've always been very appreciative when I've called and picked his brain when we had questions about my dad's setup. So fast forward to 2018 and he came out with his leveling kit, I just had to have it and I placed an order.
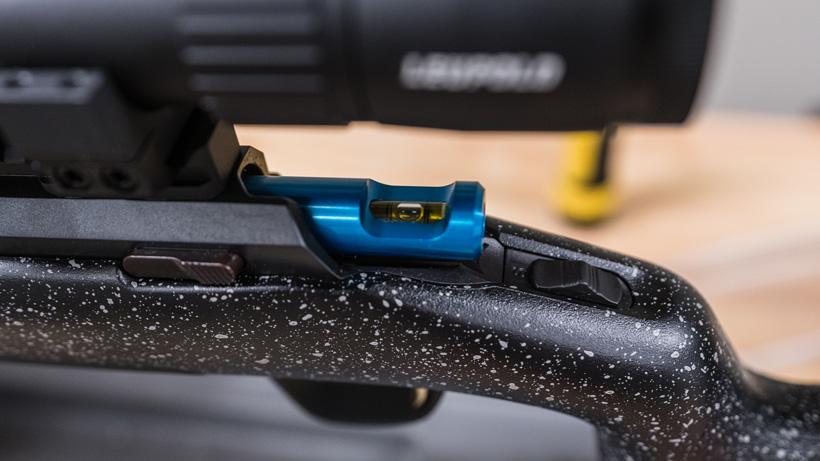
The first part of the process is to level the rifle. Take the round level and insert it into the action. If I need to raise it up, I'll add some material under the front part of the gun vice. Remember, garbage in is garbage out. So try to do what you can to make sure everything is level.
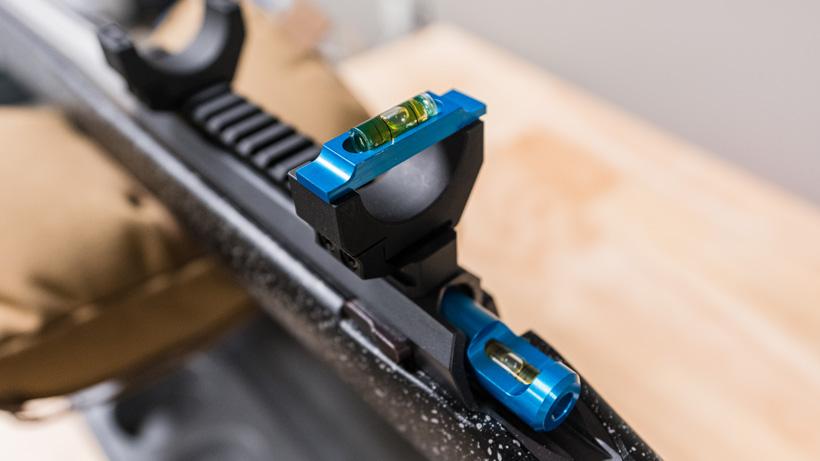
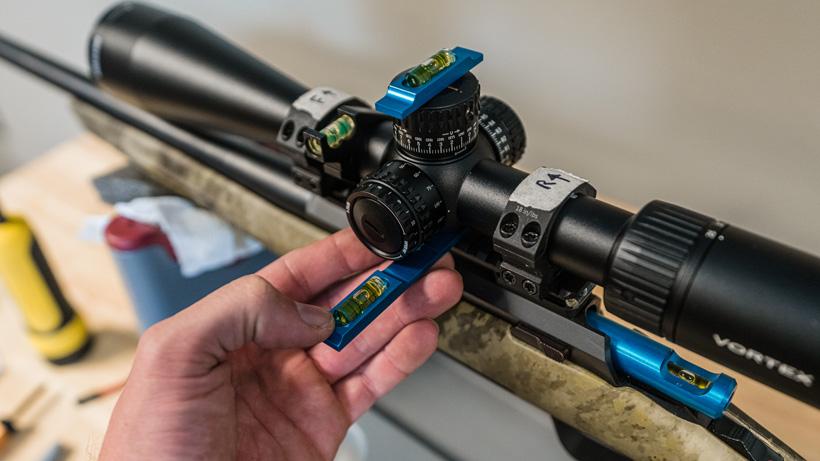
Next, I'll place the smaller level across the lower rings and I will also place it sideways on the picatinny rail as a double reassurance that the rings match the rail (which they should). Then I will move the gun around until it is level. Once the gun is level, I'll tighten the gun down in the vice and I might add some shims if necessary to get the gun perfectly level and ensure it won't move. I want the riflescope to be perfectly level with the action of the gun. Any slight rotation will cause issues further downrange, and as a hunter, I need this to be perfect.
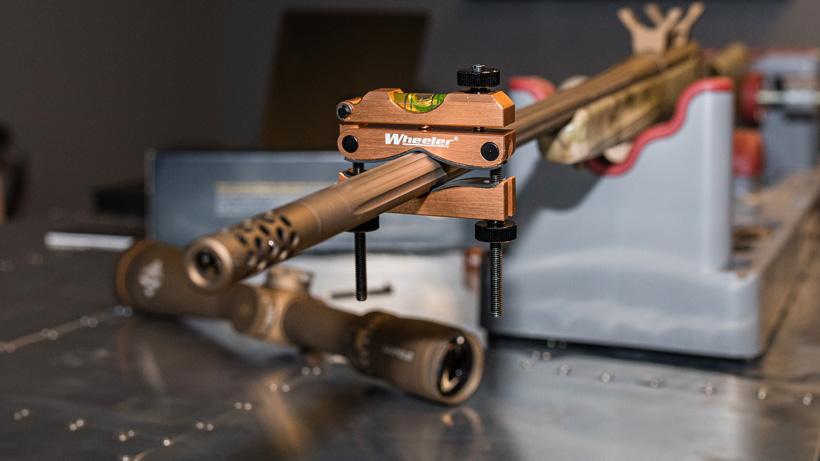
This is also when I will attach the Wheeler Reticle Leveling system to the barrel to further ensure things stay level. I mainly use this is a backup method in case I bump the gun while setting everything up.
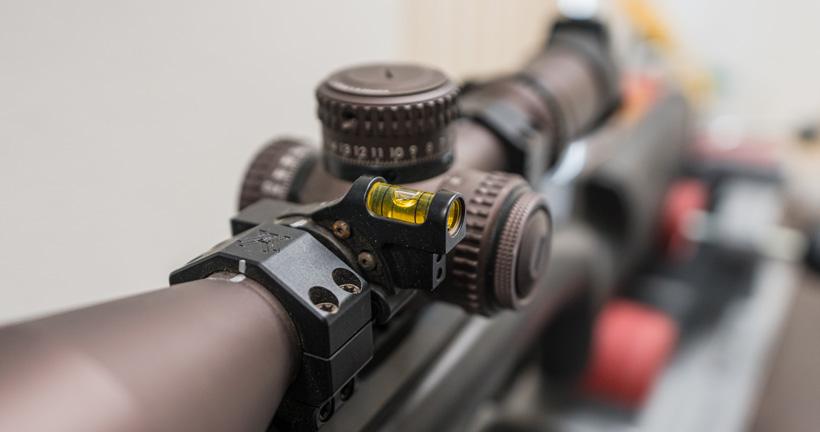
Before you place the scope on the lower rings, if you're going to be adding a scope level (I highly recommend one) be sure to add the level ahead of time to the scope tube. Some scope levels you can attach at a later date and then others are nearly impossible to attach once you have your scope fully mounted on the rifle. So when putting a scope level on my rifle, I like to add it ahead of time and just slightly tighten down the level. I prefer my scope level just in front of the parallax knob and it works great for me if the bubble is just off the left side of the tube. Where you place yours is a personal preference. Note: before you attach the top rings it is always a good idea to double check that you can see your scope bubble level. There's nothing worse than using a certain model and then noticing that you can't see the level over your parallax knob or the top turret cap gets in the way. If you have those issues, you might need to order a bubble level that sits more off to the side.
One last step, clean off the riflescope with some brake cleaner to remove any oils. By now you've noticed that I'm a big fan of non-chlorinated brake cleaner and acetone.
Then, once I've ensured everything is level I'll start to tighten down the top rings to the riflescope until almost snug. You want them just snug enough that you can move the scope without scratching it. The rings I have use a T25 Torx head.
While doing this I will take my level from the Defensive Edge kit that is attached to a flat piece of metal and use that along the bottom flat area of the riflescope underneath the turret. This flat surface is the perfect spot for ensuring the riflescope stays level as you torque down the screws. Then I will move the scope ever so slightly until it's perfectly level. Once it's level I will start to slowly tighten the screws in a cross pattern.
You will notice in this picture that on this particular riflescope the top turret is actually still in line with the bottom level. If those didn't match up, I would still base all my leveling on the bottom level under the scope. The reason I do that is leveling off of turret caps can cause your scope to be off level slightly. As a test, take a level and place it across the turret. It might show it is level but then give the turret a rotation and place the level back on it. On some scopes turning the turret may cause a slight change and which is why I never use the top turret cap as a definitive place to level any riflescope no matter who makes the riflescope.
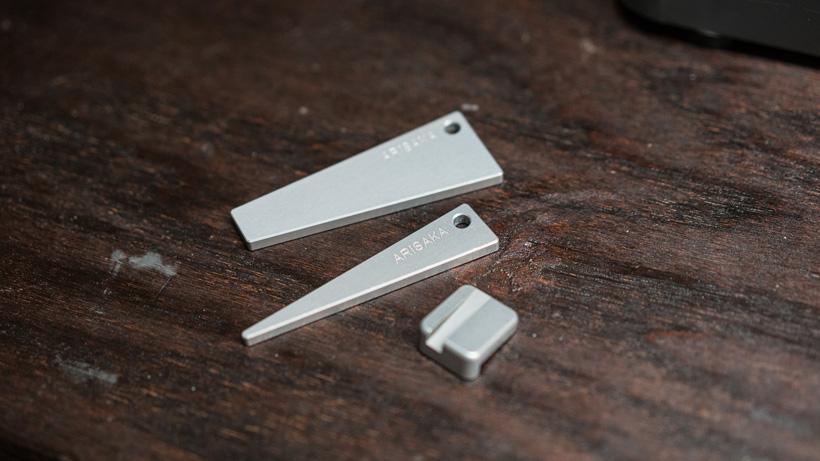
Another great tool you can use if you have room under the scope and on top of the picatinny rail is made by Arisaka called the Optic Leveler combo kit. The only problem with this tool is you need to have some room between the bottom of the scope and the picatinny rail. Also, if you don't have a picatinny or flat one piece rail, you can't use this system.
It's always best to reference your particular ring manufacturer specs for the scope rings. For the Vortex Precision Rings that I use on my personal rifles, they recommend 18 inch pounds. Do an alternating cross-cross pattern so you don’t move the scope by tightening one side down further than the other. You don't want to go overboard here. If you think that tightening these down to 55 inch pounds sounds like they will be more stable, most likely you'll just end up bending/crushing the scope tube which can cause scope tracking issues, the scope might not hold zero and potentially a bunch of other issues. If you have different rings or maybe even a different riflescope you have different inch pound values, just be sure to go off of what that particular manufacture recommends. Most of the time 15 to 18 or 18 to 22 inch-pounds is the value you will aim for.
When doing the criss-cross pattern, I'll do the rear rings and then repeat the process on the front rings. During this initial run-through, I will not torque down the rings yet. I'm just snugging everything up in a criss-cross pattern moving from the back rings to the front rings. When torquing the screws down, I'll take the flat level and double check to ensure everything is still cherry. Then I'll move forward with this process and I will twist my torque wrench until it clicks. And then after that, you guessed it, I'll double check everything is still level off the bottom of the scope. I'm aiming for an even gap between each side of the rings.
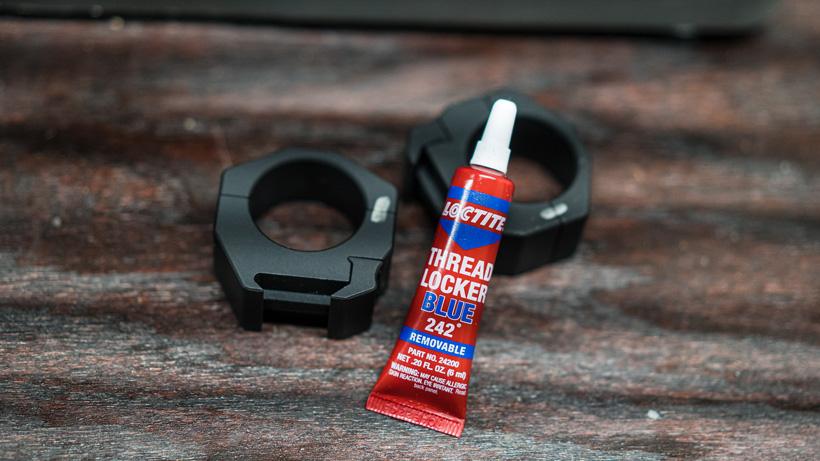
If you use Loctite... make sure to use the blue 242 version or the purple.
I'm tossing this down here at the bottom, but it's an important topic. I've talked to my dad a bunch on this subject. I use him a lot for these types of things because he has a background in cars, semi-trucks and very high end drag racing cars. I've seen him use thread locker on all sorts of car parts, even on some small precision type areas that they used it on to remove the chance of things vibrating lose. Also, I've done a ton of personal research on this subject of torque, torsion, tension, etc. and while there is the camp that says to not use it, there's also a bunch of people who advocate for its use. If you're going to use a thread locker, one - make sure it is the right kind. Two - go right up to the edge of the maximum inch-pounds and don't go over just to be safe. At the end of the day, use it or don't use it. One thing to always remember as well is to degrease everything prior to using the loctite. Without degreasing, it can still come loose over time even if using Loctite.
So the main function of the thread locker is to maintain the torque. According to Loctite, "It has been determined that over time, due to various factors like vibration, side sliding, etc., there is a loss of up to 30% of the torque given to the parts."
Thread locker is a good thing to use, but if it is used, it's best to stay on the bottom end of a torque specification. Keep in mind that if it adds higher torque and you're setting your rings at 18 inch pounds, using it could increase the torque by a couple inch pounds, that isn't going to be enough to damage anything. But be careful! Also, one lasting thought, does the torque wrench we are using even calibrated correctly? Don't soak the threads, a little goes a long way.
Threadlocker like Loctite can aid in lubrication and can cause you to overtighten the screws, that extra lubrication can involve driving the screws in deeper to reach the required torque setting. If I apply Loctite, I most of the time can't drop a small enough amount on there since one drop will completely soak the threads, so I will take a q-tip and dab off some of the threads to remove excess Loctite. Another method is to place a drop of Loctite on a plastic lid container lid, and take a nail head or small toothpick and place a minuscule drop of Loctite on the threads. Note: if you use Loctite, it increases the chance of the screws being hard to remove and you could even strip the head, especially if you're dealing with really small screws like on a muzzleloader peep sight.
Since everything is true on the riflescope and the rifle is still in the gun vice, this is the time when I'll get the anti-cant scope level dialed in. Simply rotate the level until it's true, then start to snug down the screws. Again, be sure to alternate from one screw to the next and don't over-torque it. And when you're done, double check everything again. Use all your levels to ensure the scope level is perfect. If it's canted slightly, this will cause you to miss left or right in the field at longer distances.
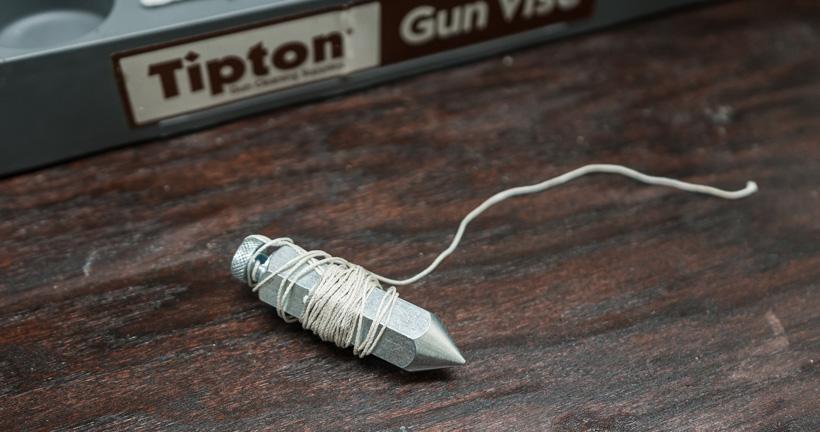
One last little thing I like to do is a plumb bob test.
Find a place where you can hang a plumb line and line up your riflescope. You'll want your rifle secured in a vice so you can again ensure all the levels are true. Now just check to make sure the reticle in the scope lines up with the plumb line. Or another way to do this is when performing a tall target test (checking turrets track and for aligning the scope) outside where you take a plumb bob or a large piece of cardboard with a line on it that is perfectly level. Then you level your gun and see if your reticle matches up.
The last step (for me) is to verify the reticle is plumb when the scope mounted level says it is. If not, adjust the anti-cant level. Luckily, if you did all the other steps correctly, your plumb bob or tall target line should match up perfectly.
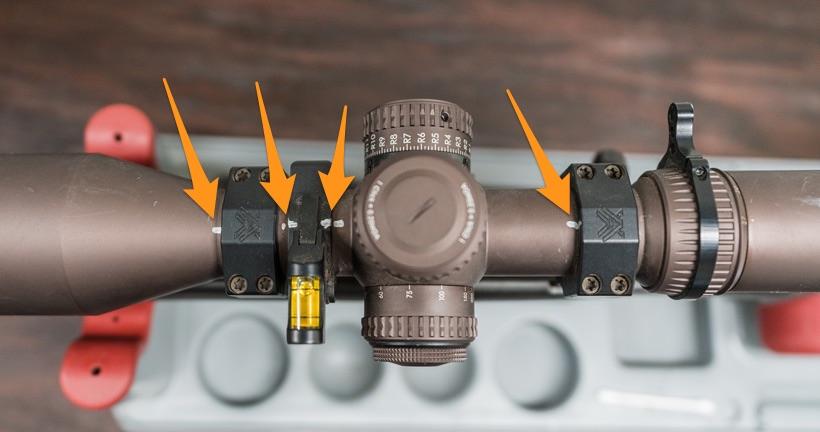
This is the point in the process when I'll mark my scope/rings in several places so I know if something moves. If you really want to go overkill, you can also add reference marks across the screw heads. This way you'll know if somehow a screw ever comes loose. All of my rifles get reference marks on the riflescopes in several places with a silver sharpe marker. This will at a glance show if your tube is slipping or maybe you fell and hit your scope hard and want to ensure nothing moved.
This process has worked phenomenally for me setting up endless rifles for friends, family and my personal hunting rifles. There's a ton of different ways to do this (flashlight through the scope, etc.), so if you have a method that works and is repeatable, by all means, use it. If you ever have questions about torque specs, I highly recommend giving whatever scope or ring manufacturer your using a call.
The last step in this process is documenting your torque specs. Write this down in a notebook that is for this specific rifle as a future reference.
Remember, this isn't a race so take it slow to ensure you're leveling up your scope perfectly. My process has a lot of "do this, double check that, clean this, check again" but for me, it just works.
Best of luck on your next hunt!
Scope mounting kit
Torque Screwdriver Wrench (Wheeler FAT Wrench or similar)
Level
Barrel level for quick reference (Like the Reticle Leveling System from Wheeler)
Gun vice
Lapping bar that is the same size as your scope tube
Blue Loctite (more on the use of Loctite below)
Extra levels
Correct size bits
Non-chlorinated brake cleaner
Acetone
JB Weld
Release agent like Johnson Paste Wax or Kiwi Shoe Polish
Q-Tips
Silver marker
Plumb bob