Locate your next buck now with these methods

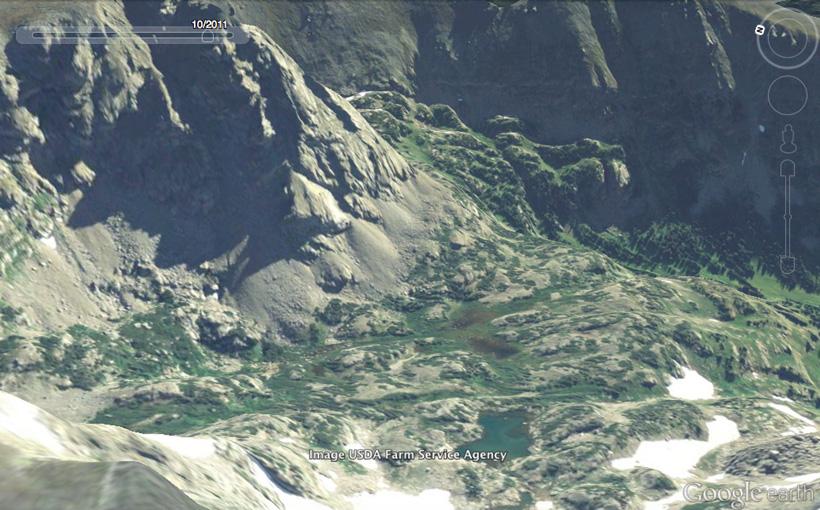
Elevation exaggeration of 1.25 in the mountains.
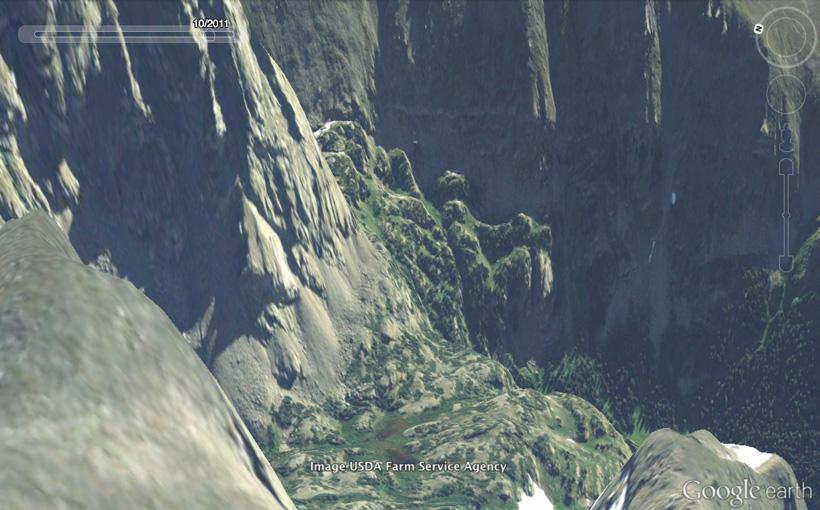
Elevation exaggeration of 3 in the mountains.
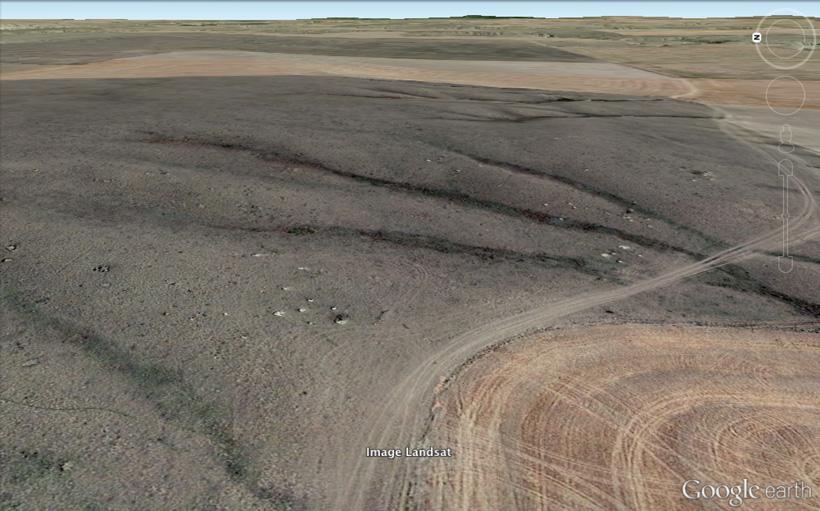
Elevation exaggeration of 1.0 in the plains.
Elevation exaggeration of 3 in the plains.

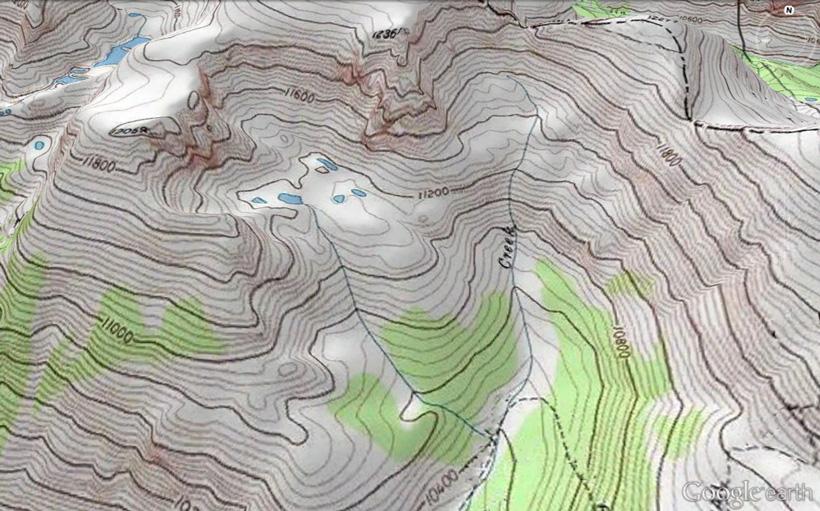
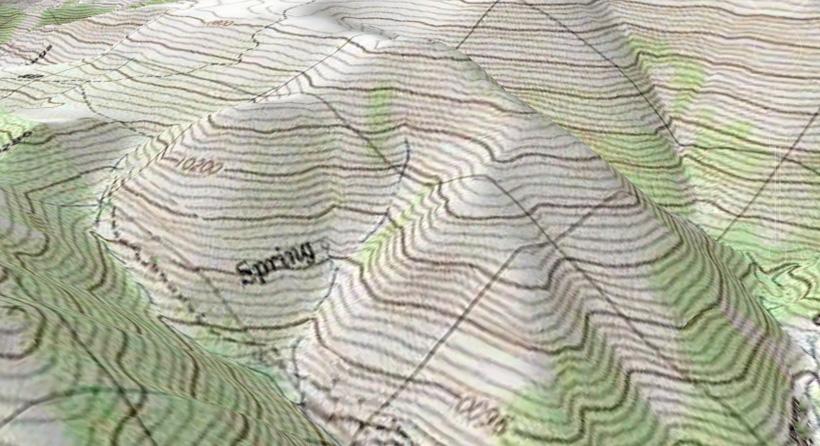
Topographical layer that shows where a spring is located.
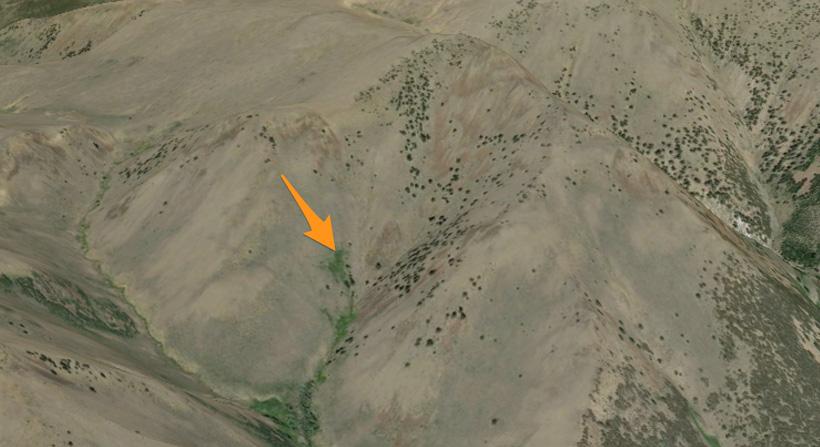
Google Earth image showing where the spring is located.
Features | Print resolution |
|---|---|
Google Earth | 1000 pixels |
Google Earth Pro | 4800 pixels |
Features | Import GIS data |
Google Earth | N/A |
Google Earth Pro | ESRI.shp, MapInfo.tab |
Features | Import addresses in bulk |
Google Earth | Manually Geo-locate each address |
Google Earth Pro | Automatically Geo-locate up to 2500 at a time |
Features | Import large image files |
Google Earth | Limited to texture size |
Google Earth Pro | Super Image Overlays |
Features | Supplemental Layers |
Google Earth | N/A |
Google Earth Pro | Demographics, Parcels, Traffic Counts |
Features | Create premium movies for export |
Google Earth | N/A |
Google Earth Pro | HD 1920x1080 |
Features | Measurement tools |
Google Earth | Line, Path |
Google Earth Pro | Line, Path, Polygon, Circle, 3D Path, 3D Polygon |
Features | Google Earth | Google Earth Pro |
|---|---|---|
Print resolution | 1000 pixels | 4800 pixels |
Import GIS data | N/A | ESRI.shp, MapInfo.tab |
Import addresses in bulk | Manually Geo-locate each address | Automatically Geo-locate up to 2500 at a time |
Import large image files | Limited to texture size | Super Image Overlays |
Supplemental Layers | N/A | Demographics, Parcels, Traffic Counts |
Create premium movies for export | N/A | HD 1920x1080 |
Measurement tools | Line, Path | Line, Path, Polygon, Circle, 3D Path, 3D Polygon |
By now every hunter has started to fully embrace the powerful tools that the internet has given us. While some may still hold onto 1:24,000 scale paper maps for at home scouting, Google Earth is the reigning king of the West.
The majority of people know how Google Earth works. It is a combination of satellite imagery with the option to zoom in and zoom out to provide you the vegetation type, terrain and landscape features. Companies like huntinggpsmaps.com took scouting and hunting to the next level with their Google Earth public/private overlays, unit boundaries, and wilderness area layers which allows a hunter to navigate the checkerboard system of private lands and they also provide a hunter with a GPS chip with the same powerful information to take into the field. If you are not familiar with Google Earth, you can download it here. I also suggest downloading it on your phone as well. Here is the link for it on iTunes and Google Play.
To find trophy deer, I look for areas away from the crowds. Could I hunt closer to roads and trails and still kill something? Yes, most likely, but I enjoy scouting and I enjoy the hard work that goes into finding my perfect hunting spot. In other words, I plan to hunt places where deer feel comfortable and where terrain features allow me to stalk in for a shot.
Thanks to Google Earth, all of this pre-boots-on-the-ground scouting can be done from the comfort of your own home. While it is a great tool, keep in mind that Google Earth should never replace boots on the ground knowledge.
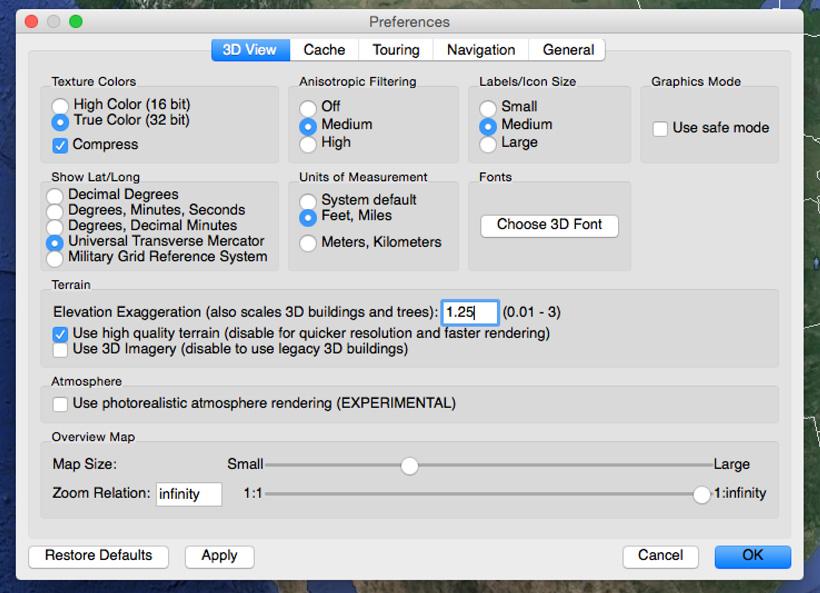
Google Earth is a powerful tool with the initial download, but with a few custom settings, you can make your digital scouting a little easier.
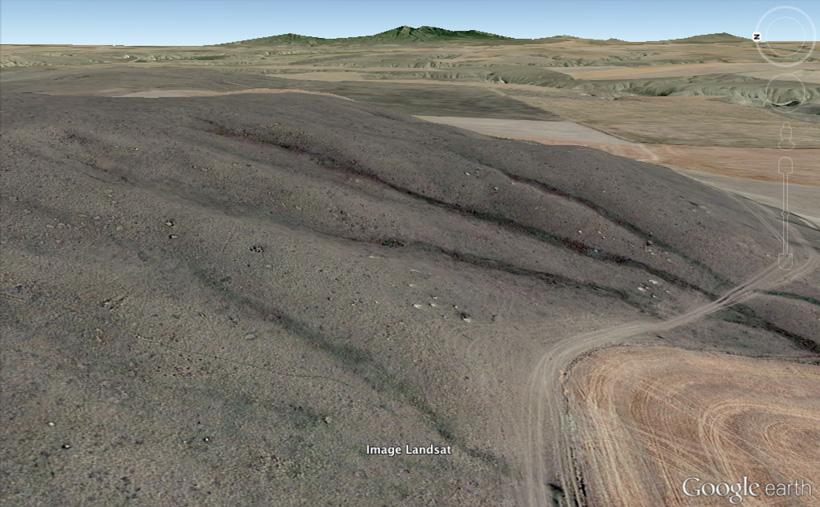
Go into the Google Earth Preferences and adjust the Elevation Exaggeration to your liking. The values go from 0.01 to 3. This allows you to "exaggerate" elevation changes, which makes the topography stand out more. For some people this can help you see the terrain features better. I like to keep mine around 1.25 (seems closer to real life terrain steepness) when looking at mountain terrain and I move it to 2.5 or 3 when I am looking at flatter plains type country. The reason for the large exaggerated terrain value in the plains is to find the small folds in the terrain that could conceal a stalk opportunity. Typical satellite imagery of the plains looks very flat, when the opposite is true while you are belly crawling for antelope or plains mule deer. This is just another way to evaluate the terrain from the comfort of your home.
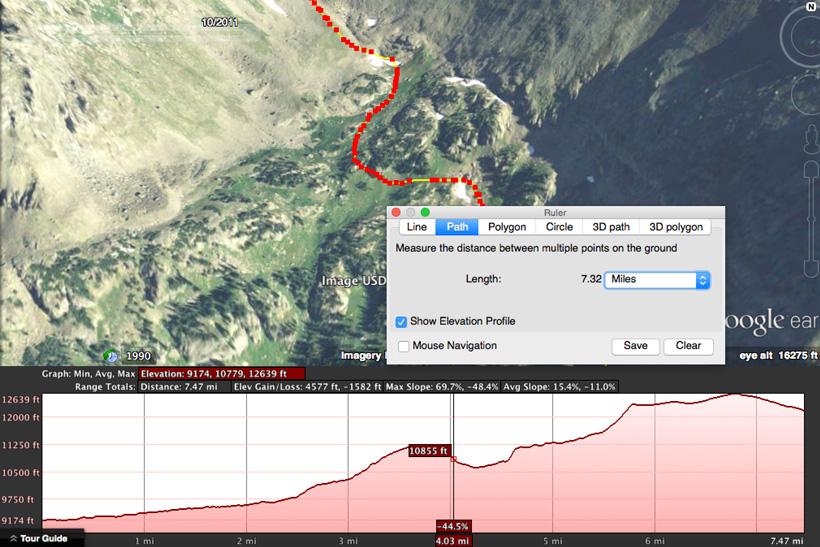
Using the path function is a great way to plan your hike into a hunting area. After you create a path you can view the elevation profile. This provides you with the following information: distance traveled, maximum/minimum slope percent, average slope, elevation gain/loss and minimum/maximum/average elevation. The path tool is a reliable way to compare routes to your campsite in order to find the easiest route.
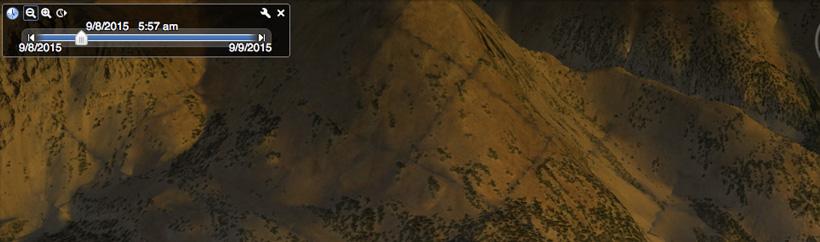
One of my favorite features of Google Earth that I do not think gets enough credit is the Time Slider, which shows sunlight and shadows across the landscape. We all know that the sun rises in the east and sets in the west, but this function can show you what areas will get sunlight first. This can be used to your advantage because it will show you which east facing slopes will allow you to start glassing earlier in the morning and which ones take a little more time to get sunlight. The same technique can be used for checking the sunset and which west facing slopes will allow you to glass longer.
This can be particularly effective during the late season when you are looking for areas with the most sunlight while you are hunting post rut bulls — bulls that might show up on a sunlit slope to grab the last few minutes of light for warmth and vegetation. You can also adjust the time slider to show you the sunrise and sunset for future dates you will be hunting.
The main powerhouse of scouting on Google Earth lies within the historical imagery. You can take your hunting area and adjust the slider to see how the area looked in previous years. The biggest value this provides is giving you a baseline for when to begin your scouting in the spring. You can look at an image in June or July from a previous year and determine what the snowpack was like. That alone can save you a bunch of headaches when you make a long drive to your hunting area only to find out that the basins are still snowed in.
Another great way to utilize the historical imagery is in order to check the vegetation during different parts of the hunting season. You can also check out the spring and summer vegetation growth to help determine where deer and elk might find the most nourishment to aide your scouting efforts.
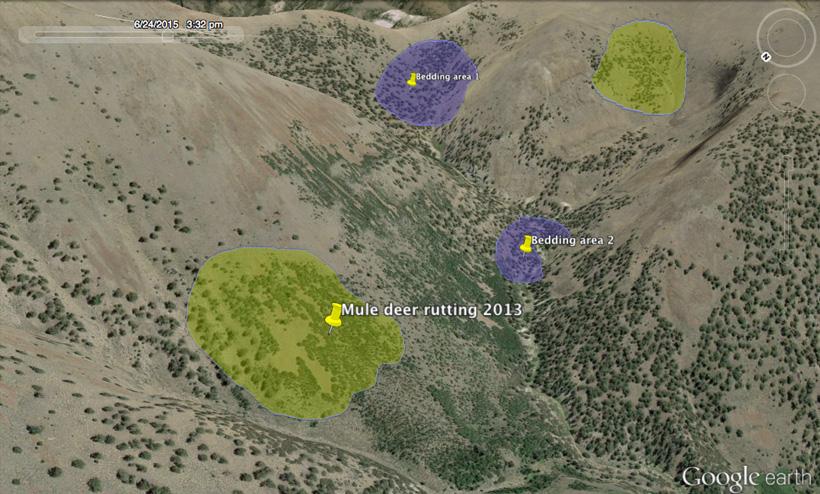
You might be asking yourself what do polygons and hunting have in common...well, when it comes to marking your hunting spot, these polygon layers can start to paint a picture on animal activity in your hunting area.
These transparent polygons are great for highlighting areas you have seen deer or elk activity before. You could create a polygon layer for areas you have witnessed bucks or bulls rutting while glassing. You could also create polygons for all of the known bedding and feeding areas. The options are endless. You can also add custom colors and adjust the transparency level of the polygons. I like to go in and create waypoints on top of my polygons so I will have this information when I transfer it to my GPS.
Google Earth is great for aerial imagery, but you can unlock even more powerful tools by using layers. Google Earth layers are imported using KML and KMZ files, which are large sets of data files.
Everyone knows the power of topographical maps. These maps show you things that Google Earth cannot. Both ArcGISOnline and Earth Point host topographical map layers. You only need one of these maps. Personally, I prefer the file from ArcGISOnline because it seems to have a clearer image and performs better on my computer.
ArcGIS topo mapTo download the topographical map layer, visit ArcGISOnline to find their USA_Topo_Maps file. Then select Google Earth at the top or just click here to get the direct file downloaded to your computer.
Earth Point topo mapThe latest topographical map layer can be downloaded here.
Open one of the files on your computer and zoom in to your hunting area and wait for the topo to load. Sometimes these layers can be slow to load or you have to zoom all the way out to get them show up. You can turn the layer on and off using the sidebar. Add this layer to the My Places section in order to reference it every time you open Google Earth.
One of my favorite features of topographical maps is used for locating water sources. Topographical maps will label seeps, springs, marshes, etc. while Google Earth only shows you the terrain and the color of the terrain, which you use to determine if there is water. These areas are worth their weight in 180” mule deer bucks. Water will also keep you going in the high country.
Simply adjust the transparency slider to increase or decrease the map’s visibility. If the topo map labels an area as a spring, I will mark it on Google Earth and then remove the topo layer to see what the terrain looks like. The spring will most likely be small, but it will still produce water.
Most often it will have a little green to it if you are viewing Google Earth imagery in the early summer months. You can then take this information and scan the surrounding basin, looking for hidden pockets of water that you can use for filtering your own water or for keeping track of deer movements in low water areas.
I will then mark these potential pockets of water on Google Earth and later transfer the waypoints to my GPS so I can check them out on the ground.
You may not have noticed, but there are two versions of Google Earth: regular and pro. In the past, the pro version cost over $400 and before that there was the old Google Earth Plus that no longer exists (which was $20 per year).
Here is some good news for hunters: Google Earth released their pro version for FREE in February 2015. You can download the pro version here.
Note: Google Earth Pro requires a license key. If you do not have a key, use your email address and the key GEPFREE to sign in.
Overall, the amount of scouting you can do with Google Earth is endless. Whether you are researching a new hunting area or trying to figure out better ways to tag out on that giant buck you have been chasing for years — Google Earth will aid you in your success. Please let me know if you have any questions in the comments below. Best of luck this scouting season!
Most state agencies will allow you to download the unit boundaries for free. These can be found in their mapping sections.
Animal seasonal use layers for deer and elk can also be downloaded from some state agency websites. Colorado lists them here and Wyoming lists them here (Note: Wyoming provides GIS shape files that will not load with Google Earth).