


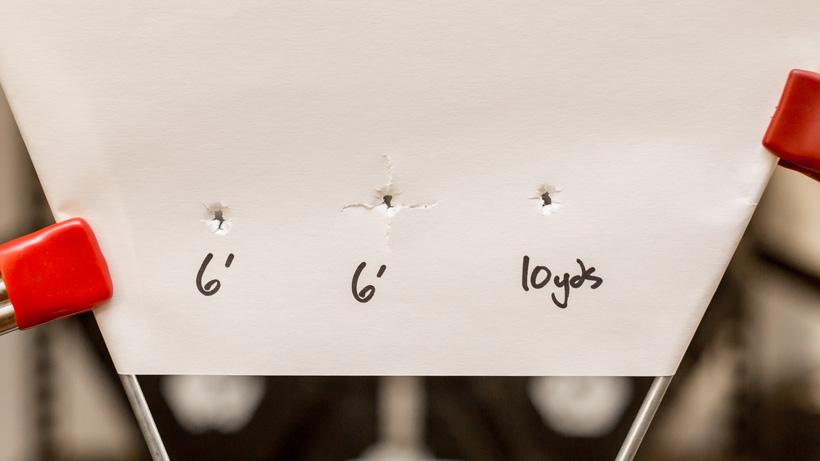
Paper tuning with fletchings and bareshafts. All other photo credits: Brady Miller
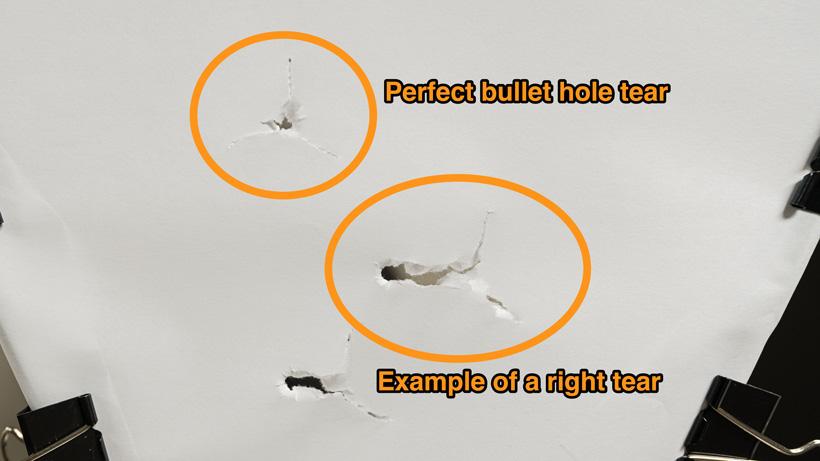
Arrow action | Tail high tear |
|---|---|
Adjustment | Move rest up or nocking point down |
Arrow action | Tail low tear |
Adjustment | Move rest down or nocking point up |
Arrow action | Tail left tear |
Adjustment | Move rest right toward riser or arrow spine is too weak(might need to decrease draw weight) |
Arrow action | Tail right tear |
Adjustment | Move rest left away from the riser or arrow spine is too stiff |
Arrow action | Adjustment |
|---|---|
Tail high tear | Move rest up or nocking point down |
Tail low tear | Move rest down or nocking point up |
Tail left tear | Move rest right toward riser or arrow spine is too weak(might need to decrease draw weight) |
Tail right tear | Move rest left away from the riser or arrow spine is too stiff |
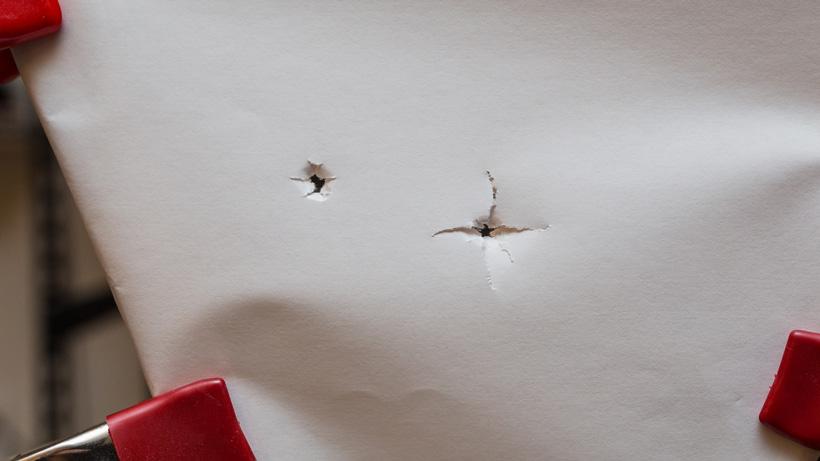

Arrow action | Tail high tear |
|---|---|
Adjustment | Move rest up |
Arrow action | Tail low tear |
Adjustment | Move rest down |
Arrow action | Tail left tear |
Adjustment | Move rest right |
Arrow action | Tail right tear |
Adjustment | Move rest left |
Arrow action | Adjustment |
|---|---|
Tail high tear | Move rest up |
Tail low tear | Move rest down |
Tail left tear | Move rest right |
Tail right tear | Move rest left |
Bare shaft impact vs. fletched shaft | Impact high |
|---|---|
Adjustment needed | Move rest down |
Bare shaft impact vs. fletched shaft | Impact low |
Adjustment needed | Move rest up |
Bare shaft impact vs. fletched shaft | Impact left |
Adjustment needed | Move rest left |
Bare shaft impact vs. fletched shaft | Impact right |
Adjustment needed | Move rest right |
Bare shaft impact vs. fletched shaft | Adjustment needed |
|---|---|
Impact high | Move rest down |
Impact low | Move rest up |
Impact left | Move rest left |
Impact right | Move rest right |
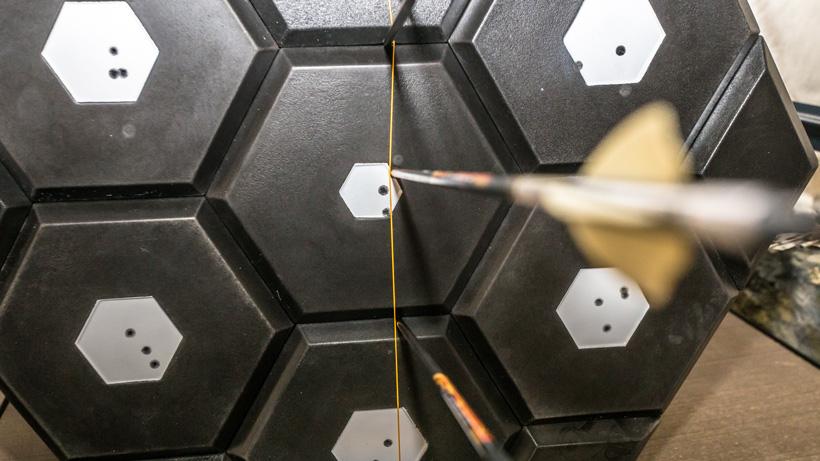
French tuning at close range aiming at a piece of string.
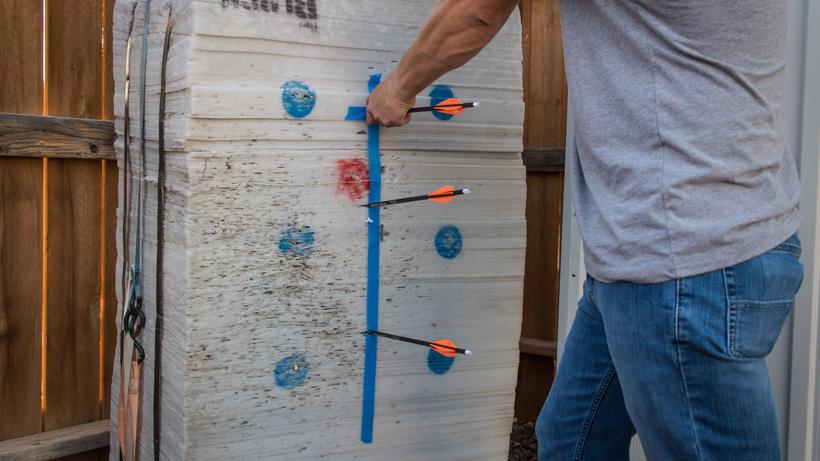
Vertical tape attached to target for long-distance french tuning.
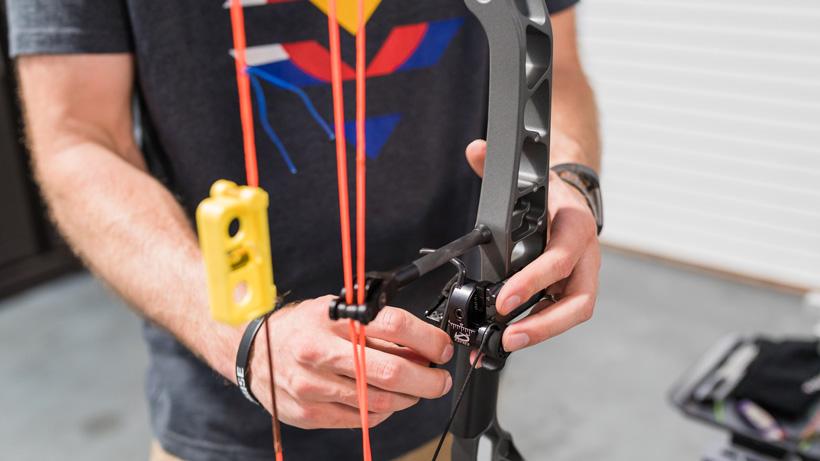

A well-tuned hunting bow is the backbone of a successful season and will allow archers to squeeze every ounce of efficiency and forgiveness out of their setup. With today’s technologies, bows are shooting better than ever and getting “acceptable” hunting accuracy out of most setups is fairly easy. Still, some simple techniques can be used beyond the pro shop that will really enhance how your bow shoots and lead to more confident success down the road.
Having a reputable and reliable shop can be an invaluable asset, but even the best shops will have their limitations when it comes to completely tuning a bow. Most good shops will have access to some great gear like presses, draw boards and some tuning equipment, but very few have the ability or space to shoot much past 20 or 30 yards. Really, for a good tune, archers need to be able to shoot out to 40 yards or more, depending on their comfort at distance. This isn’t due to a lack of skill from the technicians—merely just a side effect of how each individual will shoot a bow slightly different from someone else.
In the following sections, I cover some of the at home methods any archer can do to ensure his or her bow is shooting to the best of its ability and tuned for their specific style.
Here, you can follow the 7 part series GOHUNT recently filmed walking us through a Mathews bow build. Before really diving into the good stuff in this article it is first important to establish a few things that need to be perfect before beginning any tuning process:
There are a few other factors specific to each tuning method, but if any of the above items are not perfect, the tuning process will look similar to a dog chasing its own tail.
Paper tuning with fletchings and bareshafts. All other photo credits: Brady Miller
Paper tuning is generally the most widely used and understood method for tuning a bow and will generally get most bows in the ballpark for shooting broadheads accurately. Essentially, this process involves shooting arrows through taut paper in an effort to observe how the arrow is exiting the bow. The paper will immediately indicate if an arrow is kicking left, right, up or down with the end goal of achieving something that resembles a bullet hole.
Adjustments for various tears can be dependent largely on the type of bow being shot and the current setup, but my general rule of thumb is to leave the rest alone as much as possible if already set to the factory recommended setting, generally around 13/16”. Up and down tears can generally be remedied by moving the D-loop or rest while left and right tears can usually be cleaned up by adjusting yokes or moving tophats/shims. Like I mentioned earlier, I leave the rest alone as much as possible; however, it may be necessary to move it some, particularly with binary cam systems.
The paper tuning method is really just a starting point and I rarely spend a ton of time on this before moving onto more effective tuning methods. A great writeup by Trail Kreitzer on tuning a Mathews bow via tophats can be found here.
Bare shaft tuning is a commonly misunderstood and overlooked method that is really quite simple once you dive into it. Fletching on an arrow creates drag, which, in turn, steers the arrow and can cover up a number of shooting flaws and some slight tuning issues. Bare shaft tuning takes things a few steps further and involves shooting a shaft with no fletching at various distances to examine how the arrow is flying out of the bow. The beauty of this method is that it will quickly expose how the arrow wants to naturally react to the bow being shot.
When first beginning the bare shaft tuning process I like to, again, start with a paper tune. I’ll generally start at about 6’ and fire one bare shaft through the paper. Ideally, we are looking for a hole the approximate diameter of the arrow shaft with no elongation in any direction, which is an indication of tail kick. Generally, when at the point of bare shaft tuning, it’s safe to assume that any tophat/shim or yoke adjustments have been made during the initial paper tune and most of the adjustments here will be via the rest. When adjusting the rest it is always important to keep in mind that a small adjustment on the rest can make a big impact downrange. Start with minute adjustments of around 1/16” to 1/32” at a time. Additionally, keeping a written log of any adjustments made from your starting point can save a lot of headache down the road.
Once you feel like you are getting a good and consistent bullet hole through the paper it’s time to move to the range. When shooting a bare shaft at a distance the process is pretty straight forward. We are trying to, ultimately, achieve a fletched and unfletched shaft that will impact at the same location. For this, I like to fire a single fletched and unfletched arrow at 20 yards and will then observe how they impacted compared to each other. Ideally, I’m looking for the POI of the two arrows to be within 1/2” or so. Again, any adjustments here will be made via the rest and will need to be very minute.
When doing the above method, keep in mind that with each rest adjustment, your fletched arrow POI will also be changing. At this point, we are not too terribly interested in where the arrows are hitting in relation to your aiming point, but more so that the arrows are grouping together. Once the arrows are hitting with each other, a simple sight adjustment will bring everything back to the center.
Beyond a bare shaft tune, most archers will not need much more tuning, if any, to achieve great broadhead flight. Still, a french tune can really clear up any residual flight issues and really add to the forgiveness of your entire setup. The idea here is pretty simple: ensure that the sight and rest are perfectly in line with each other.
French tuning at close range aiming at a piece of string.
To start, set your target out at a comfortable level and establish a perfectly vertical line on the target. Painter’s tape and a level can work great as well as a plumb bomb made with 550 cord. The main thing we need is a highly visible vertical line. I’ll start at about 6’ to 10’ from the target and fire a single arrow at the vertical line using my 50 yard pin or with my slider sight set for 50 yards. Ideally, the arrow should hit the center of the vertical line. If the impact is anywhere but the center you will want to adjust the windage on your sight until the desired result is reached.
Vertical tape attached to target for long-distance french tuning.
Next, step out to 50 yards and shoot for the vertical line again. Again, we are looking for the arrow to be reasonably close to the center of the line. If the arrow is off you will move the rest in the opposite direction that the arrow is impacting. For instance, if the arrow is impacting left, you will want to move the rest slightly to the right. Fire another arrow from 50 yards until the desired result is achieved. Finally, repeat the steps until no further adjustment is needed at any distance.
Walk back tuning is very similar to french tuning in that it involves shooting at various distances to establish whether your rest is or is not set to its true center shot. Much like the french tune method, you will need a target with a plumb vertical line on it and a small aiming point on the line near the top of the target.
For this method, you will be using your 20 yard pin aimed at the same point and at various distances. Stacking two targets on top of each other can be very beneficial here. Take your first shot at 20 yards and adjust the sight until the arrow is striking the predetermined aiming location. Next, step out to 30, 40 and 50 yards, firing a single arrow at the same aiming point while still only using your 20 yard pin. At this point, you will generally see one of three possible outcomes: arrows in a near vertical line, arrows in an increasing trend to the left or arrows in an increasing trend to the right.
If your arrows are in a nearly vertical line you are set; this shows us that the arrow is not drifting left or right as the distance is increased due to an improper center shot. If the group has an increasing left impact tendency you will want to move the rest slightly to the right. If the group is hitting to the right, you will move the rest left. After an adjustment has been made, repeat the process until all of the arrows are striking in a vertical fashion for each yardage. The farther you can shoot, the smaller the margin of error becomes and the more accurate the tune becomes.
As I stated earlier in the article, with today's technologies, it’s not difficult to set up a bow from start to finish in under an hour while expecting acceptable hunting accuracy. The above-mentioned techniques will take the tuning a few steps further and can really increase the forgiveness of your bow. Forgiveness in your setup really equates to how much you can get away with on a sloppy shot and still get a good accurate impact. All of these methods can easily be done at home or on the range.
The bow’s cams must be perfectly timed and in sync with each other.
The rest should be set to the exact center shot of the riser or to the factory recommended starting point.
The arrow should be sitting perfectly level on the bow and the arrow should mostly bisect the Berger bolt hole on the riser.
The arrows being used to tune the bow must be properly spined for the setup.
You will need a properly leveled sight.