

All photo credits: Anthony Wright
In 2018, at a Total Archery Challenge event, I was introduced to a small, family-orientated archery company: Shrewd Archery. Prior to speaking with them, I was what you consider a “back bar basher.” I was under the impression that I was good enough without one, that they were for target archers only, that they were cumbersome, etc. I was naive, but willing to listen to what Shrewd Archery had to say about a back bar setup given that they specialize in high-end stabilizers. They offered a setup for me to try for the next course I was going to shoot, which at Big Sky, had plenty of sloping shots to offer. I was shocked with the results — enough to never go back to a single bar setup.
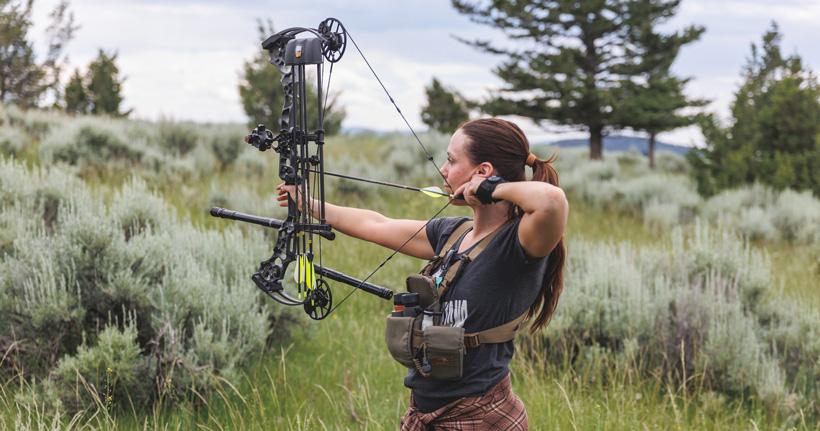
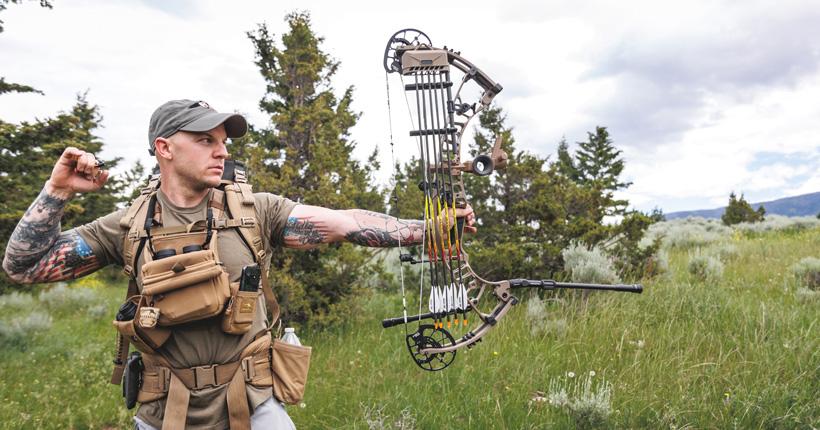
The first benefit that stuck out to me was the stability at full draw. During my old draw cycle, I would always feel like I was inducing torque to get stable. Once I added the back bar, I immediately felt the need to torque eliminated. I could really see the added stability shooting in windier conditions given to the increase in weight. Initially, it can feel cumbersome, but with familiarity and repetition, that feeling subsides. Last season, I started utilizing the eight-degree offset, which drops the front bar downward. I felt it helps and can reduce how much weight you use on the front bar to get the same effect due to the angle. Another great option is the Last Chance Archery Multi-Angle Mount. It enables you to go from zero to 20 degrees with the same bar so you can find the angle that suits you best.
This was one of the most apparent benefits to adding a back bar. On flat ground, you can definitely see the difference, but once you start shooting off slopes, you can really see the change in just how easy it is to make your bubble level in the shot process. Once you have tuned your bar setup with the correct weights and angles at full draw, your bow naturally goes to plumb. The expedited leveling, if you will, eliminated a lot of human-induced torque and led to very clean shots, especially when stretching out to farther distances.
Tip: Take the additional time to perfect the weight setups on both the front bar and the rear bar for your setup. This will pay off in the long run once you start shooting off of slopes.
The setup that I currently use has numbers/lines for indexing. This helps when setting up your bars for initial setup and for other configurations you may shoot in such as those times when you take your quiver off. Finding the perfect angle both vertically and horizontally for your rear bar in either configuration is key. One thing I like to do, so I know what numbers to use, is make index marks with a silver sharpie on the back bar mount: one with quiver installed and another with quiver removed. Don't forget to carry the proper Allen key so you can adjust on the fly if needed.
Along with the indexing portion, you can micro-tune the weight you add to each bar by using either aluminum weights, stainless weight or a combination of both. This once again enables you to find that “Goldilocks” zone of stability.
Shrewd Archery has a plethora of styles for everyone's taste. They have a wide variety of bar diameters, lengths and weights. I personally like the Rev-X line. The Rev-X line features internal dampening, slim-line bar diameter and multiple lengths. The GOHUNT Gear Shop also offers a variety of brands to suit your needs from brands, disconnects, bars and weights. Check them out!
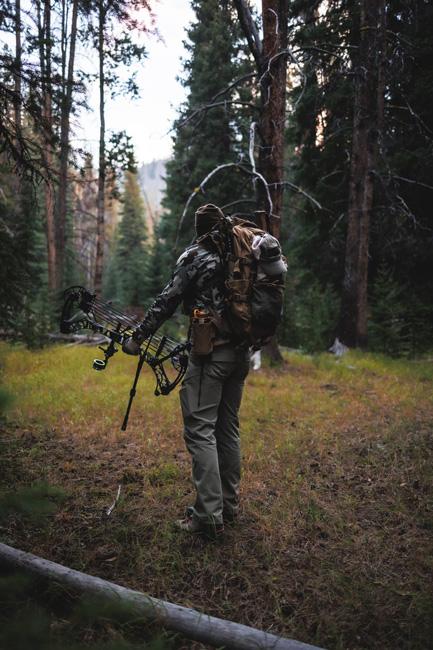
Overall, I don’t believe you can go wrong in adding a back bar — unless you are going for a super light setup, then I could see why maybe a back bar isn't for you. Otherwise, I believe every archer who hasn’t tried one should. There are many positive benefits to utilizing one in the field that I’ve found outweighs any negatives that I have come up with. Many may debate that the back bar gets in the way in the elk woods, but I haven't seen that to be the case — even in dense timber.
Let us know what you think of back bars in the comments!
As always, stay safe and hunt hard!