


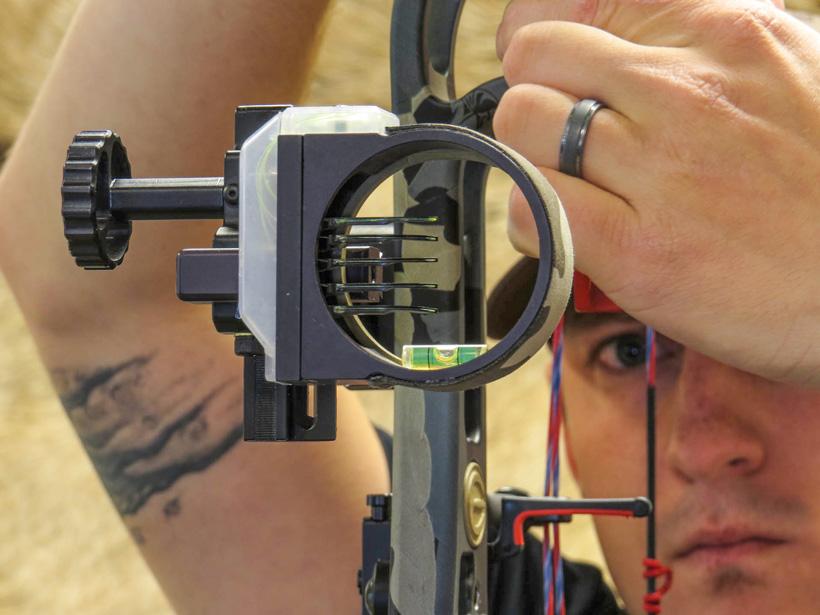
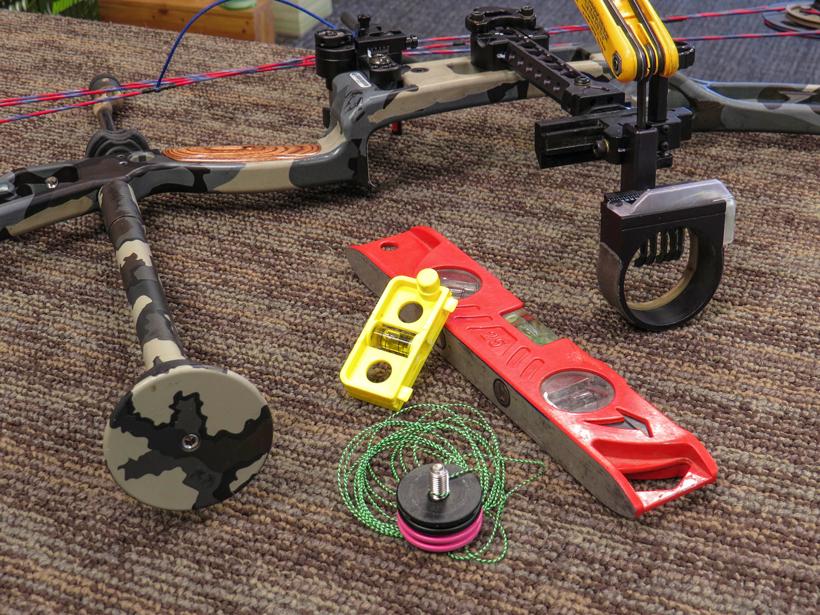

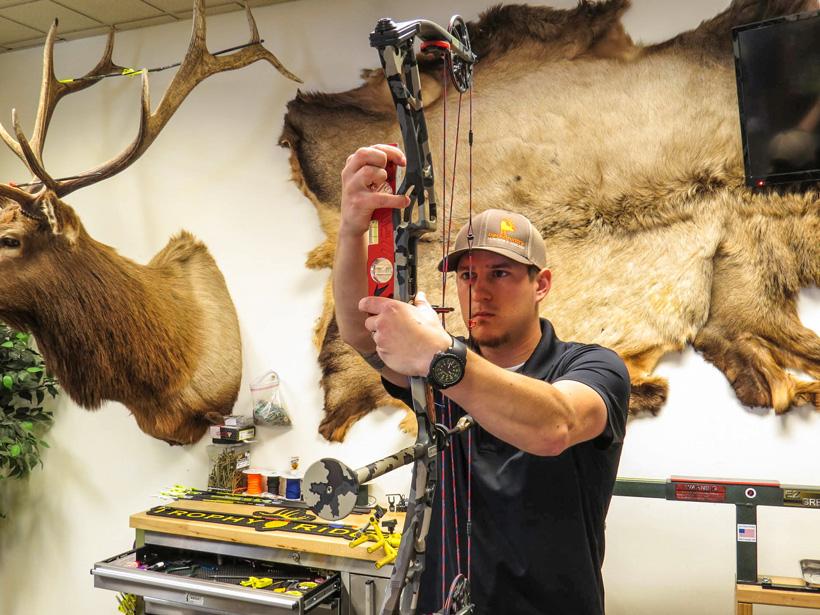
Checking level on the bow.
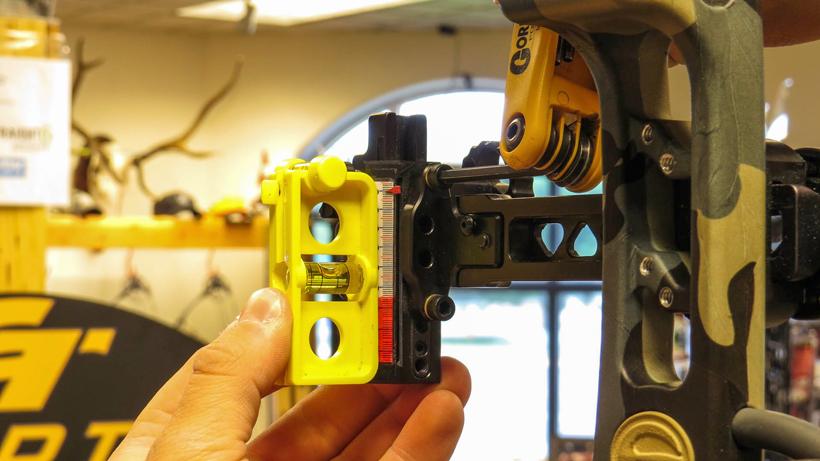
Setting first axis level.
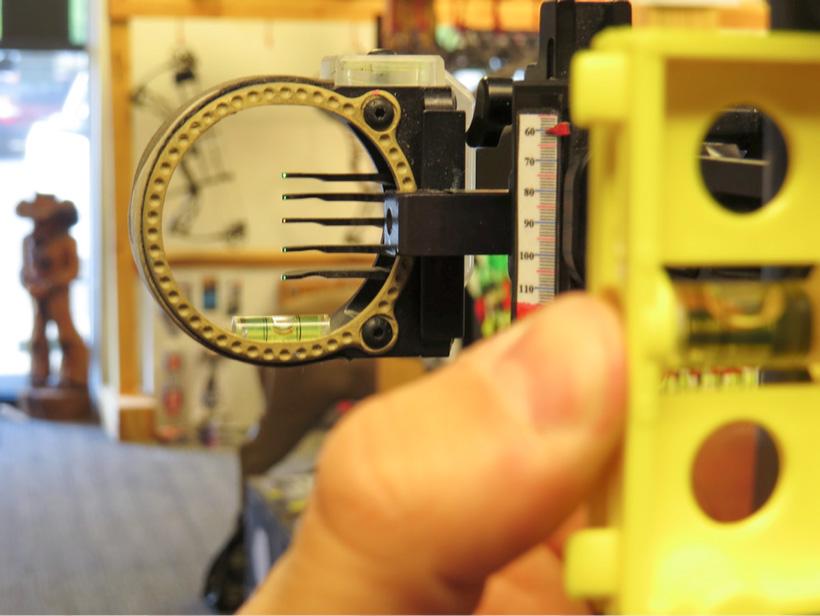
Checking second axis level.
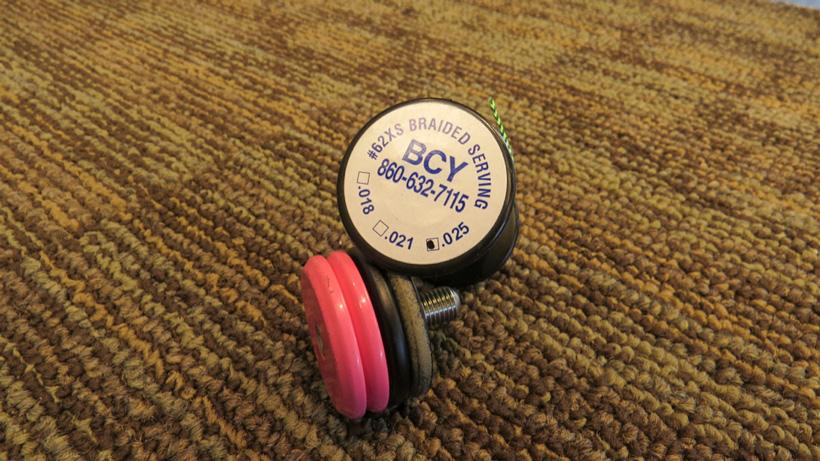
Making a plumb bob for bow sight level check by using some stabilizer weights and string serving.
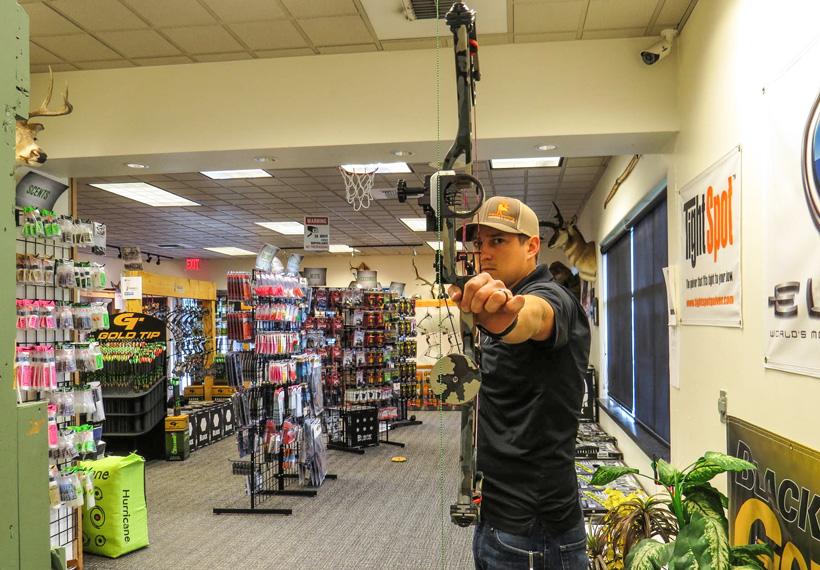
Author checking second axis level at full using a plumb bob.
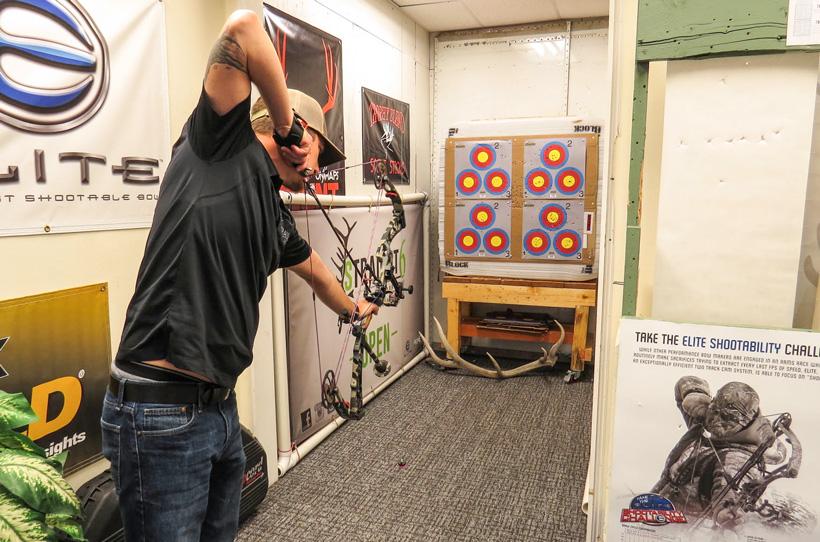
Author checking third axis level while at full draw with a plumb bob.
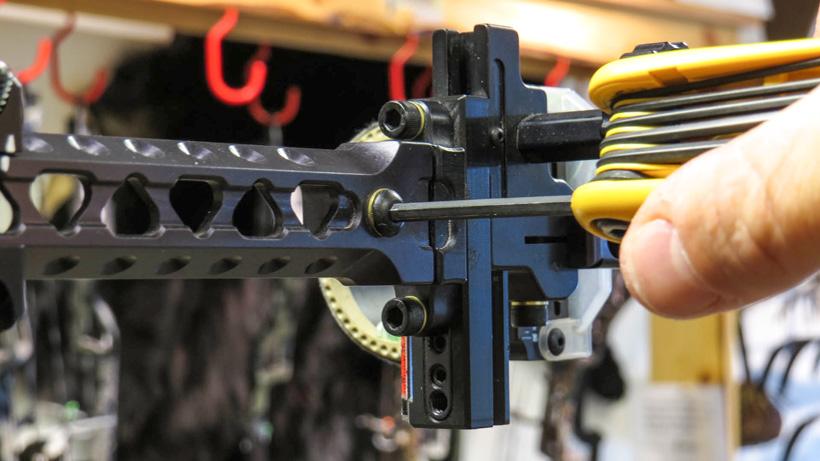
Making a third axis bow sight adjustment.
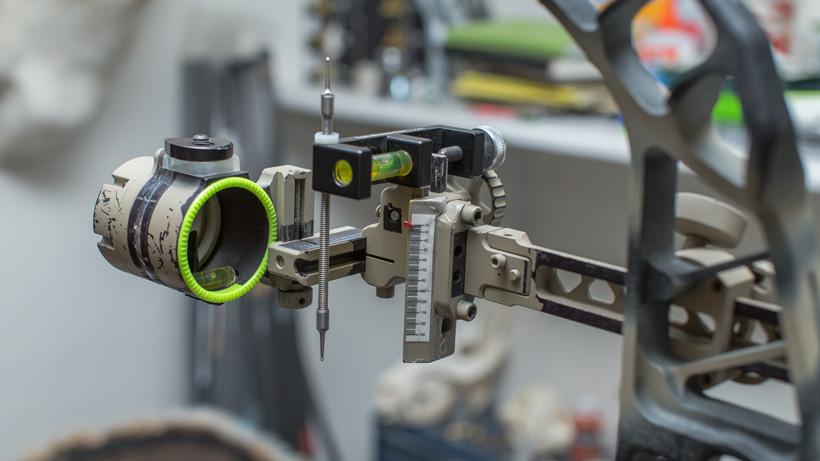
Hamskea Archery's Easy Third Axis Level for adjusting bow sight axis. Photo credit: Brady Miller
Perhaps one of the most underused and underthought features that come standard with nearly every bow sight on the market is the bubble level and axis adjustments. Over the years, I have dealt with many confused archers wondering why their tuned hunting bow is throwing arrows in a diagonal pattern at longer ranges. It is honestly something I deal with very frequently while working the General Manager position at Straight 6 Archery in Missoula, Montana. While hand torque and other elements can certainly play into this the most common answer is that the archer’s levels are not correctly set or not being utilized. Here, I will guide you through simple steps to ensure your sight is square and that you are getting the most accuracy out of your setup.
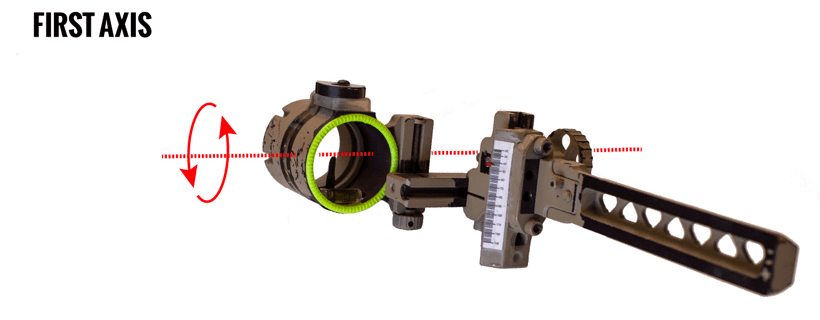
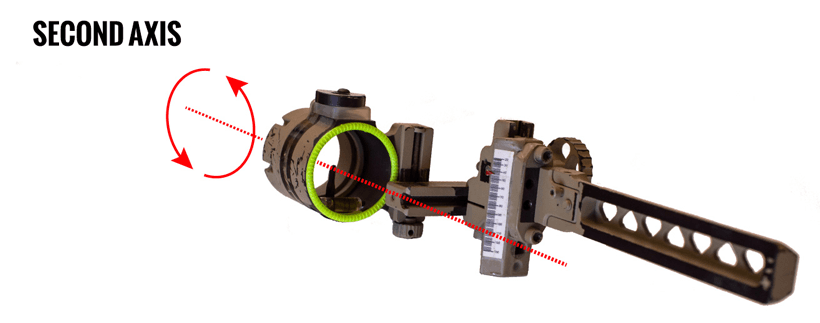
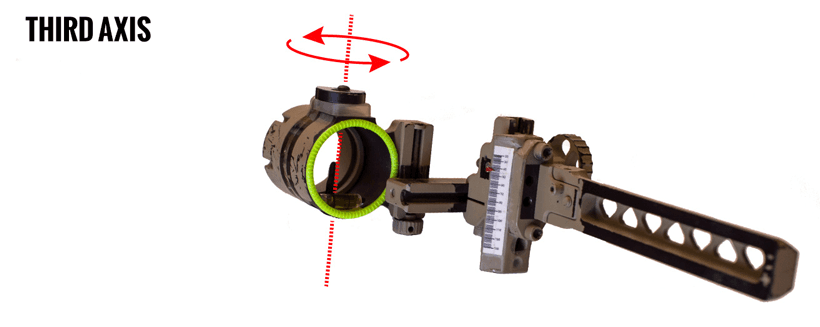
In your bow sight there are three elements we want to ensure are level: first axis, second axis and third axis.
Not all sights come with all three axis adjustments and it is important for archers to consider these when buying a new sight.
The short answer: very. While considered the least important of the three, first axis adjustment can very likely be the culprit to groups hitting to the right or left, especially on sliding yardage sights. Imagine the mounting bracket on your new slider sight is not plum to the bow, meaning it leans to the left or the right. As you slide the sight head up and down it will follow the same lean causing left or right deviation from your zeroed position. Most fixed pin sights will not have, or need, a first axis adjustment, but this is an element that should still be checked to ensure the most accuracy from your setup.
Second axis adjustment will allow you to adjust the vertical lean of your pins, both left and right, to lie perfectly vertical in relation to the earth. Like the first axis, if this is out of whack you will notice groups that tend to deviate left or right of your intended target in increasing increments as the shot distance is increased. This is an adjustment that every quality sight should, and usually does, include. This level will become increasingly important when shooting steep side hill shots as the shooter will tend to lean to the downhill side inadvertently. Having a properly set second axis will allow the shooter to correct for this natural lean and execute an accurate shot.
Perhaps the most underrated and misunderstood axis is the third. The best way to describe it is like a door swinging on it’s hinges. To understand this, imagine your sight housing is angling away from you at a 45 degree angle. If you shoot at a target on perfectly flat ground your bubble will read level if you have properly set your second axis. Now, imagine shooting at a target uphill from you. As you begin to aim your bow uphill the 45 degree angle on your third axis will take effect and you will notice the bubble begin to slide to the left side of the level (for a right handed shooter). Aim at the same angle on a downhill shot and you will notice the bubble move to the right side of the level. This feature is very important for both western hunters in steep terrain and midwestern and eastern hunters shooting from treestands,
With the first, second and third axis levels adjusted on your sight, you can take confidence in knowing that no matter the shot angle or distance your arrow will hit it’s mark.
First, it will be necessary to gather the required tools:
Situate your bow in a bow vice and lay a long (12” to 24”) carpenters level on any long vertical service along the bow and adjust as needed until the bow riser is level. Some bows may not have large enough surfaces to level off of the riser so a longer level (36”+) may be needed. To do this, simply press the level firmly against the limb pockets.
If you do not have a bow vice there are a few tricks to get around that. By setting the lower limb on a dining room table (after asking the wife for permission) clamps can be used to secure the bow. Shims may also be needed to ensure that it is square. Additionally, a square and level wall can also be used by simply holding the bow firmly against the wall (this may be a two person job).
First axis leveling is generally a feature only found on sliding or adjustable sights due to the vertical movements associated with them. Most fixed pin sights of quality construction will generally be machined to be exactly plumb but some adjusting may be required.
I like to start by removing the head on my sight as this will simply add more weight to a portion of my sight that I'm trying to adjust in the slightest amounts. Locate your first axis adjustment screws (refer to your owner's manual) and find a flat surface on the slider to use as your leveling plane. I will generally switch to a string level for this step as they are much smaller and easier to work with. Adjust as needed until the roving portion of the slider is perfectly vertical. Keep in mind that it is good practice to double check the level of the bow throughout the process.
Archers with fixed pin sights can simply lay a level on the flattest portion of the mounting bracket and check for level. Generally speaking, this should be level or very near. If any adjusting is needed, small washers can be added between the riser and the sight mounting holes. Depending on the second axis adjustment within your sight, it may be possible to accommodate for any first axis issues.
Re-install the head back onto the sight body and recheck the level on the bow. Locate the second axis adjustment screws (refer to the owner's manual). While holding a level against your bow, turn the adjustment screws until the bubble on your sight matches the bubble on the level.
Third axis, perhaps the most misunderstood axis, will be a little bit more involved as this needs to set while the bow is at full draw. The reasoning behind this is that when a bow is drawn, unavoidable torque is induced into your bow due to the the cam design, roller guard or cable slide, grip, draw weight and draw length. Because this torque moves along the horizontal plane, the ill effects of a improper third axis adjustment will not be seen until an angled shot it taken.
To begin with this, hang a plumb bob from the ceiling or along a wall with the weight nearly touching the floor. The longer the better.
Once the weight has settled and the string is no longer moving bring your bow to full draw. Begin aiming at a 90 degree level to the floor and put your pins along the string in a perfectly vertical fashion. If you set the second axis properly the pins should match the string and the bubble should read level.
Now, begin to bend at the waist and aim down about 45 degrees. Maintain your vertical level as you follow the string down and watch the bubble. If your bubble moves to one side of the level or the other, then your third axis is off.
Find the third axis adjustment screw(s) and adjust in the proper direction (refer to the owner’s manual). Again, draw the bow and begin to aim down to a 45 degree slope. Adjust as needed until your bubble remains entirely level through this entire process.
If your sight does not feature a third axis adjustment shims can be added in front of or behind the screws on the mounting plate to adjust for this. Yet, the generally accepted outcome is for the shooter to begin looking into different sight options in order to maximize their accuracy.
If all of the steps have been followed you should now have a perfectly leveled sight ready for any hunts you can throw at it. To experiment with the new adjustments, especially the third axis, go take some challenging shots in steep terrain and see for yourself the improved accuracy and consistency in your shooting.
Individuals looking to take their tuning to the next level can also invest in the Easy Third Axis Level from Hamskea Archery for even more precise and accurate adjustments.
Allen wrench set
Large carpenters level; 12” to 36” depending on your bow
Plumb bob; string and some weight
Bow vice or a level wall
String level (optional)
Small washers (optional)