


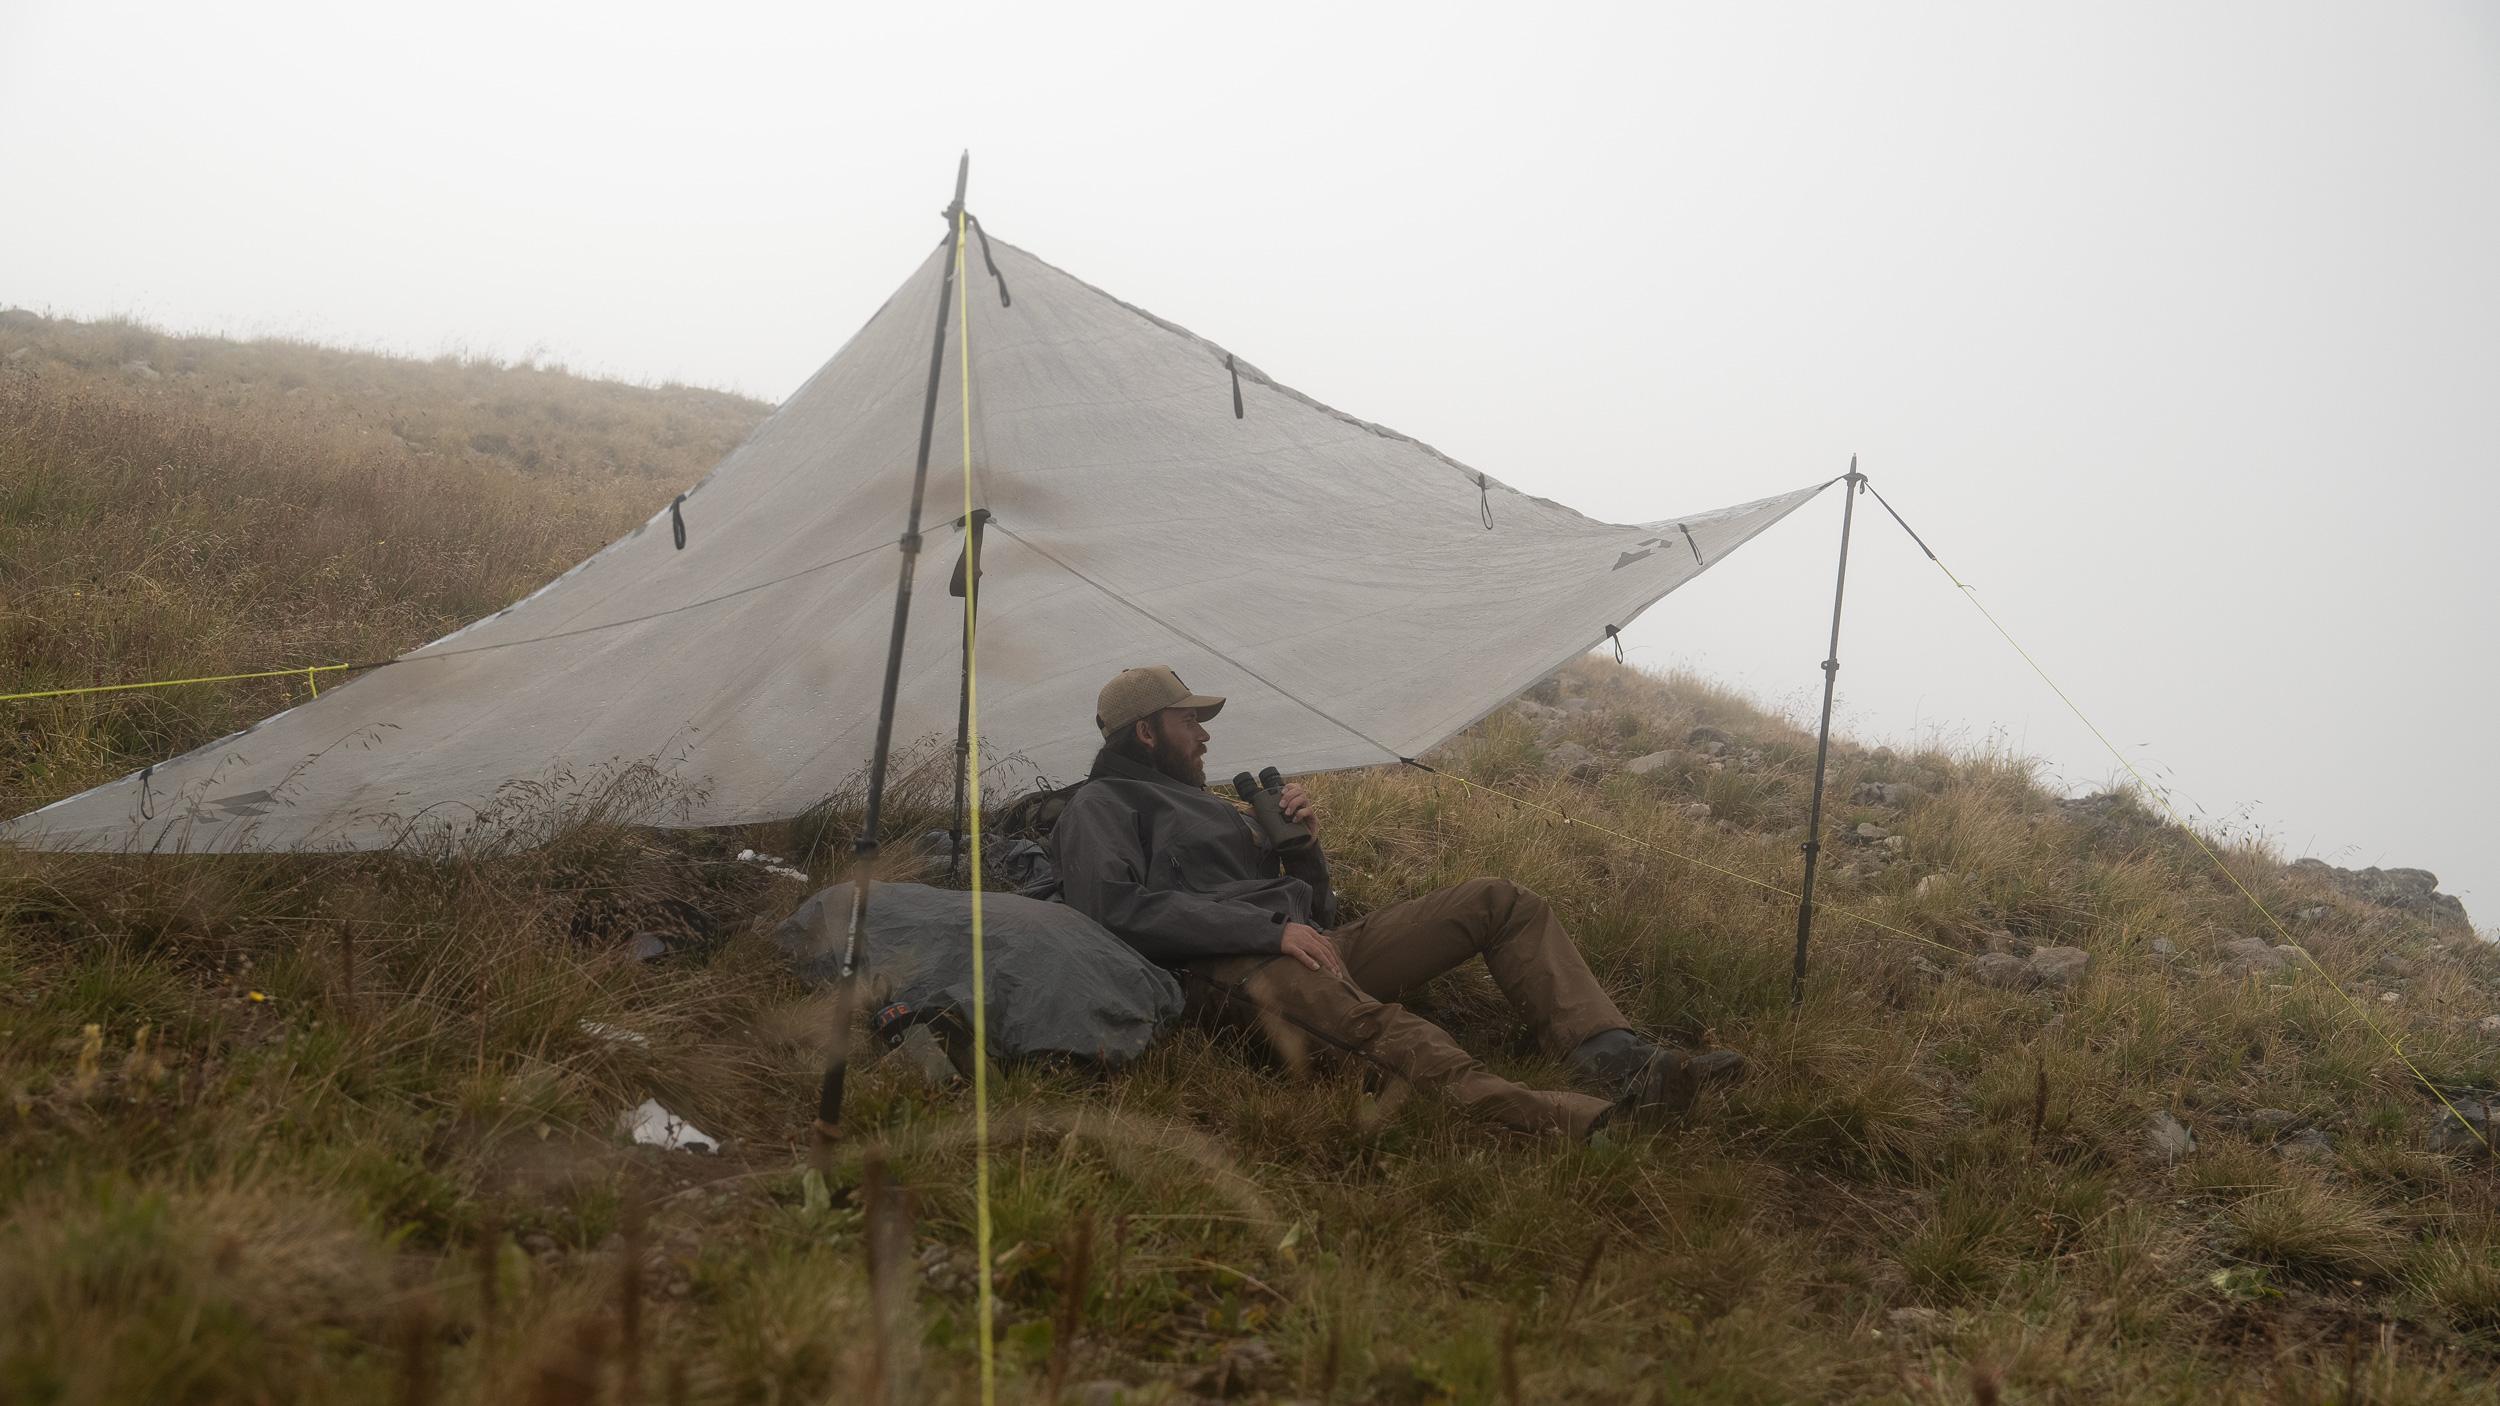
Brady Miller under the GOHUNT Dyneema Tarp weathering the storm.
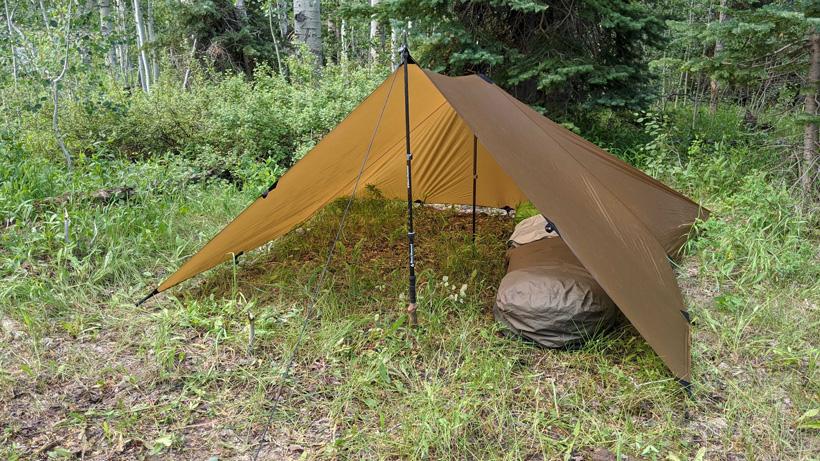
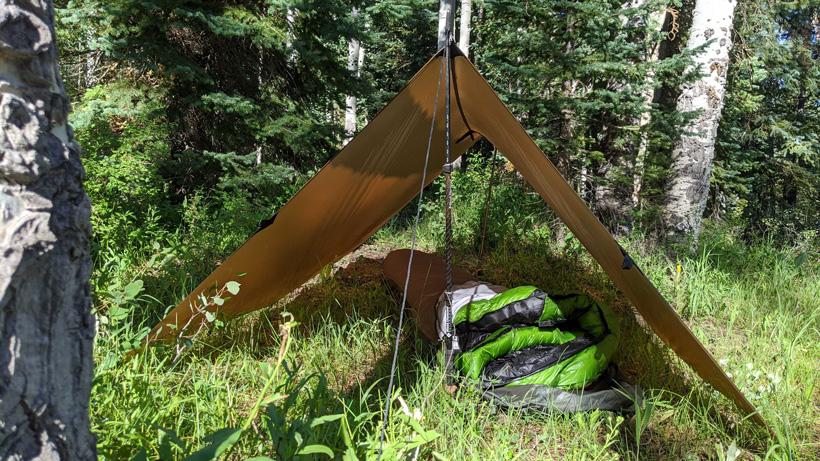
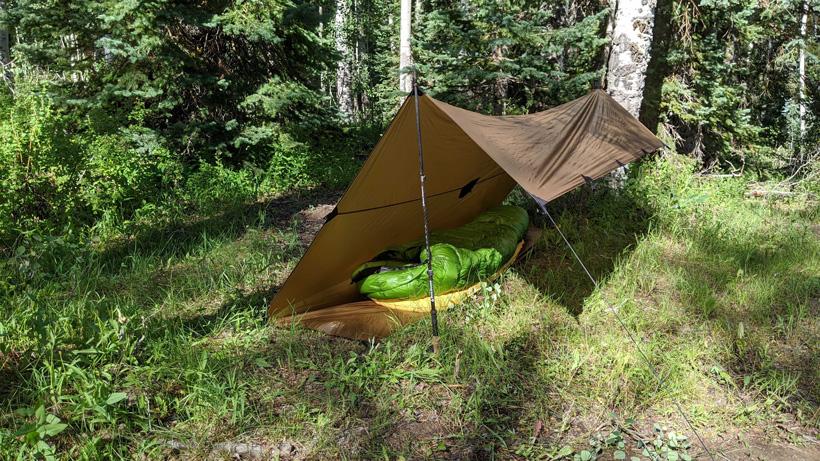
Right now, many of us are well into the next stage of hunt preparation, including e-scouting, hunt planning, and thinking about our gear selection for the year.
Carrying a tarp in your backpack while hunting or spending time in the backcountry can be a game-changer. A tarp provides versatile protection against harsh weather, allowing you to stay in the field longer, glass in comfort, or create emergency shelter if needed. Here's an overview of why tarps are essential and three key ways to set them up effectively: the A-frame, lean-to, and diamond configurations.
A tarp is lightweight, compact, and easy to carry, making it an essential item for extended backcountry trips. It can protect you from rain, wind, and sun while allowing you to remain outside without having to retreat to camp. When glassing for extended periods, setting up a tarp keeps you comfortable, so you can continue hunting during unexpected storms or intense sunlight. In survival situations, a tarp can also serve as an emergency shelter when combined with other gear like a bivy sack.
One piece of gear that I have used over the years has been a lightweight tarp and, once again, this past fall, that item was particularly useful. Whether I needed shelter from the rain, wind, sun, or a place to debone an elk quarter — or even to catch and collect water — a tarp is a key piece of my gear.
It’s no secret that my favorite archery elk hunting shelter setup is a bivy and a tarp. Over the past 10 years, I have found that I’m more effective if I carry camp on my back and I sleep wherever I end up each night. It allows me to follow along and hunt elk all day, and I don’t waste time and energy hiking back and forth to a base camp. The point being is that I like a mobile quick set-up/tear-down cam, and a tarp has been my favorite quick-pitch shelter. Learn more about hunting with a bivy sack here.
I don’t always pitch a tarp. Most nights, if the weather is good, I just use my bivy sack. I’ll inflate my sleeping pad, slide it and my sleeping bag inside the bivy and I’m in bed in a matter of minutes. If wet weather is imminent, I pitch the tarp. That gives plenty of protection for me and my gear. There are seemingly endless options for pitching a tarp for shelter.
In the video, Brady Miller covers three key tarp setups:
Below are some of my favorite tarps and options for pitching them.
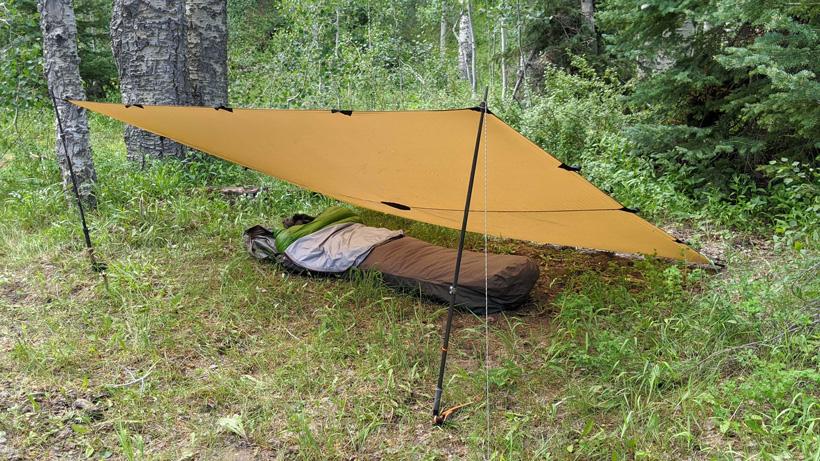
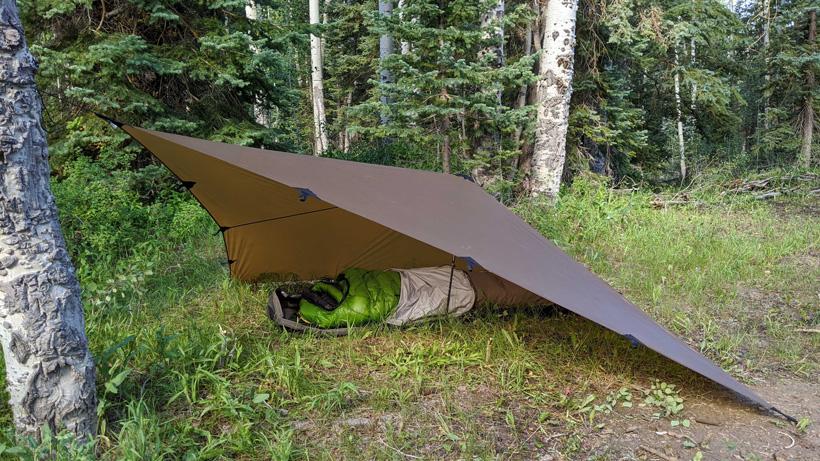
The closed-end A-frame is the pitch I use most often. It is quick to set up and can be done with a couple of trekking poles and five to eight stakes. It should be pitched with the foot of the shelter facing into the incoming storm, which protects you from rain and snow blowing into the open end. The closed-end A-frame offers great protection, provided the tarp is large enough to sleep in either vertically or horizontally. I have often used this pitch with a hunting partner and stored our gear under our pack flies outside or by myself and there is tons of room for my gear. A couple of my favorite tarps for this type of shelter are the Seek Outside DST Tarp or the GOHUNT Dyneema Tarp. The Argali Talus Tarp would be another great option. For the solo hunter, the Hilleberg Tarp 5 or the Stone Glacier SkyAir ULT Tarp can be pitched in a closed-end A-frame fashion.
The A-frame is quite common and super quick to set up. It provides good coverage from a light storm. It also provides good airflow since both ends are open. I often use the basic A-frame pitch if it’s relatively calm, but overcast, and I might get some showers during the night. On a solo hunt, the Seek Outside Gunnison is a great option for the basic A-frame. Any rectangular tarp can work though and, depending on the size, can offer room for a couple of hunters. For two people, I would suggest 8’x10’ or slightly bigger.
The C-fly pitch is a good option when you need to get your pad and bag off the ground and use the tarp as a ground cloth as well as a shelter. The C-fly is useful when going extremely light and fast or if you forgot your bivy sack. I have used the C-fly during early season scouting trips when I am only going for a few nights and I want to drop as much weight in the pack as I dare. This pitch will leave both ends open for airflow and the front of the shelter will be somewhat exposed as well. It’s not the perfect fit for really bad weather, but like I said, for light, fast trips it works well. Any rectangular tarp will work and it’s easy to pitch with as little as six stakes, some guy outline and a couple of trekking poles.
The lean-to is the basic shelter that provides larger coverage from wind and some directional rain storms. It’s very open, providing a lot of air, but also opens you up to some rain exposure. The larger coverage allows more people to fit under a lean-to and you can also use a fire or cook under it. To block light rain, wind and the sun, the lean-to is effective. Use this configuration only when the conditions are favorable. The lean-to pitch makes a great shady spot for glassing on open, exposed faces.
You can also use your two trekking poles to secure and stake out the high side. I often also put my two trekking poles in the middle of the outside edges and then extend the rest of the tarp and tie those off between two trees. This creates a lean-to with a roof that can provide some light coverage. This is also my preferred pitch to provide some mid-afternoon shade.
The diamond fly provides a quick shelter and is great for shedding wind and rain due to the steep angles. The diamond also provides you the full length of coverage, corner to corner, which is great if you really need to hunker down inside and keep yourself out of the weather. Pitching the diamond fly is easy and can be done in a matter of minutes.
You can also use two trekking poles to pitch the diamond fly. In that case, I prefer to start with staking one of the longer corners to the ground, then, use the trekking pole, tilted slightly out to cause tension, at the opposite corner. Then, stake the two other corners. Lastly, a second trekking pole can be used inside to create some headroom.
Early into hunting, I realized I was more successful when I distanced myself from the bulk of the hunting pressure. The benefits of hunting farther from roads and trails also came with some challenges in the form of processing and packing out meat and taking care of a cape.
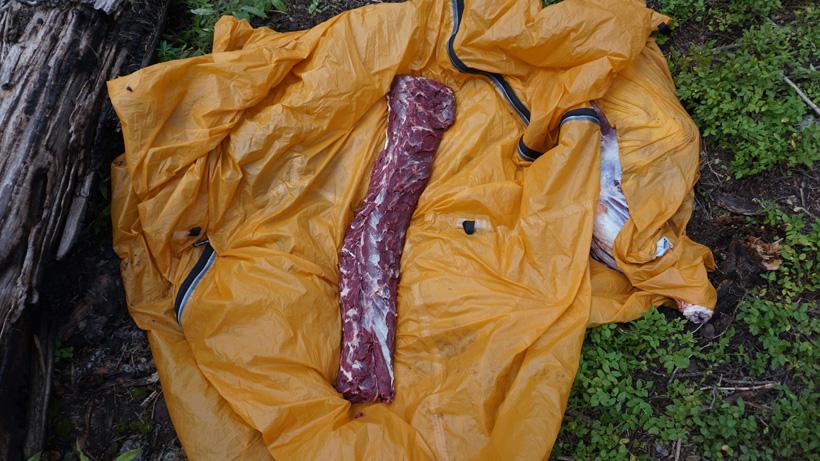
Getting meat off of the animal to start cooling, keeping it clean, and getting it out of the backcountry in good time is the key to good table fare. I have used a tarp regularly as a ground cloth to lay meat on while I am processing an animal. Stake the four corners, and a tarp works really well to keep meat from getting dirt and debris on it. If you are boning out quarters, the tarp is the perfect spot to keep everything clean while you are cutting the meat off the bone.
This past fall, while hunting moose in Alaska, my hunting partner and I used a tarp to keep our meat cache dry. Moisture increases the rate at which bacteria can form and can cause meat to spoil quickly, so keeping it dry is important. A tarp can be pitched over a meat cache to offer protection from rain while still allowing air circulation.
Another use for a tarp is to keep a cape clean and free of dirt and debris. Your taxidermist will thank you if you show up with a clean hide. Several times I have used a tarp to lay the cape on to either cape and flesh the excess meat from the hide or salt it. A tarp makes it so much easier to keep things clean.
Hopefully, none of us get to a point where we are in a true survival situation, but it’s within the realm of possibility when you are hunting in remote country and a tarp has many uses. One of the best sources of clean water in a survival situation is rainwater. A tarp tied off between four points with a depression in the middle can provide a good amount of water during even a light rainstorm.
In addition to providing coverage for shelter, a folded tarp tied off to two trees can also function as a hammock if you need to get up off the ground. Along the same lines, the folded tarp can be fashioned into a stretcher, which can be an effective way to haul out an injured hunting buddy.
A tarp is great at keeping you dry. It’s also really nice to keep the sun off of you as well. In open country environments, a tarp can save you from sun exposure and provide much-needed shade.
There are likely other uses like using strips of a tarp braided together to create rope or for netting fish. The point is that a tarp is an essential piece of a survival kit, and I would argue that a tarp should be in everyone’s pack.
Having a tarp in your backpack ensures that you can stay out longer in the field, no matter the weather. Whether you’re hunting, glassing, or just need a quick shelter, the A-frame, lean-to, and diamond setups provide versatile options to meet your needs. Practicing these setups before heading out will help you stay comfortable and prepared for whatever nature throws your way.
In conclusion, a tarp is a really handy tool for backpack hunting and even survival if need be. There are some great options on the market for tarps. Listed below are a few of my favorites.
This article was originally published on July 28, 2020, and has been updated with more information.
A-frame setup
Lean-to setup
Diamond setup
Stake down the middle point at the foot of the shelter.
Place a trekking pole at the front, angled slightly back to create some tension, and then stake out a guyline from the top of the trekking pole out to the ground.
Stake out the front corners.
Place the second trekking pole inside the tarp, handle end up and create some space.
Stake out the back corners and add any other stakes to further secure the sides.
Adjust the trekking pole heights to create the right space.
Tighten and adjust the tarp's guylines to ensure it’s taut, and make sure all corners are securely staked to the ground for maximum protection.
Stake down two corners on the long edge of the tarp.
Place a trekking pole at the midway loop at the head of the shelter, angled slightly back to create some tension, and stake out the guy outline.
Place another trekking pole at the midway loop at the foot of the shelter, angled slightly back to create some tension, and stake out the guy outline.
Stake out the additional loops on the other corner.
Extend trekking poles to create a tight pitch.
Stake two corners on the long side of the tarp.
Move to the middle loops and stake those, creating a ground cloth to sleep on.
Place a trekking pole at the loop at the head of the shelter, angled slightly back to create some tension, and stake out the guy outline.
Place another trekking pole at the loop at the foot of the shelter, angled slightly back to create some tension, and stake out the guy outline.
Tie and stake out guy outlines from the last two corners, creating a C shape.
Stakeout two of the corners on the longer side of the tarp.
Use the guy out points on the opposite side to tie off on two trees or use trekking poles at the desired height. Best to ensure the tarp faces away from the wind.
Tie out additional guidelines to keep the tarp stable and adjust the height based on wind and weather conditions.
If you want, insert a trekking pole inside the shelter (handle up) and extend it to the desired height to create headroom inside the shelter.
Tie off one of the longer corners to a tree at the desired height.
Next, stake out the opposite (kitty) corner to the ground.
Stake out the two other corners of the tarp to the ground.
If you want, insert a trekking pole inside the shelter (handle up) and extend it to the desired height to create headroom inside the shelter.
Always angle your stakes away from the tarp to ensure a strong hold, especially in windy conditions.
You can also insert your tarp stake from the bottom side of the guyline and then give it a twist before you place it in the ground. This will give you extra bite on the guyline around the stake.
Use rocks or additional weight on the guidelines to keep them secure and maintain tension.
Pre-tie your guidelines before going out, so you’re ready to set up quickly when needed.